Getting Started as a Smartcat Workspace Administrator
Overview
A quick-start guide covering everything a workspace administrator needs to set up, run, and scale your global content in Smartcat, from activating your Chief of Staff to managing review resources and reporting.
Each section gives you a brief how-to and the reason it matters, plus a link to the full step-by-step article for more detail.
1. Set Up Your Chief of Staff and Workspace
Your Chief of Staff is your AI coordinator. It orchestrates the other AI Coworkers in your workspace and is the fastest way to get productive on day one. It is included in every plan. Set it up first, then bring your team in.
Activate and configure your Chief of Staff
Turn it on from your workspace and give it a few basics about your team and use case. Do this first — it becomes the single AI coordinator that the rest of your AI Coworkers connect through, so everything you set up afterward is already working with it instead of around it.
Watch this short Platform Tour to learn more about your Chief of Staff, AI Coworkers, your Intelligence Fabric and more.
Fill in your profile
Go to Intelligence Fabric > Chief of Staff to set a name and avatar, and answer a short set of questions:
-
how you work
-
what slows you down
-
how much autonomy you want it to have
-
your role
-
your department
-
the content you work with most
-
your communication style
-
what you want to solve with Smartcat
Every field is optional, and anything you skip stays empty — it won't keep asking. Your profile, your personal Skills and everything it remembers about you are private to you, and are not visible to anyone else in the workspace.
Explore the shortcuts in the AI chat interface
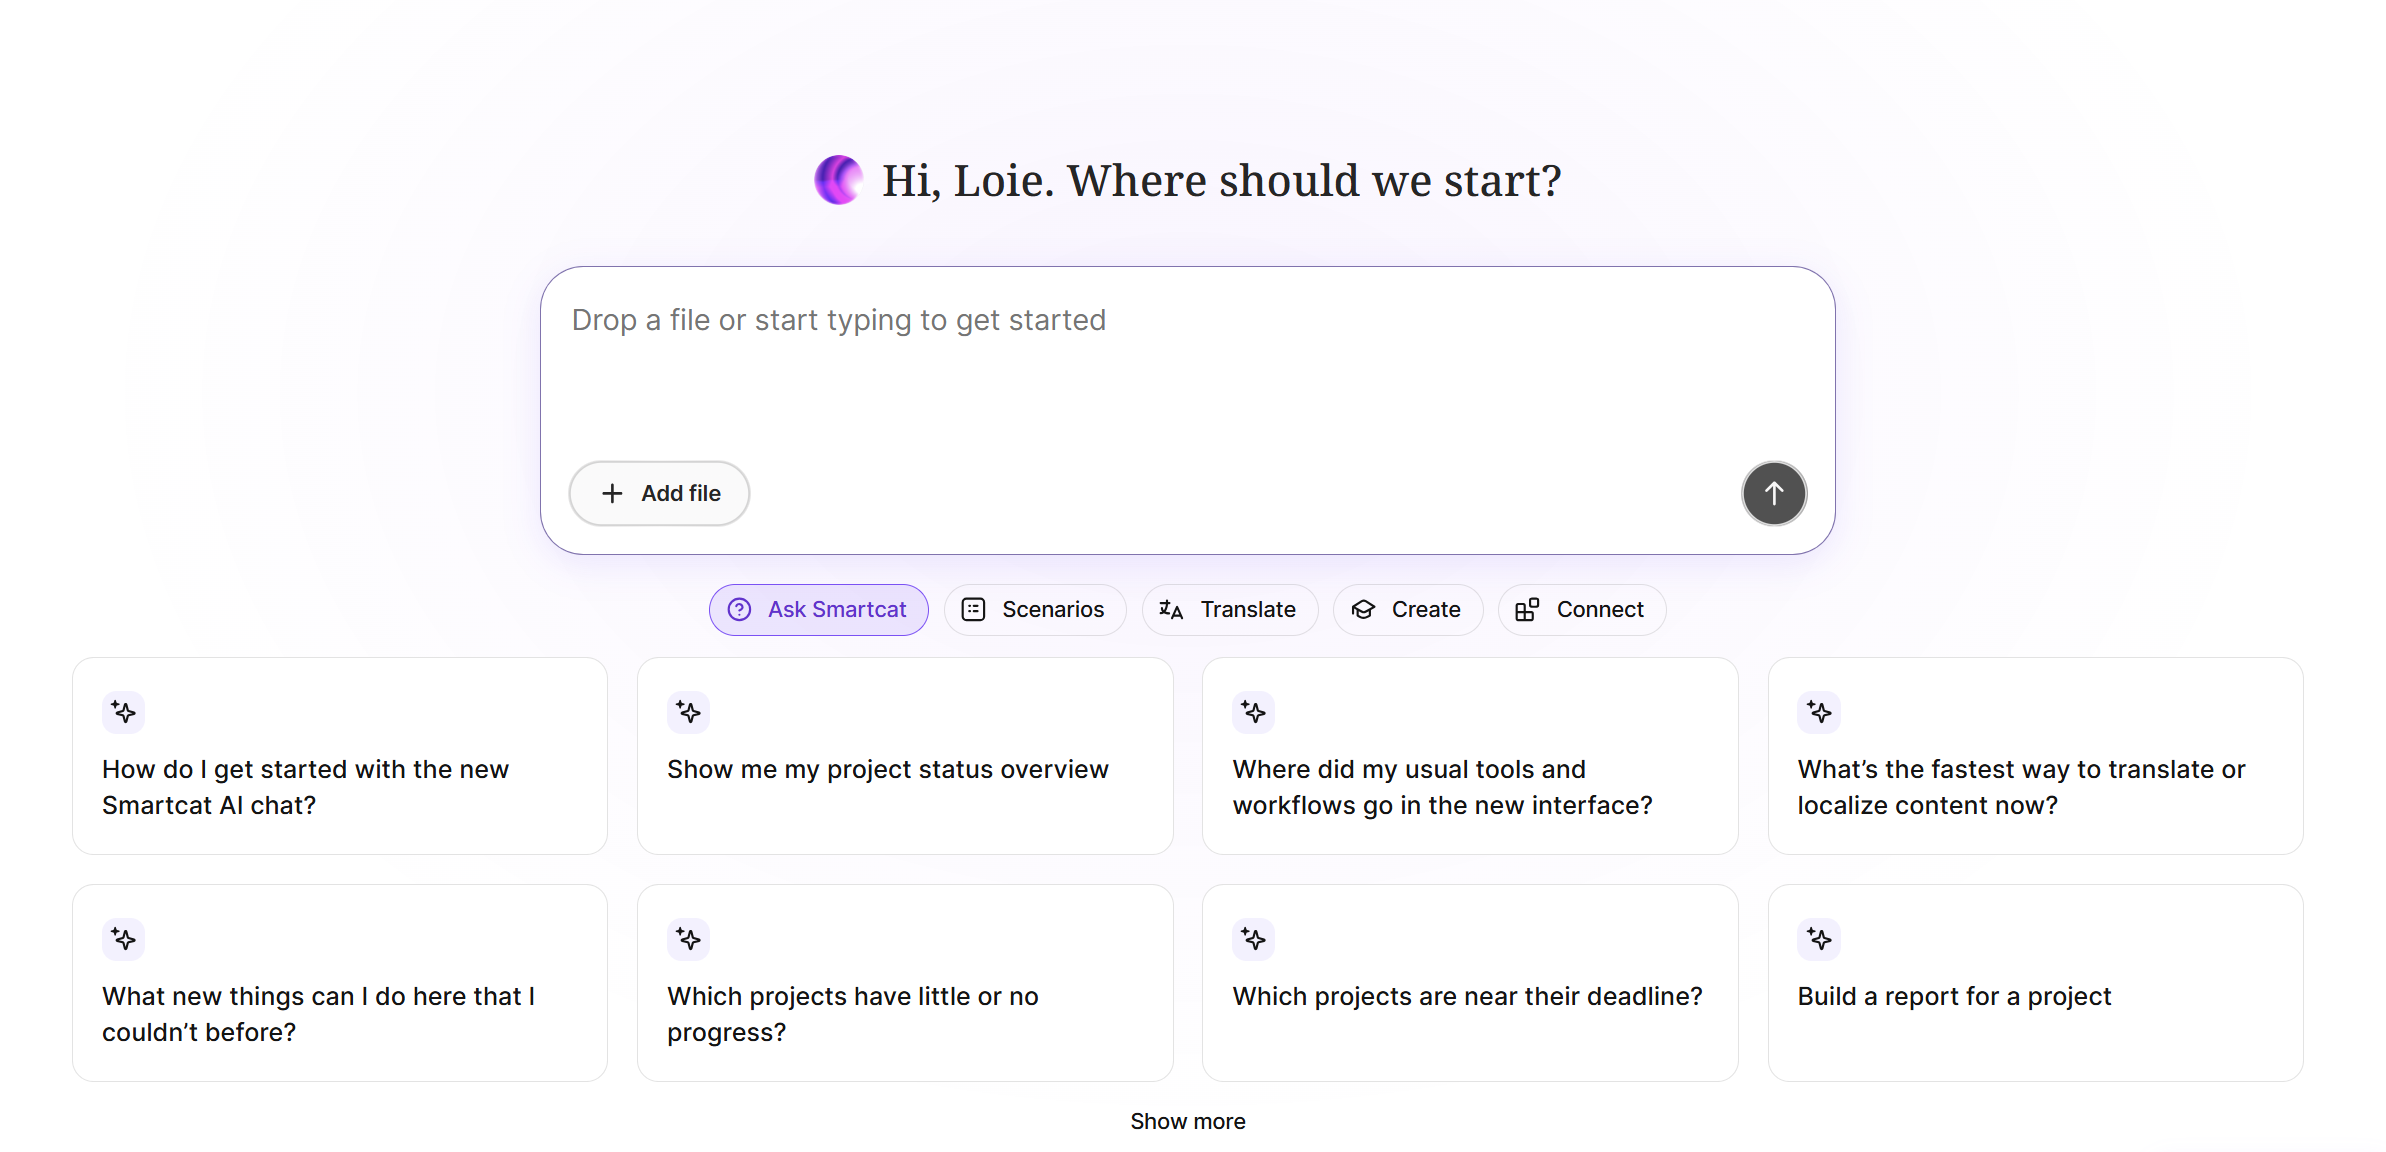
Try a couple of the pre-configured prompts for common tasks (starting a project, checking status, translating a file) instead of typing requests from scratch. This gets you a working result in seconds and shows you what's possible before you've learned the platform in depth.
Add new members to your workspace
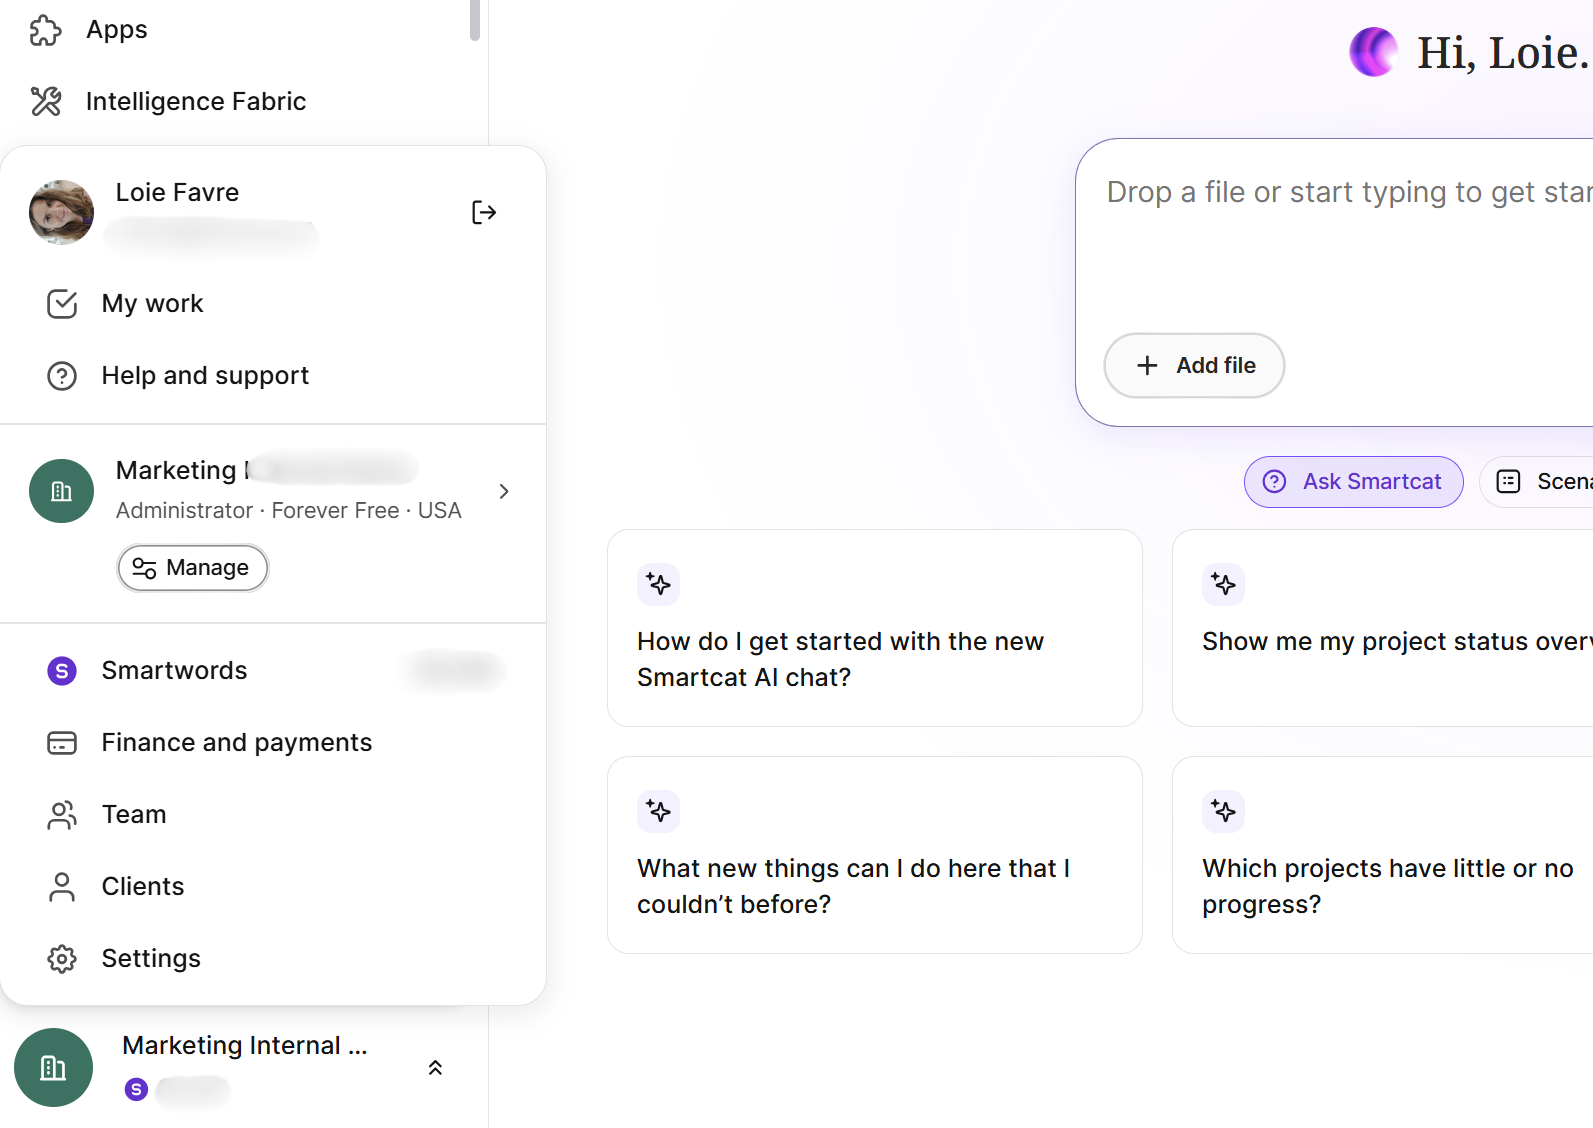
From the workspace dashboard, click Team, then invite each person by email. Doing this now means your team is ready to collaborate the moment you create your first project — you won't be blocked waiting on invites later.
Assign roles to each member
Set each person's role when you invite them, or right after. The right role keeps people scoped to what they actually need — Linguists only see the work assigned to them, while Teammates and Administrators keep the account-wide access required to manage projects and resources. If none of the three fit, you can create a custom access level.
Go to Team, then use the role dropdown next to each person's name. Custom access levels live in Settings > User Access Levels.
2. Translate Your First Content (By Use Case)
Once your workspace is set up, complete your first real translation. What you translate first depends on your use case — pick the path that matches your team, and bring in coworkers to help as needed. Once translated, you'll be able to assign reviewers in the Smartcat Editor (covered in the next section).
Go to Projects > + New project, or drop the file into a chat with your Chief of Staff.
Marketing
Websites, images, PDFs, documents, presentations, and knowledge files (e.g. Google Drive). Connect the relevant integration (Website Translator, Drive) or simply upload a file, then run AI translation. Starting here localizes your most customer-facing content first, since it's usually what gets seen soonest.
L&D
SCORM course packages: courses, guides, videos. Upload your course package or connect your authoring tool (e.g. Rise 360) and run AI translation on the course content. This lets you launch training in new markets without rebuilding the course from scratch in every language.
Product & Software
UI/UX strings, mobile apps and games, Figma designs. Connect your Figma file or upload your strings/resource files, then translate. Localizing here early avoids a separate, disconnected localization pass right before release.
Retail/PIM
Product content via your PIM integration. Connect your PIM (e.g. Salsify) so product data flows in automatically. This keeps product listings consistent across markets without manual re-entry every time content changes.
Knowledge Management
Help-center articles (e.g. Zendesk) and Drive-based knowledge content. Connect Zendesk or Google Drive so articles sync directly into Smartcat. This keeps your external and internal knowledge base current in every language without manual copy-pasting.
3. Review & Quality Control — Your Intelligence Fabric
Intelligence Fabric is how Smartcat keeps translation quality consistent as you scale. It's the central hub for the assets that shape every AI translation, and it's what you and your reviewers use to check and confirm content.
-
Reviewed Translations — formerly translation memories. Translations you've already approved, reused automatically in future projects.
-
Terminology — formerly glossaries. Your approved terms, telling Smartcat how specific words should or should not be translated.
-
Language Insights — Short pieces of guidance on tone of voice, terminology, audience and style that keep AI output consistent.
How to set up your Intelligence Fabric
Go to Intelligence Fabric > Dashboard.
1. Set up your Reviewed Translations and Terminology. Upload existing translation memories and glossaries, or let Smartcat build them for you — point it at your website or upload a document you've already had translated, and it extracts your terminology, past translations, and tone of voice automatically.
These are what let Intelligence Fabric reuse approved translations and enforce your terminology, so the more you use it, the more consistent your content gets with less manual correction.
Go to Intelligence Fabric > Terminology for your terms, and Intelligence Fabric > Assets > Reviewed Translations for your approved translations.
How to pull terminology from third party pages like Notion
2. Add Language Insights. Each insight shows its source — website, document, or added by hand. To add one, click Add New Insight, choose the insight type (for example, Tone Of Voice), pick the language, enter your text and save.
3. Assign reviewers to your project. Pick reviewers from your team on the project's Team tab. This puts a second set of eyes on the AI output before anything ships, catching errors the AI alone would miss.
4. Review and edit translations in the Smartcat Editor. Open the project and work through it segment by segment, editing anything that needs a fix. This is where quality actually gets enforced — it turns a raw AI draft into content you can publish with confidence.
5. Confirm reviewed segments. Mark each segment as confirmed once it's checked. This locks in your progress, keeps tracking accurately, and signals to the rest of the team that the content is ready to move forward.
4. Manage Your Review Resources
As volume grows, manage your review workflow at the project level and bring in outside help when your internal team needs support.
1. Manage review resources within a project. From the project's Team tab, adjust who's assigned as translator or reviewer as work or team availability changes. Keeping this current means each piece of work always lands with the right person, not whoever happened to be assigned at kickoff.
2. Use assignment templates to standardize reviewer/linguist assignment across projects. Save your usual setup as a template once, then apply it to future projects. This saves you from reconfiguring the same assignment every time you start a similar project.
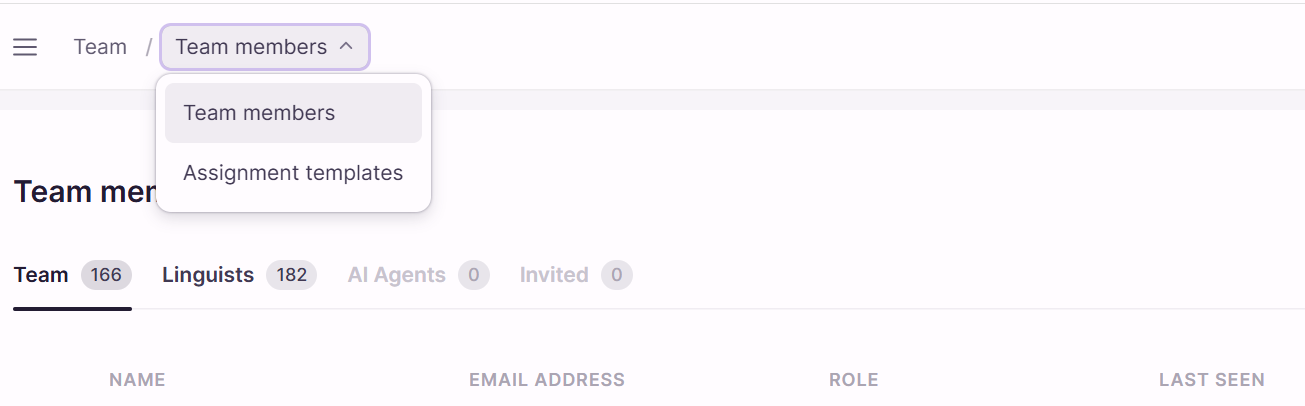
Go to Workplace menu > Team > Templates.
3. Set up Global Skills for your organization. A Skill is a repeatable procedure your Chief of Staff follows — the steps, the inputs, the tools it uses and how it validates its work. As an Administrator you create Global Skills in the Workspace view, and they're always on for everyone.
Only you as the owner can edit the shared version, and when you do, the change reaches everyone using it automatically.
Anyone can copy a Global Skill into a personal version and adjust their copy, which changes nothing for anyone else. Every Skill is validated with your Chief of Staff in a chat before it saves — it checks the instructions, confirms the tools exist, and test-runs the tool call.
Go to Intelligence Fabric > Skills.
4. Automate linguist assignment rules. Set rules so the system assigns linguists automatically based on language or content type. This removes manual assignment work entirely as your volume grows, so scaling up doesn't mean scaling your admin overhead.
5. Hire linguists or vendors from the Smartcat Marketplace when you need extra capacity. Search by language or specialty and add them straight to a project. This is the fastest way to cover a gap in your team without a separate recruiting process.
Go to the Workspace menu > Team > Find Freelancers.
5. AI Tools, Reporting, and Support (Anticipate / Autonomous customers)
Once you're up and running, use reporting to track performance across your workspace, and know how to get help when you need it.
1. Discover Reporting & Analytics in Smartcat Apps. Open the Reports section from your workspace to see volume, spend, and performance across every project. This gives you visibility across the whole account, so you can spot a problem (or an opportunity) before it grows.
Go to Apps in the left sidebar and open the report you want. Account-wide Reports are in the sidebar as well.
2. Put reporting on a schedule. Ask your Chief of Staff to send you project status on a recurring basis — for example every morning. Each run arrives in its own new chat, so your working conversation stays clean and each report stands on its own. You can ask it to list, change or cancel any scheduled task.
3. Set up Automations. An Automation is a Skill with a trigger attached — it runs on a schedule or an event instead of you asking each time. It isn't a fourth kind of Skill. Review everything you've set up under Intelligence Fabric > Automations.
4. Create a support ticket. Submit one through the Support Portal when something needs a real fix. This gets a Smartcat engineer working on the issue directly, instead of you searching for a workaround.
5. Track the status of your open tickets. Check the Support Portal for updates on anything you've submitted, so you always know where a reported issue stands.
6. Access the Help Center and Smartcat Academy for ongoing training. Browse either any time you want to go deeper on a feature.
Want to learn more?
See how Smartcat can transform your localization workflow.
Still need help?
Our support team responds within one business day.