Set up the Akeneo integration
Overview
The Akeneo integration connects your product information management system with Smartcat, streamlining your translation workflows so you can localize product content accurately and efficiently.
Step 1. Create a connection in Akeneo
- Open your Akeneo workspace and go to the Connections settings
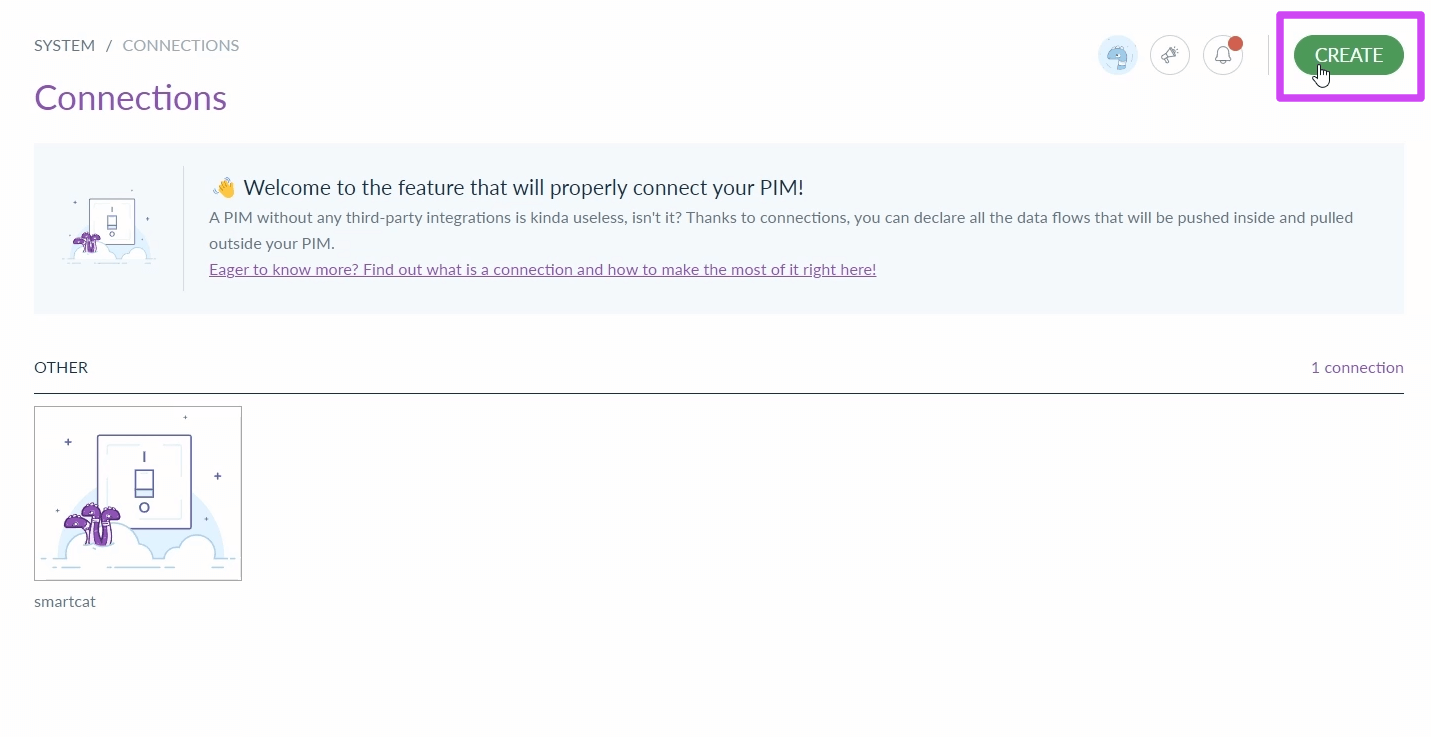
- Create a connection using the respective button, enter the label and the code, then save your connection
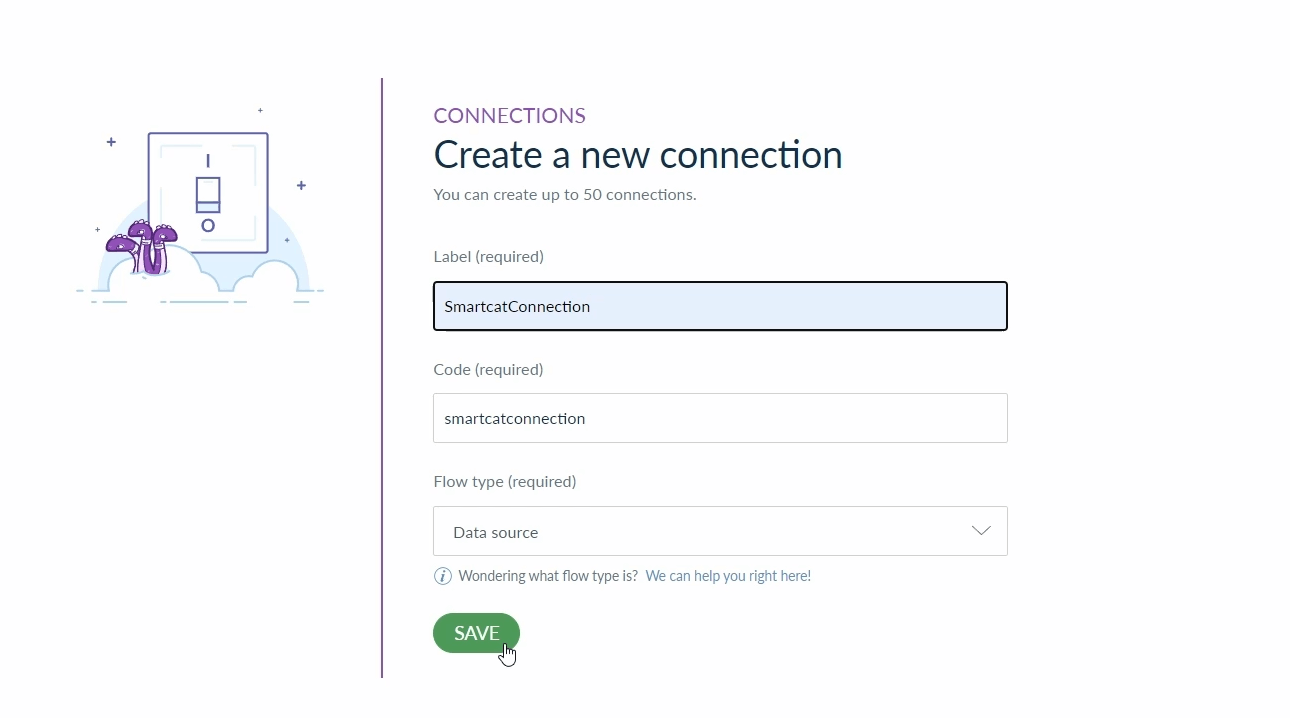
- On the page that opens, save all of the data that Akeneo provides under the Credential field, which Smartcat uses later
Your Akeneo connection is now created and its credentials are saved.
Step 2. Enable locales in your project
-
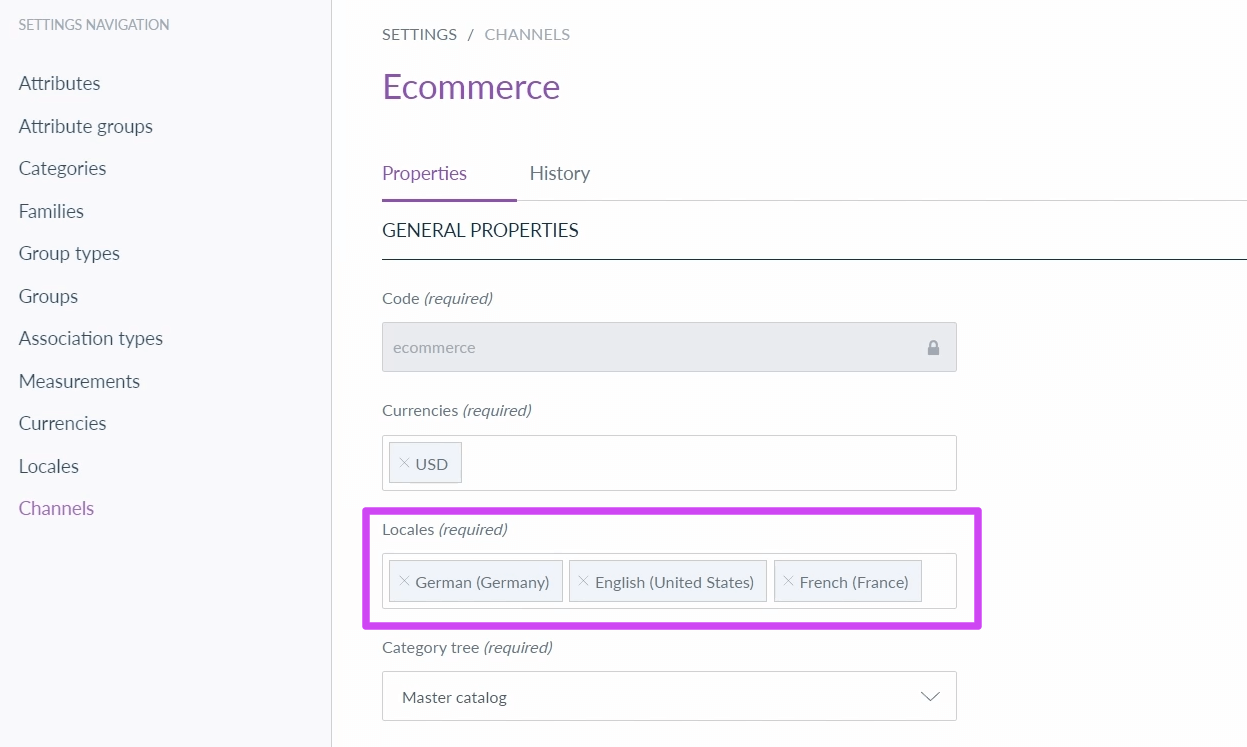
Go to Settings, then open the Channel settings
-
Specify new locales in the Locales field
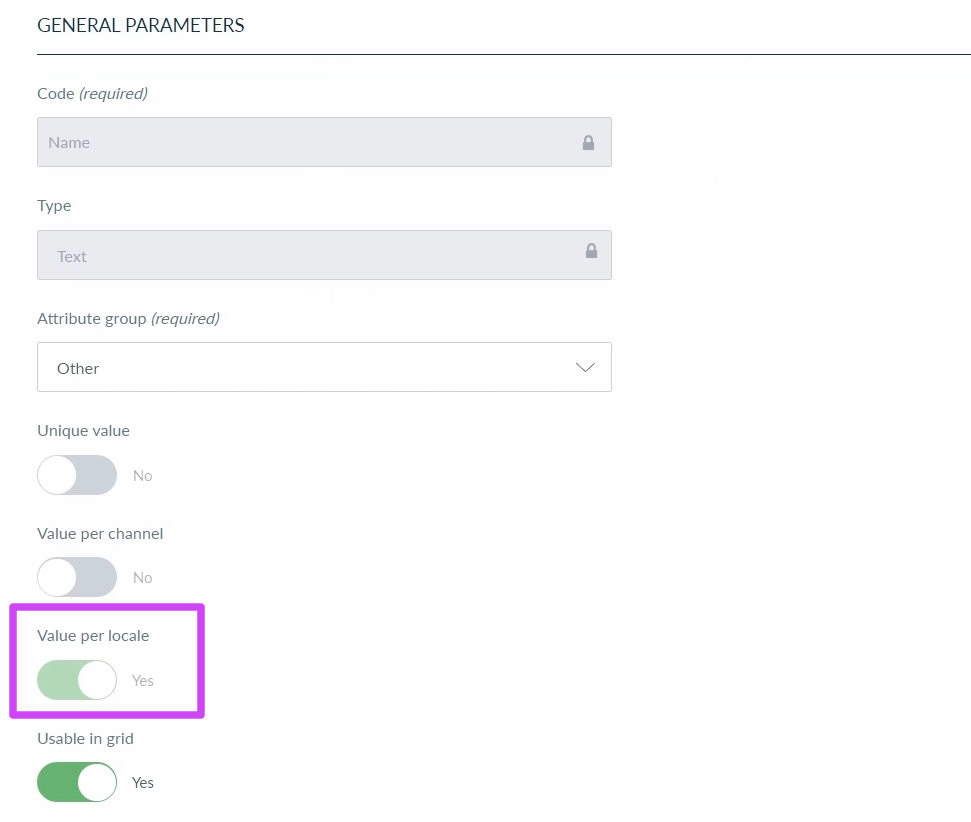
📌 Make sure that the attributes used in your project are localizable. To make an attribute localizable, toggle on the Value per locale switch when creating a new attribute.
Your project now has the target locales enabled and localizable attributes.
Step 3. Connect your Akeneo workspace with Smartcat
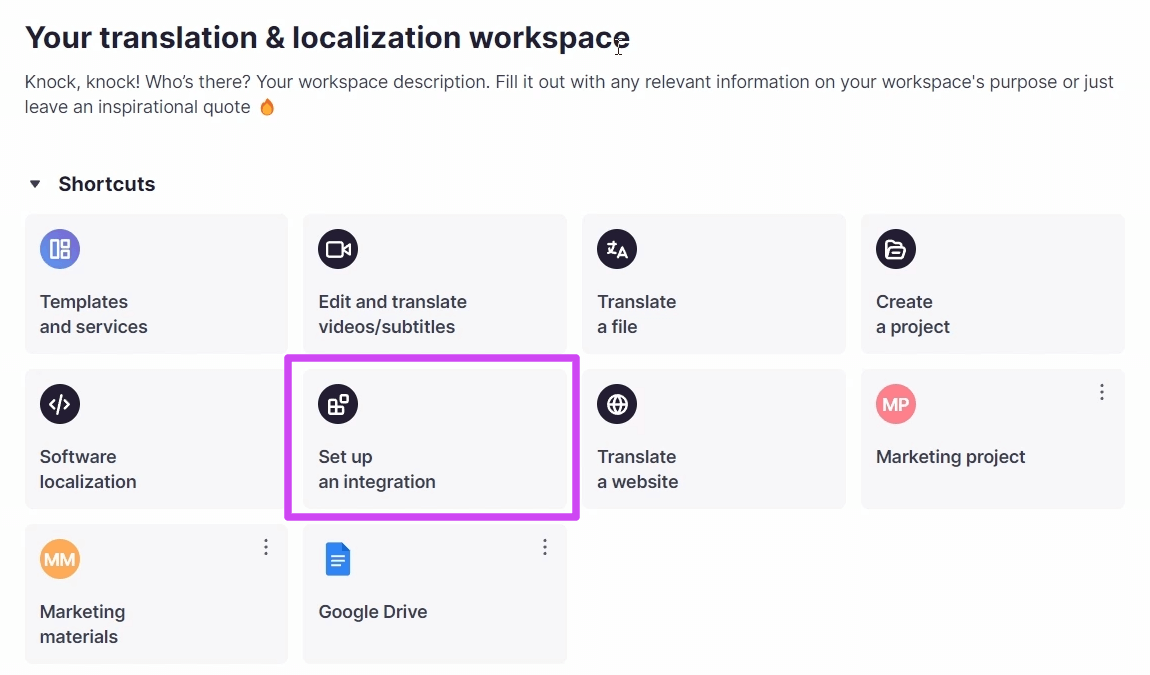
- Open your Smartcat workspace and select the Set up an integration shortcut
-
Select the Akeneo integration from the list
-
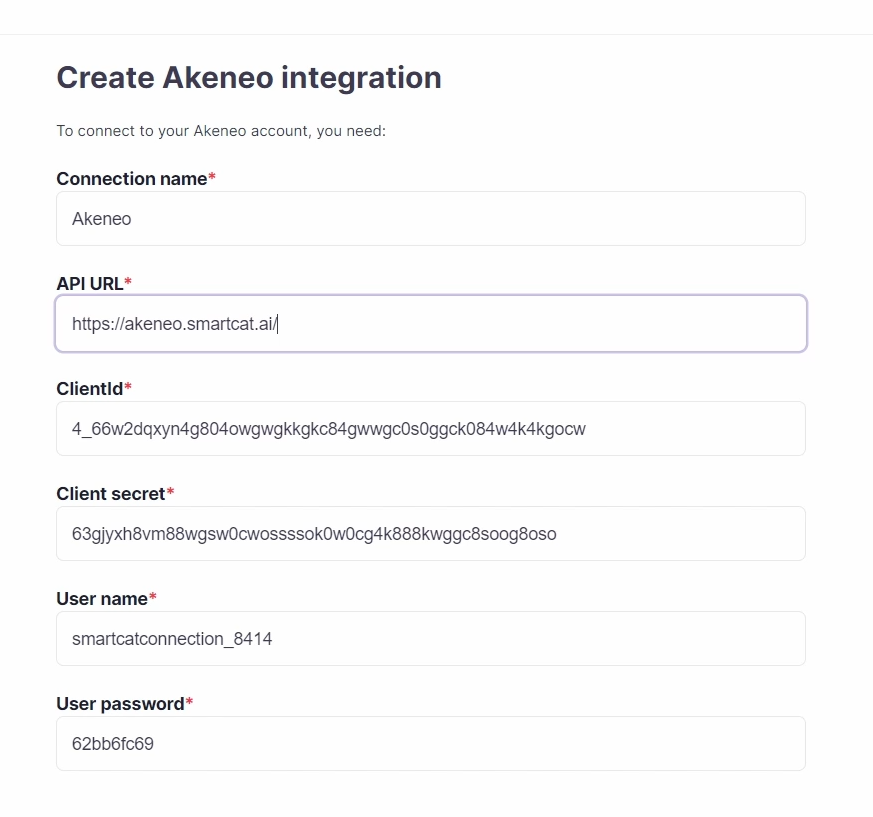
Fill in the required data fields. Locate the API URL in your Akeneo workspace by checking the browser's address bar
-
For the remaining fields, use the previously saved data: the Client ID, Client Secret, Username, and User Password. Click Create Integration to continue
-
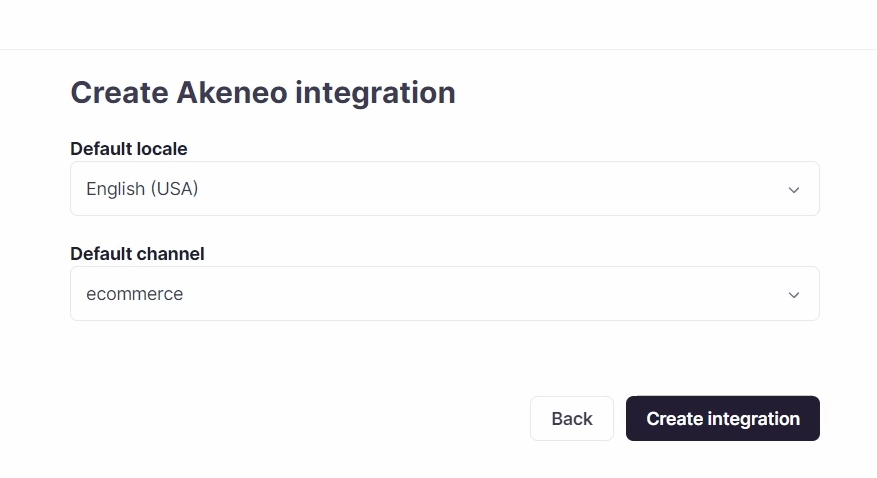
On the next screen, select the default (source) locale for your Akeneo project and choose the channel to be used in Akeneo, then click Create Integration again to complete the process
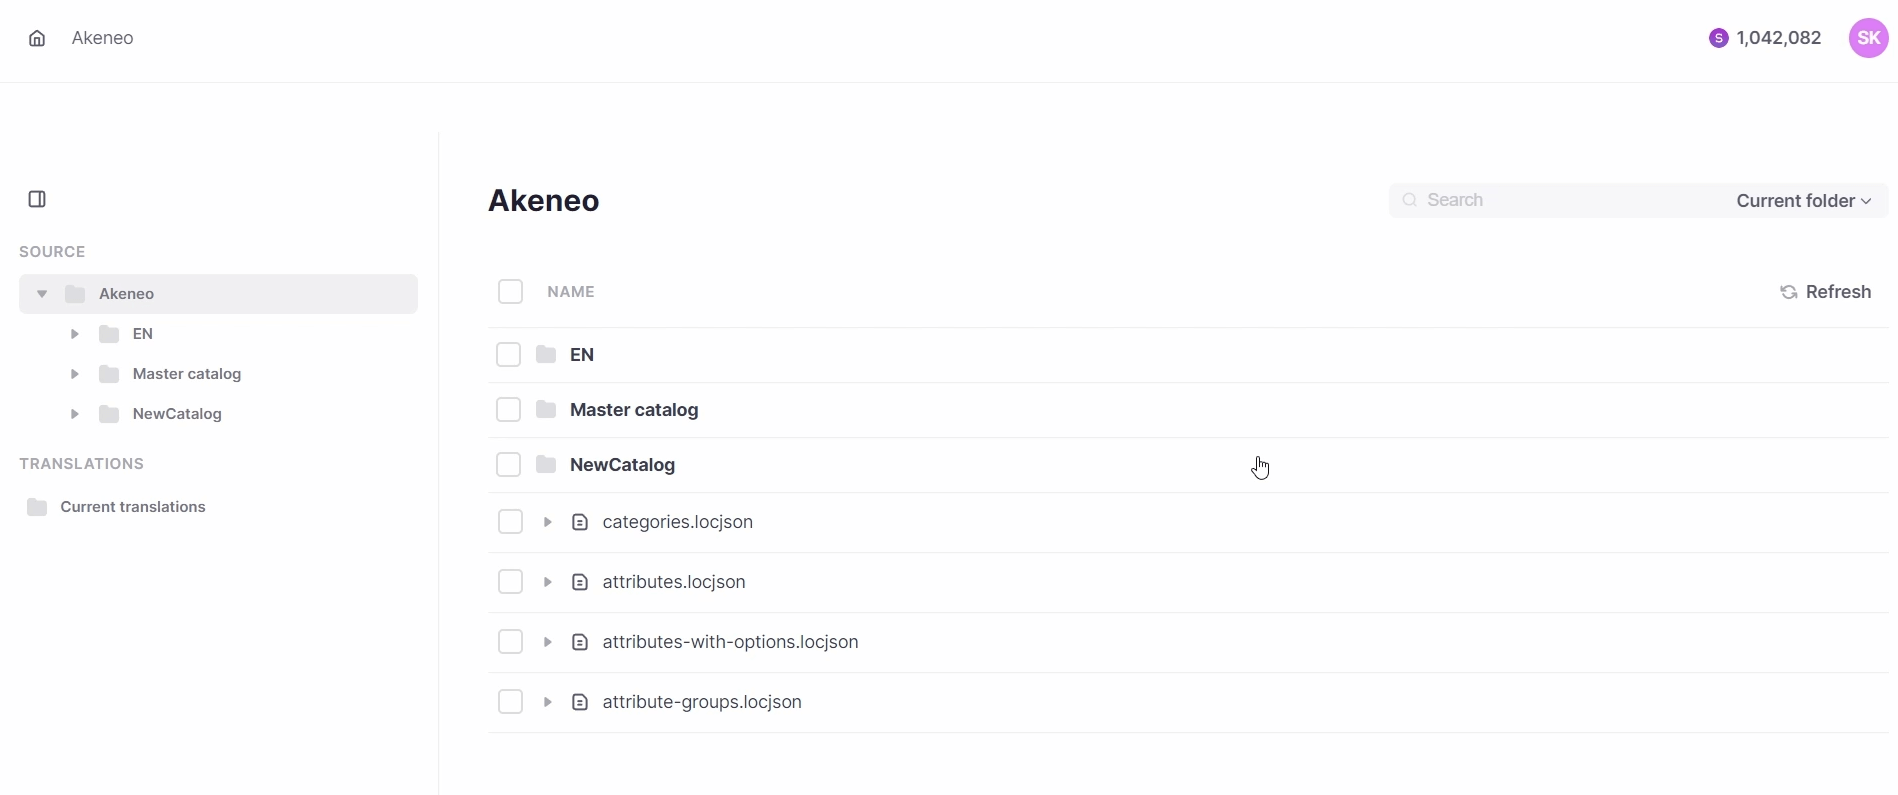
The integration page opens, showing the hierarchy of your folders along with the categories and attributes within your project.
Ensure your product appears in Smartcat
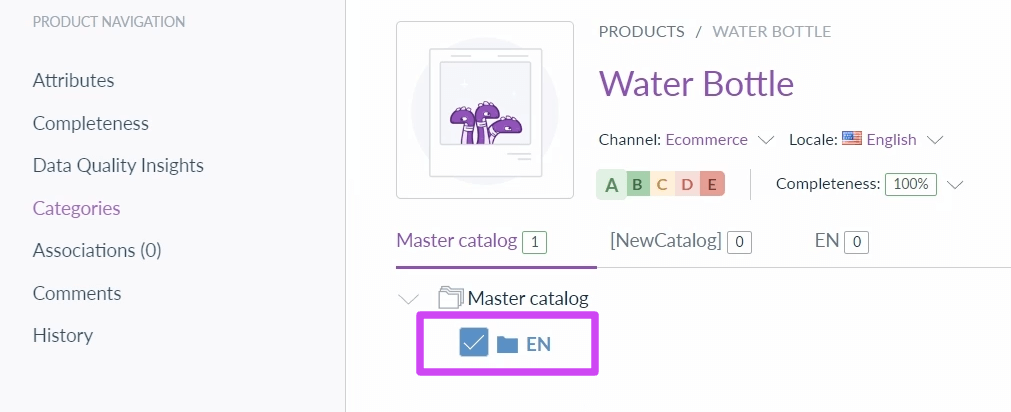
If you can't find your product in Smartcat, it hasn't been added to any category yet.
- Open your product in Akeneo, then go to the Categories settings
-
Select the category for your product and click Save. A notification confirms the product was updated
-
Go back to Smartcat and use the refresh button to synchronize the changes
Your product now appears under the specific category in Smartcat.
Step 4. Import your content in Smartcat
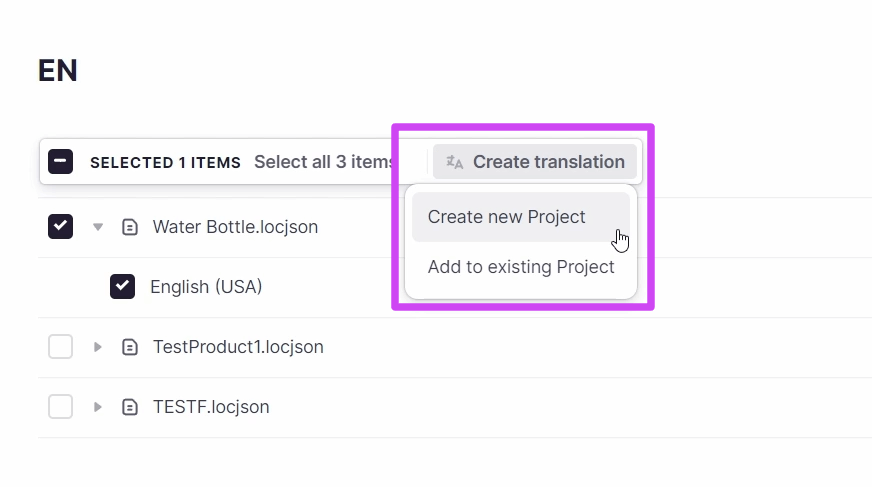
- Under the name of your product, select the source language. In the context menu above, click Create translation
-
Choose whether to create a new project for your translation or add it to an existing project in Smartcat
-
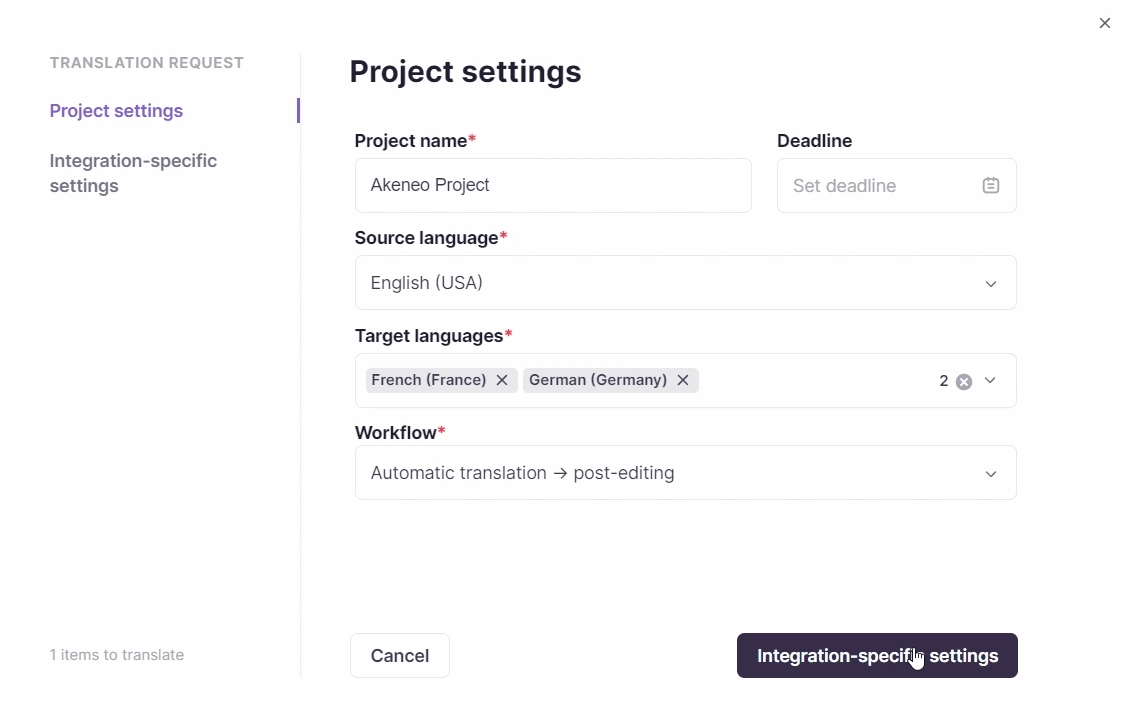
Populate the required fields such as name, source language, and target language(s). You can select multiple target languages to translate into more than one
-
Choose a workflow for your translation. This guide uses the Automatic Translation → Post-Editing workflow. Smartcat selects the most suitable AI engine for the initial translation, after which you can review the translation yourself or invite a collaborator
-
Click Integration-specific settings
-
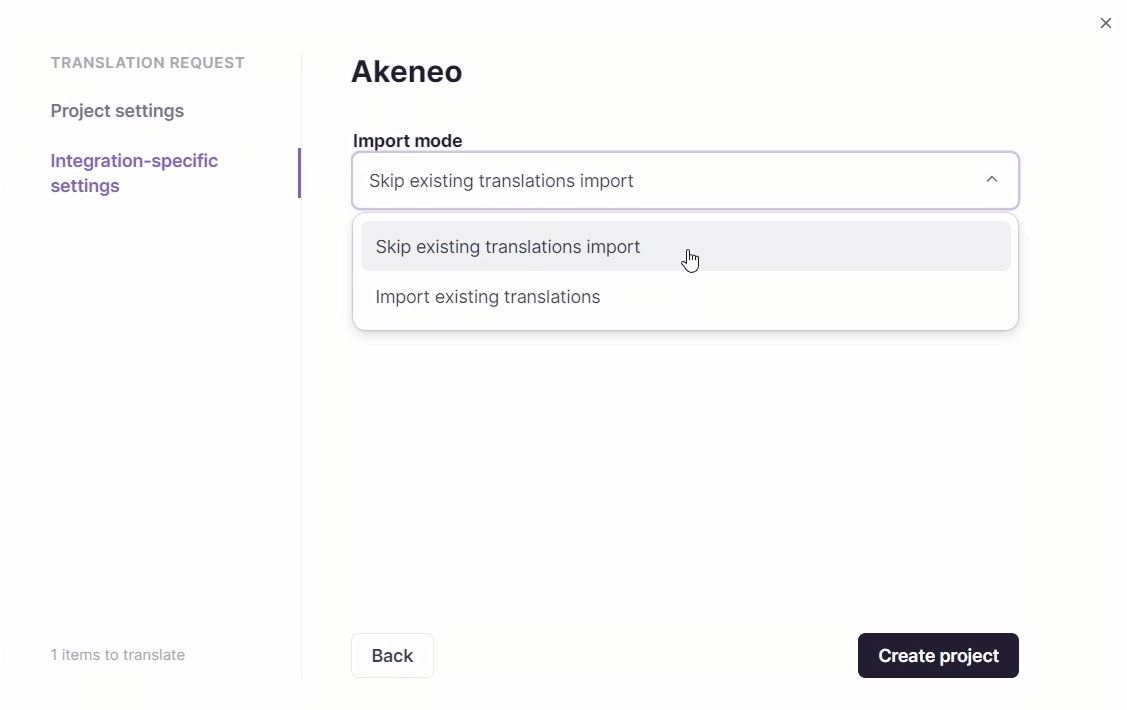
Set the following options:
-
Import mode: select whether to import an existing translation, if any
-
Attributes: choose the attributes for translation
-
-
Click Create project
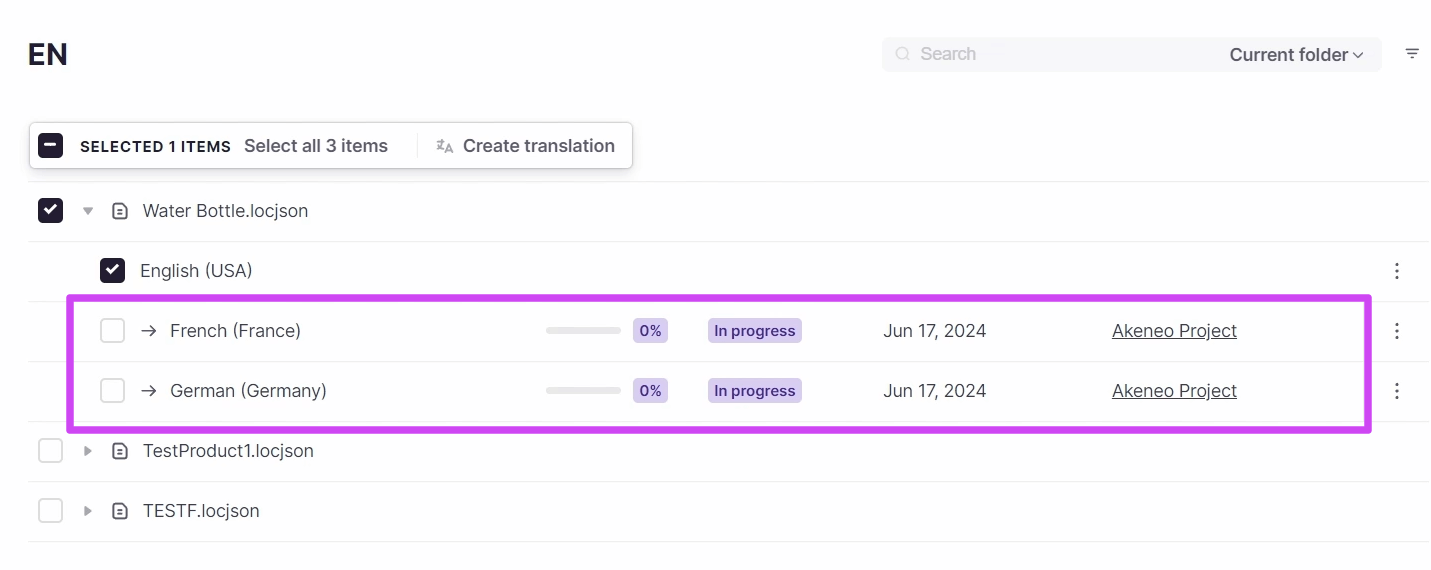
After the process finishes, new target languages with progress bars appear under the name of your product, and the associated Smartcat project name is shown on the right.
Step 5. Review your translation in the CAT editor
-
Click the underlined name of the associated Smartcat project to the left of the target language
-
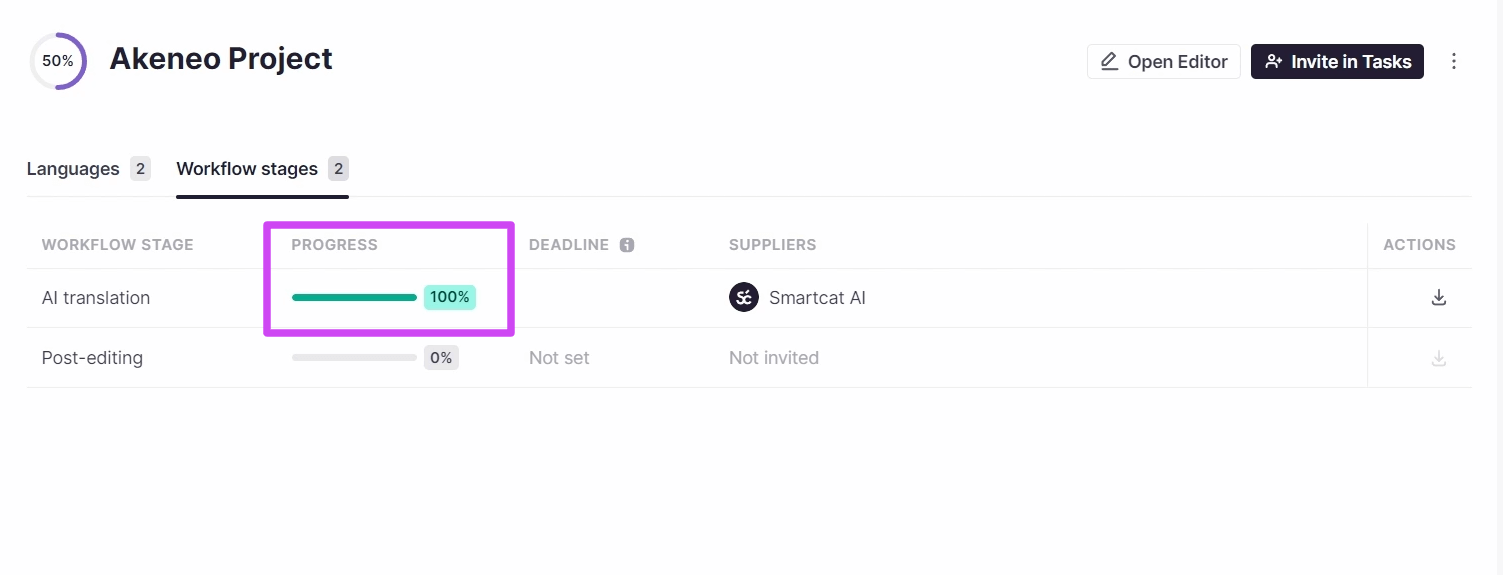
The Overview tab opens. When the progress bar reaches 100%, the AI translation workflow stage is complete
- Go to the Files tab and open your file by clicking the source language
-
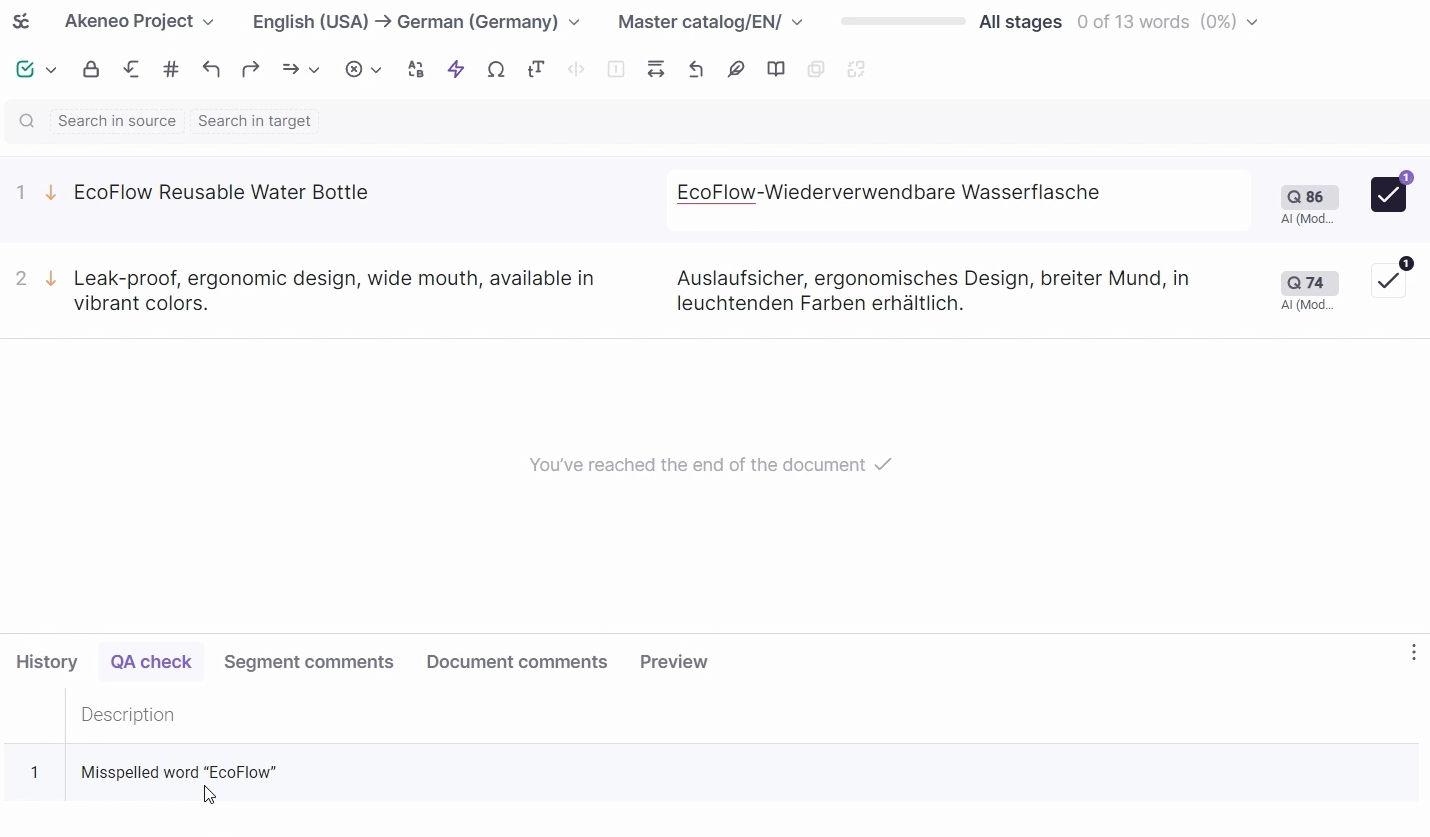
The editing area is divided into segments. Edit your translation as needed
-
Check the Quality Assurance tab for any inaccuracies
-
Access the history of changes in the History tab
-
Review your translation segment by segment. Alternatively, confirm all segments at once by clicking the green button in the toolbar above, on the left
-
When you're done reviewing, click Done to finalize the review stage
Your translation is reviewed and the review stage is finalized.
Step 6. Assign a human reviewer
Another way to review your translation is to assign the task to a human reviewer.
-
Go to the Tasks tab
-
Select the Post-editing task, then click Invite
-
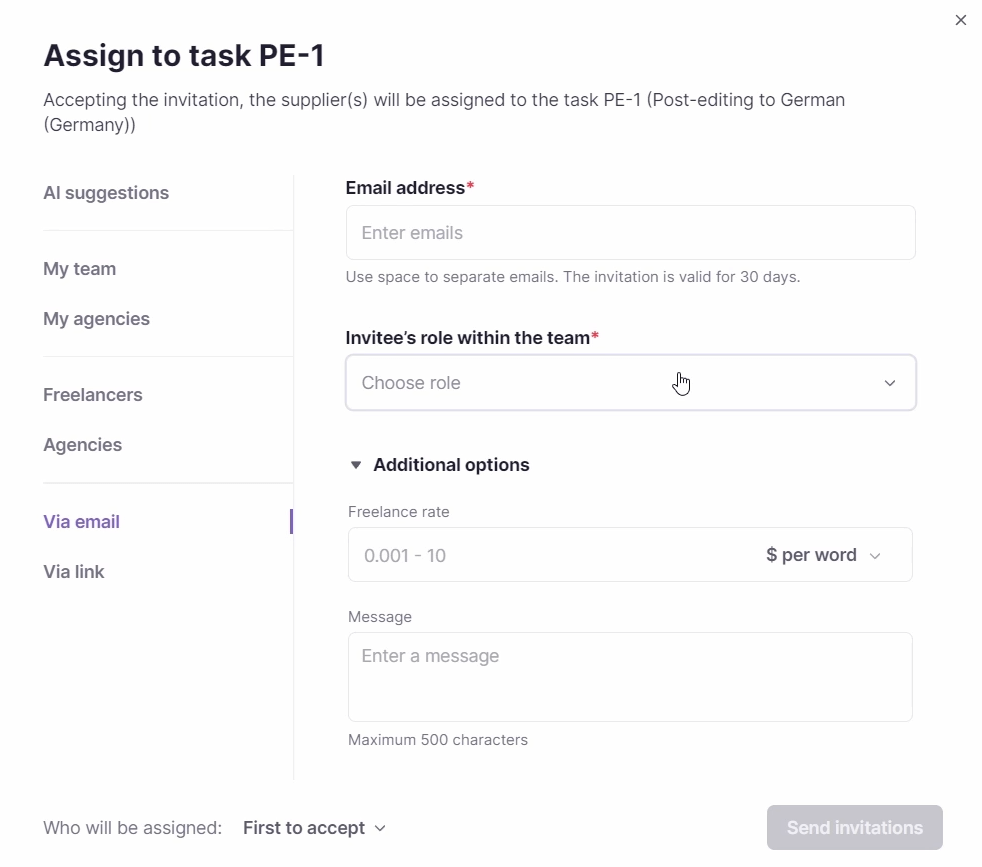
Choose the most suitable option: invite a human reviewer from your team, agencies, or the Marketplace. Alternatively, invite a reviewer to the Smartcat workspace using an email or link. Specify the reviewer's role and rate in the Additional Options section
-
Click Send Invitations. Track your invitation status on the Tasks page
Your invitation is sent and its status is tracked in the Tasks page.
Step 7. Send your translation to Akeneo
-
After the review stage is complete, refresh the status of your project using the Refresh button, then wait for the progress bar to update
-
Select the translations that you want to send. You can choose multiple translations. Then click Send to Akeneo
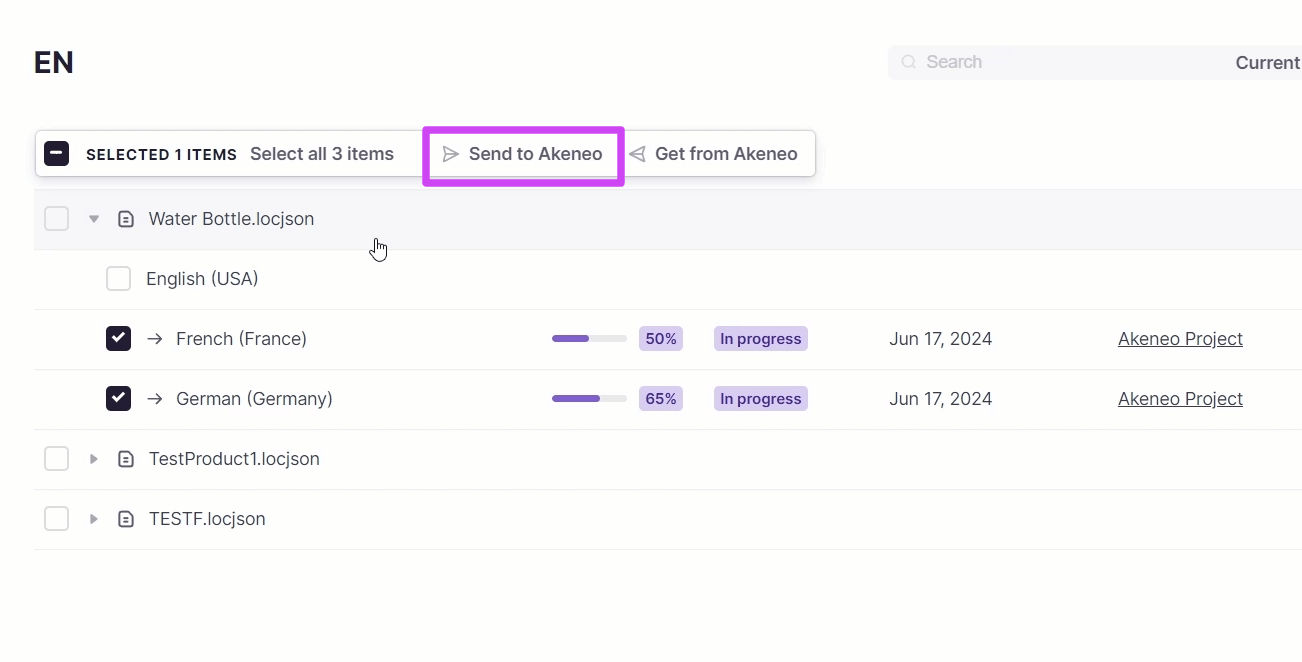
- Specify the completion mode of your translation
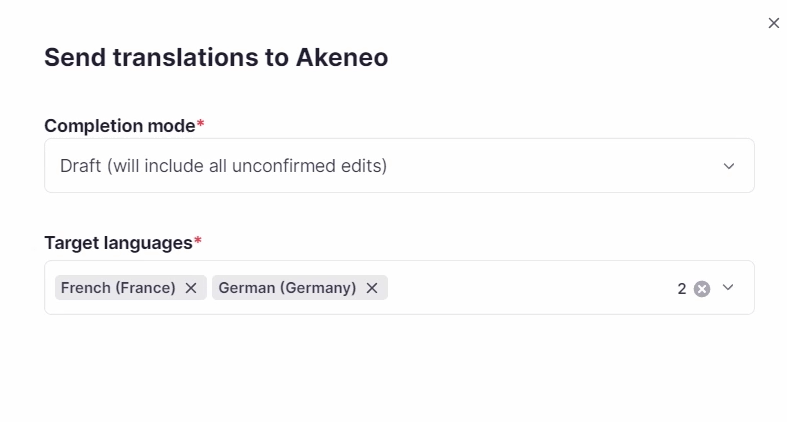
💡 You can send the translation with unconfirmed edits if you haven't finished working on it.
- Once synchronization is complete, return to your Akeneo workspace, open your project, and select the desired locale
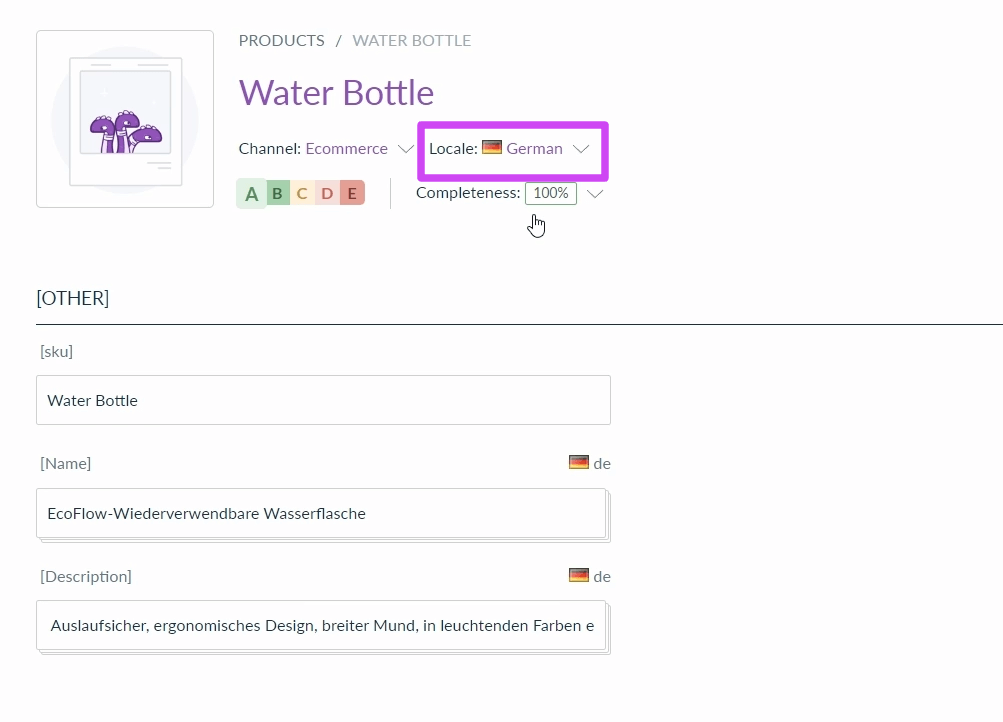
Your content is successfully translated and available to review in Akeneo.
FAQs
Why can't I find my product in Smartcat after connecting Akeneo?
Products not yet assigned to a category in Akeneo won't appear in Smartcat — add the product to a category in Akeneo, save, then refresh in Smartcat to sync it.
What Akeneo-side settings do I need to check before translating?
Make sure your target locales are added under Channel settings, and that the attributes you want translated have the "Value per locale" switch toggled on (localizable).
Can I assign a human reviewer instead of relying only on AI translation?
Yes — from the project's Tasks tab, you can invite a human reviewer from your team, agencies, or the Smartcat Marketplace to handle the Post-editing task.
What credentials does Smartcat need to connect to Akeneo?
The API URL (found in your Akeneo workspace's browser address bar), plus the Client ID, Client Secret, Username, and User Password saved from your Akeneo connection.
Can I choose to import existing translations already in Akeneo?
Yes — the Integration-specific settings let you choose an import mode to bring in existing translations, and pick which attributes should be translated.
Want to learn more?
See how Smartcat can transform your localization workflow.
Still need help?
Our support team responds within one business day.