Translate audio files in Smartcat
Overview
Smartcat lets you translate your audio files with AI translation and review the results in the CAT editor. Follow these steps to create high-quality translations of your audio files.
Upload your audio file
Open your workspace and click Translate a File, or ask Smartcat AI to translate an audio file.
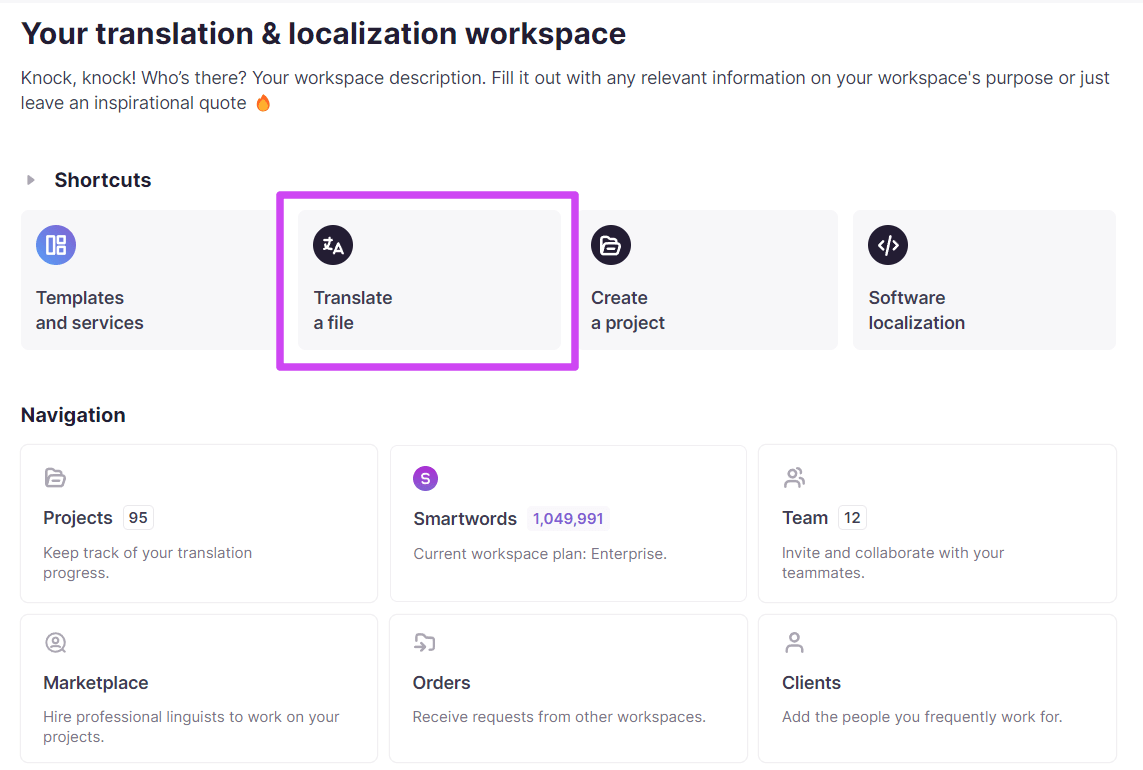
That opens the project creation tab.
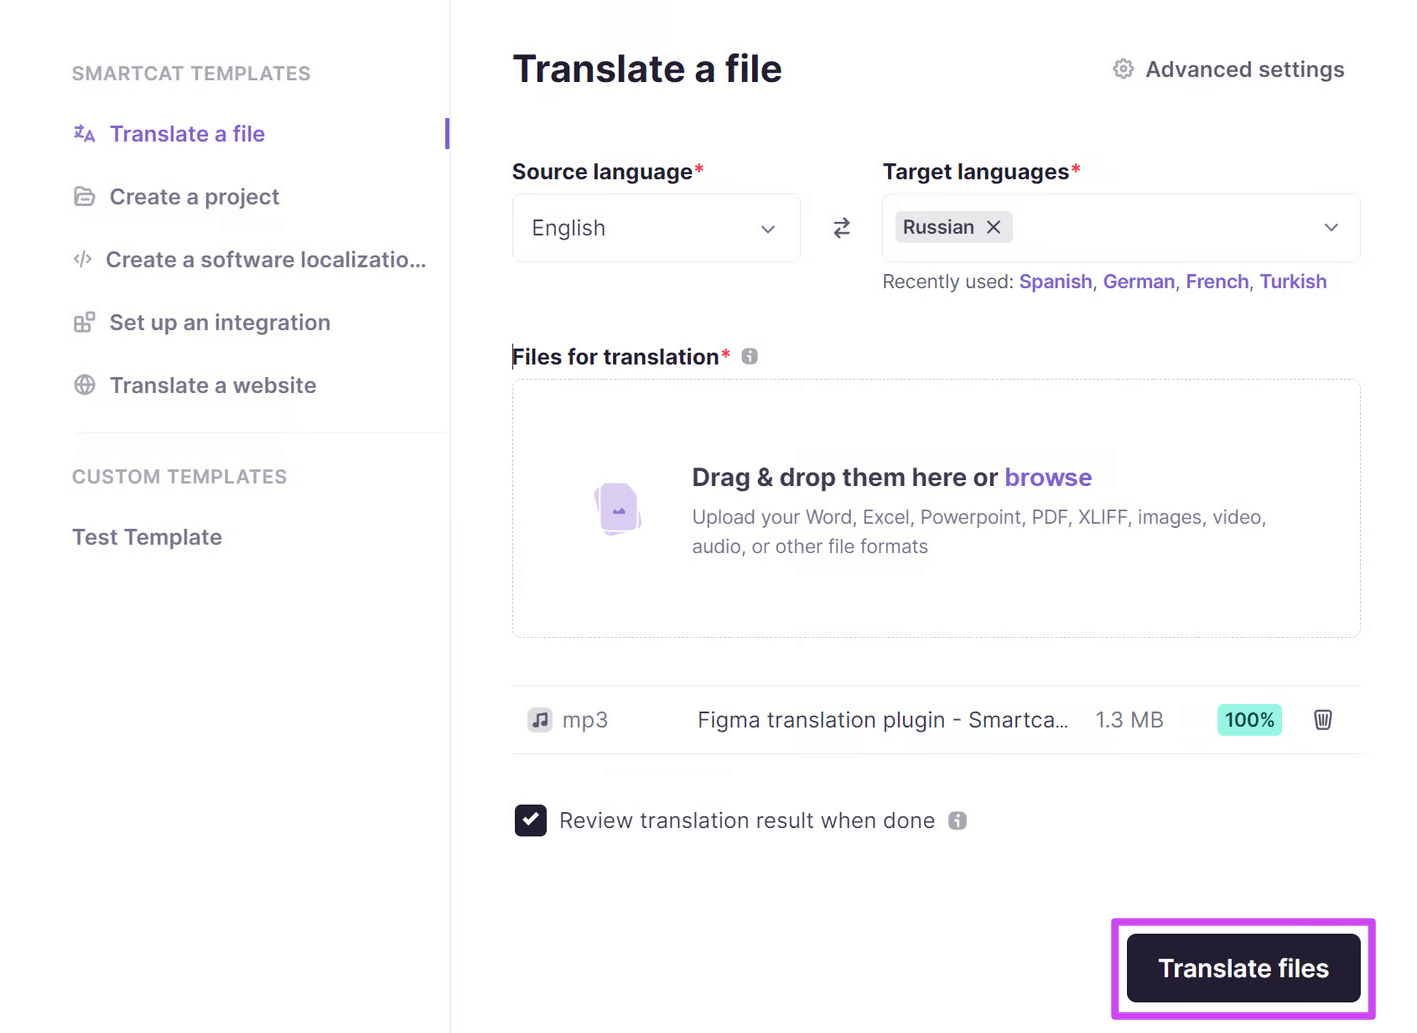
-
Specify both the source and target languages
-
Select your audio file from the computer
-
Click Translate files
An Overview tab opens, where you can view the workflow stages. When the progress bar of the AI translation stage reaches 100%, the translation is complete, and you can open your file in the CAT editor.
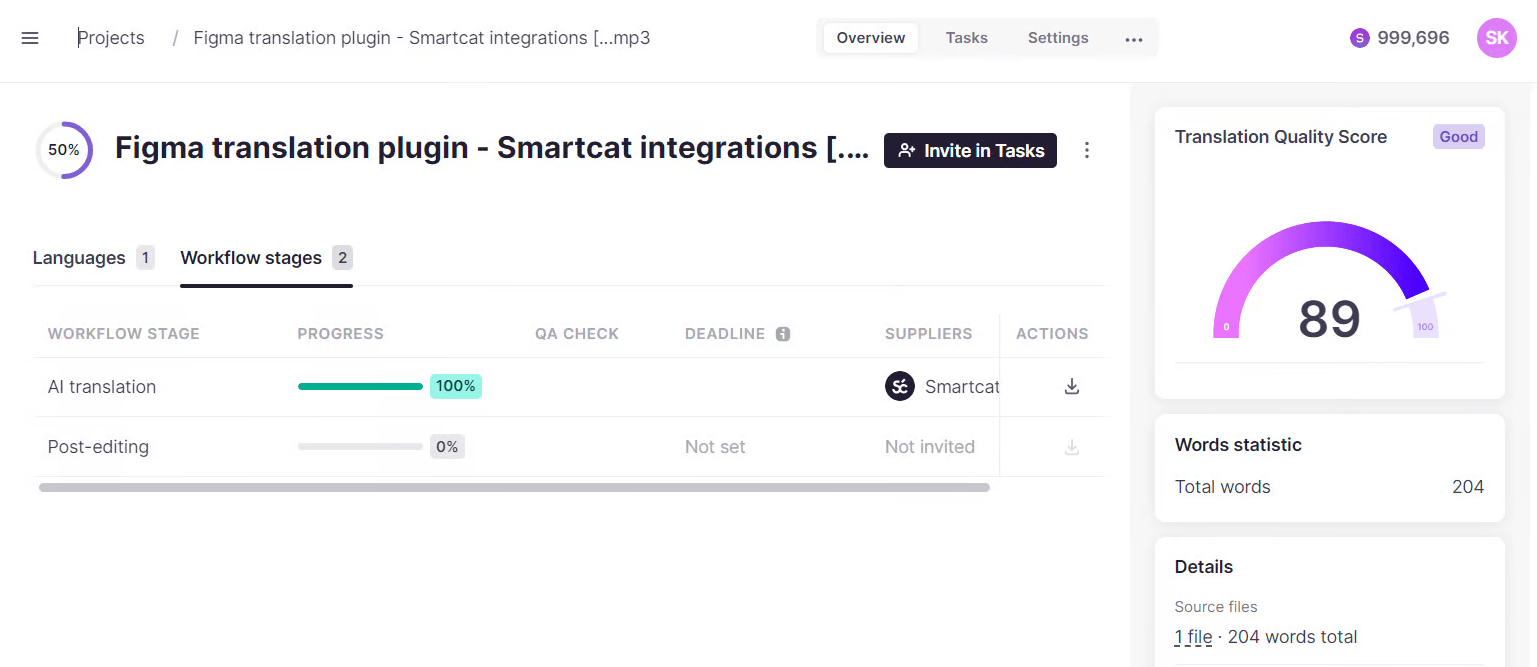
Your audio file is now translated and ready to review.
Upload your file to an existing project
Another option for working with your audio file in Smartcat is to upload it to an existing project.
-
Open your project
-
Go to the Files tab and click Upload
-
Select Upload documents from the drop-down menu
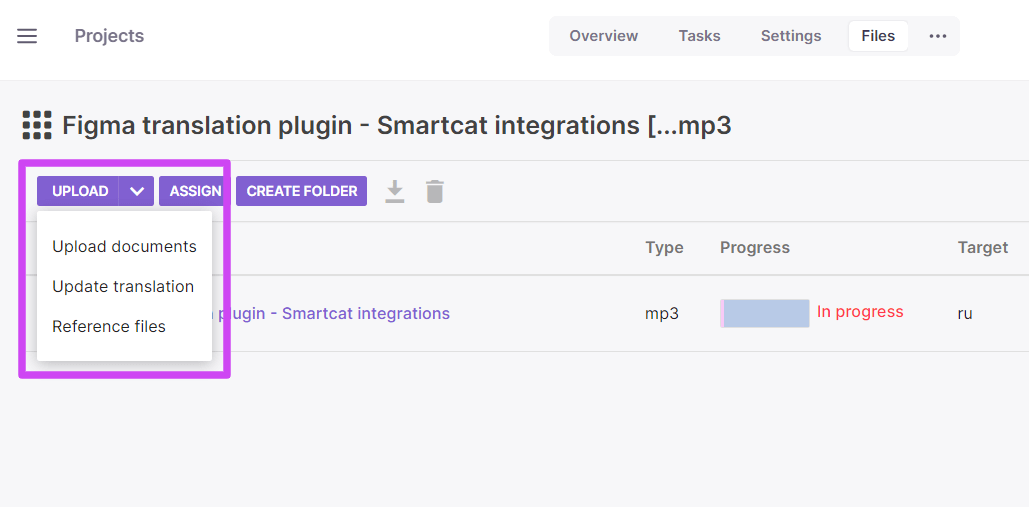
Select your file from the computer and click Finish. You can upload multiple files at once.
Review your translation
Open your file from the Files tab. The editing area is divided into segments.
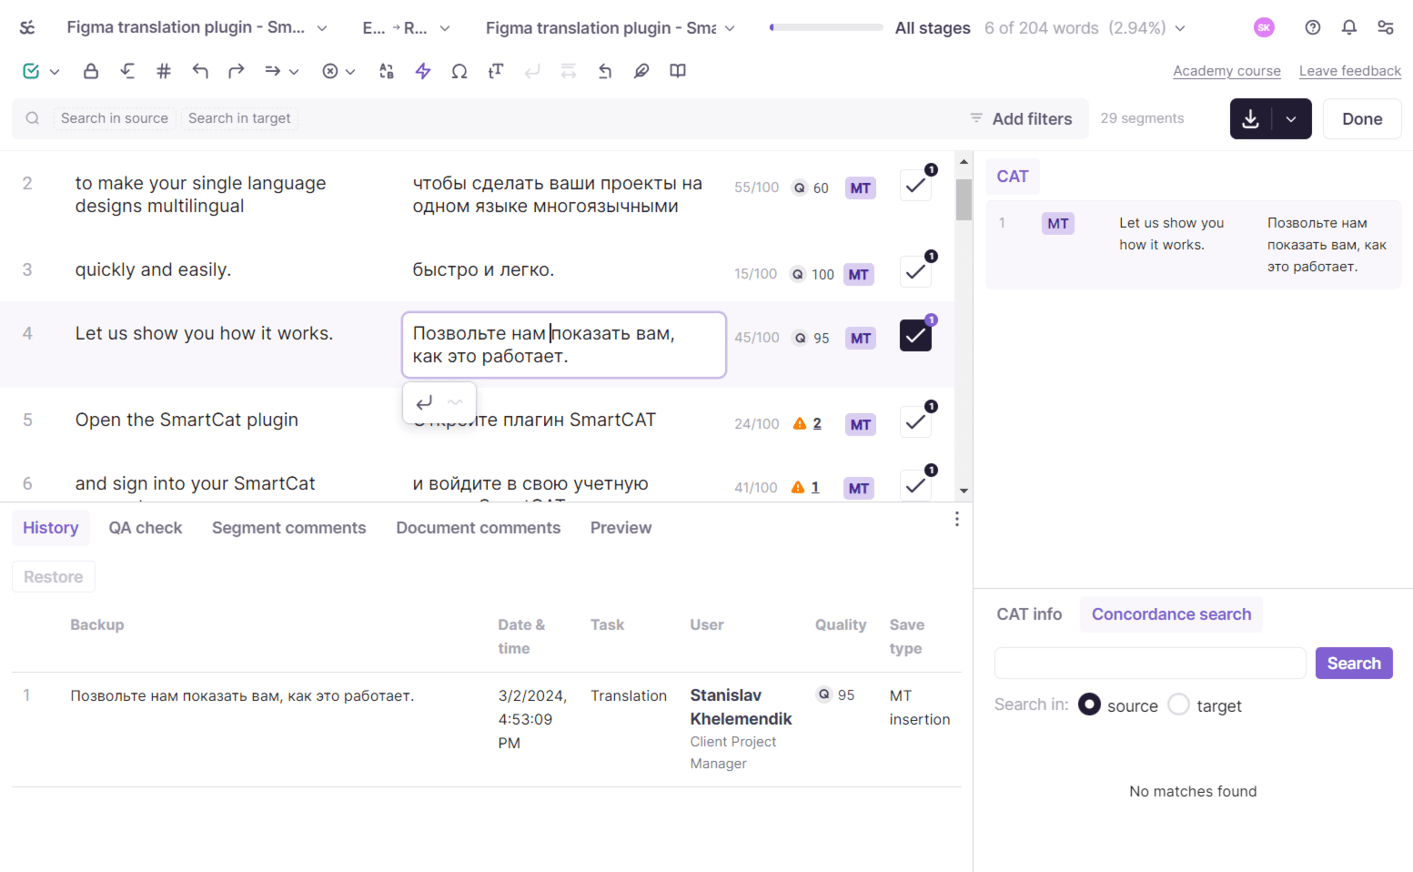
Edit your translation if necessary. Below the editing area, you'll find various tabs.
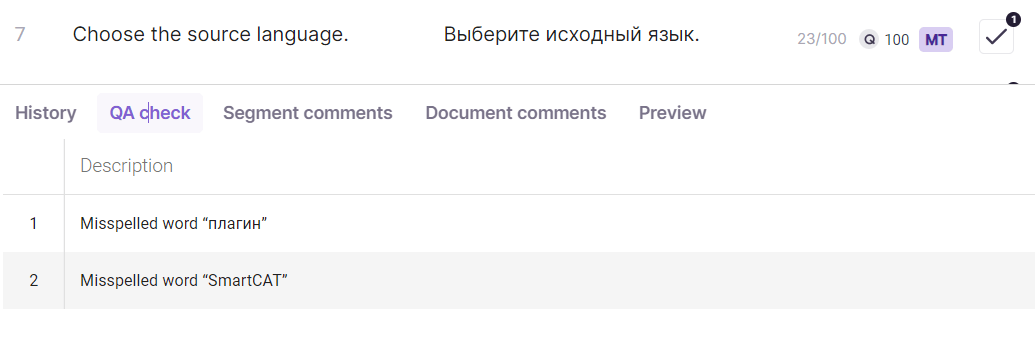
-
History. Monitor the edit history of your file
-
QA check. Check the Quality Assurance tab for inaccuracies if there are any. You can also track errors via the orange warning sign on the right of the segment
-
Segment comments & document comments. Add comments to specific text segments or an entire document for other assignments
-
Preview. View the preview of your audio file in the respective tab. The preview automatically displays the selected text segment within the source file
Review and confirm one segment after another by clicking the checkbox on the right of the text segment.
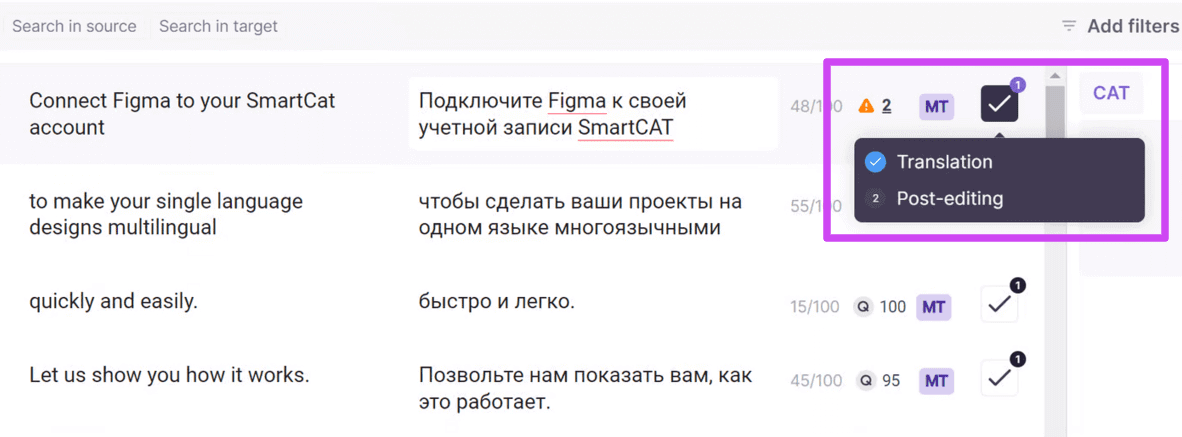
To confirm all segments at once, click the checkbox icon in the toolbar.
Export options
Once the review and edit of your AI translation is complete, click the Done button in the CAT editor and download your resulting file in DOCX format. You can export your file in TMX, XLIFF, or CSV if you choose the Special formats option in the drop-down menu.
Assign a reviewer for your translation
A good idea is to assign the review of the translation to another linguist. Smartcat lets you assign tasks to a human reviewer within Smartcat.
Assign tasks from the CAT editor
If you are working with your translation in the CAT editor, follow these steps.
- Go to the Tasks tab and select the Post-editing task
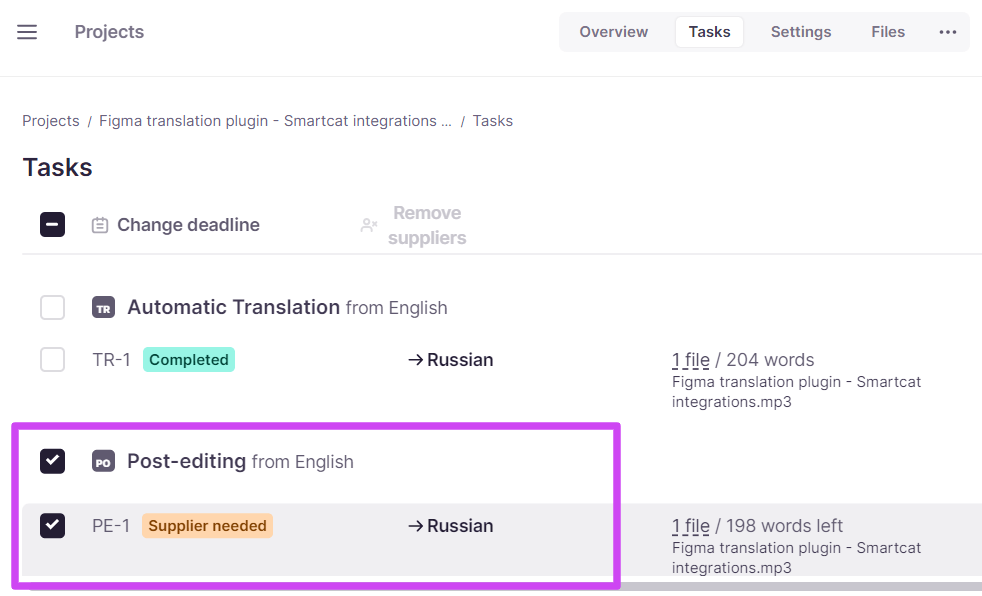
- Click Invite. In the following pop-up, you can choose from various options
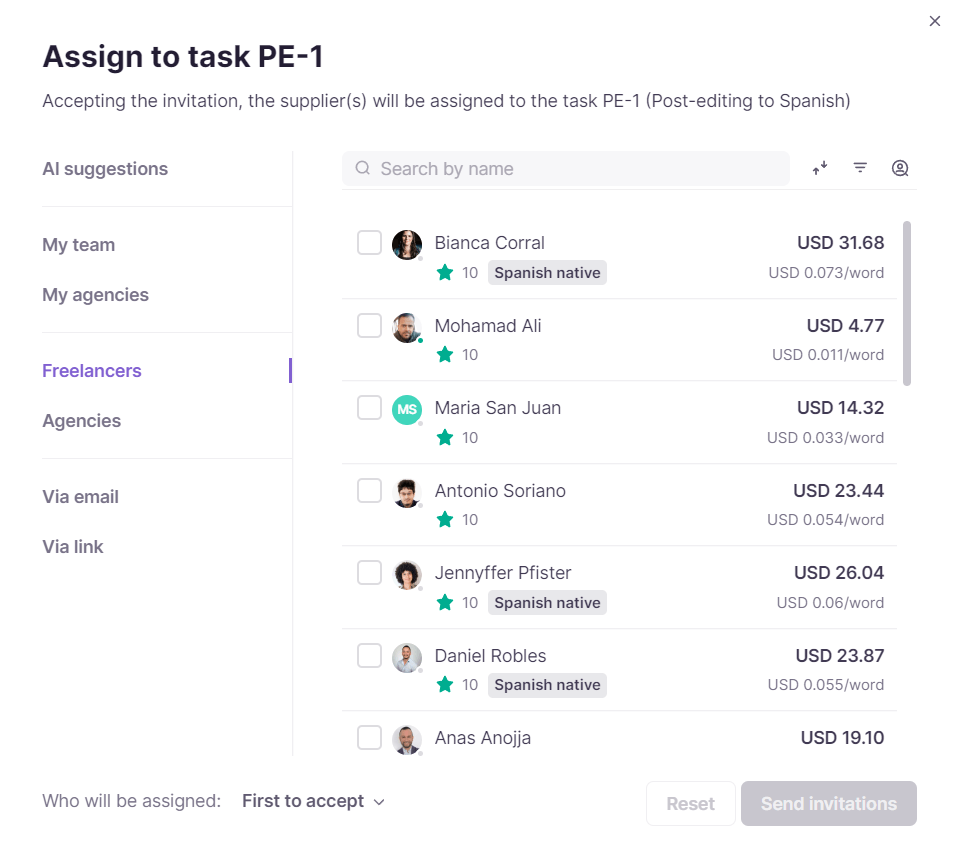
- AI suggestions. Smartcat AI analyzes content and selects the most suitable suppliers from a Marketplace of over 500,000 vetted linguistic reviewers based on various criteria including ratings, reviews, and completed projects
Hover over a profile to view concise statistics.
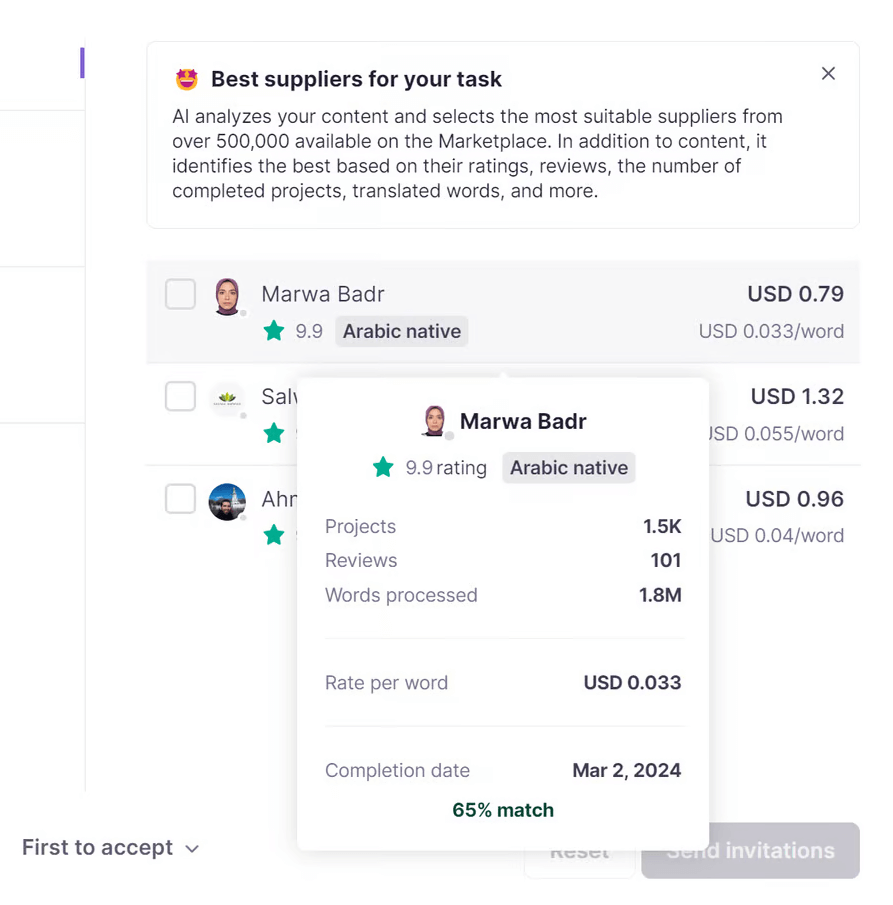
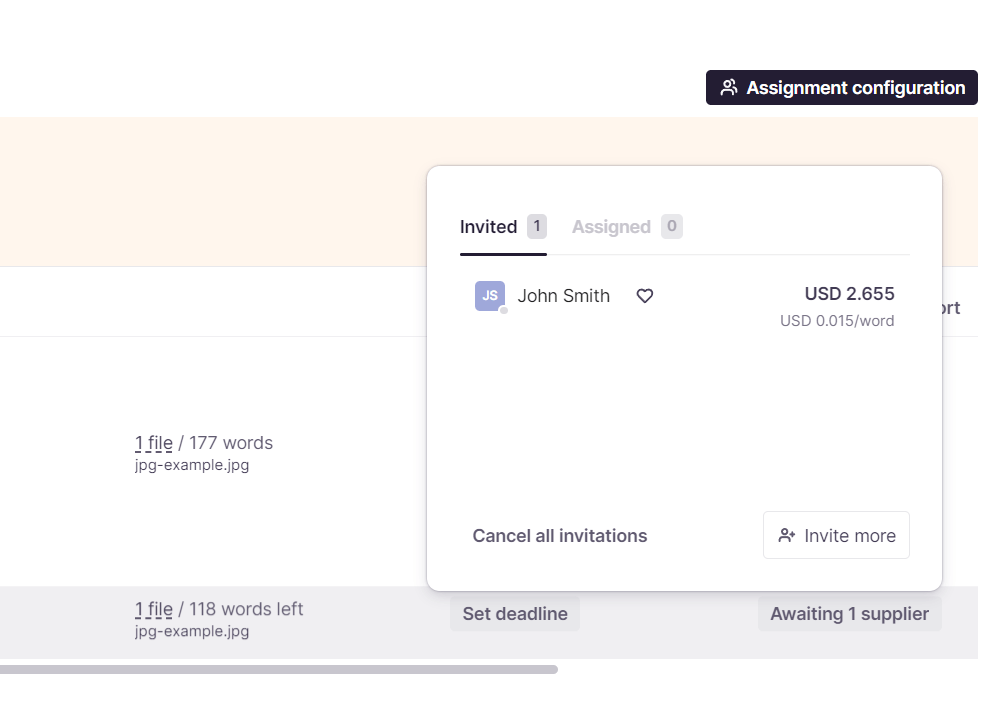
After you have selected a suitable reviewer, click the Send Invitations button. The reviewer receives an invitation. Check the invitation status in the Tasks tab.
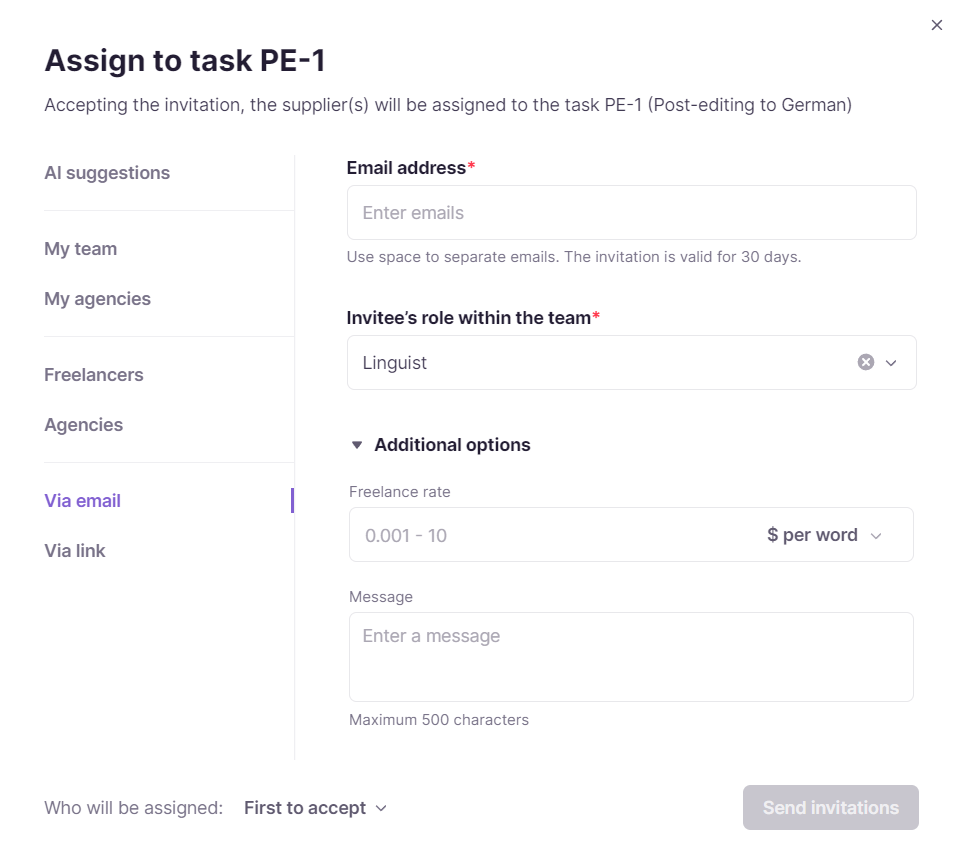
You can also invite reviewers through the following options:
-
Agencies. Find the vendor on the Marketplace and save it to your agencies list
-
Human linguistic reviewers. Use search criteria to find a reviewer that best suits your needs
-
My team. Select a reviewer from your team
-
My agencies. Select a vendor from your saved agencies
-
Via email. Enter the email and specify the role of the specialist you want to invite to your project. In additional options, you can select the rate and enter the invitation message
-
Via link. Generate an invitation link for a reviewer. As in the previous option, you can specify the role and rate, and write a message
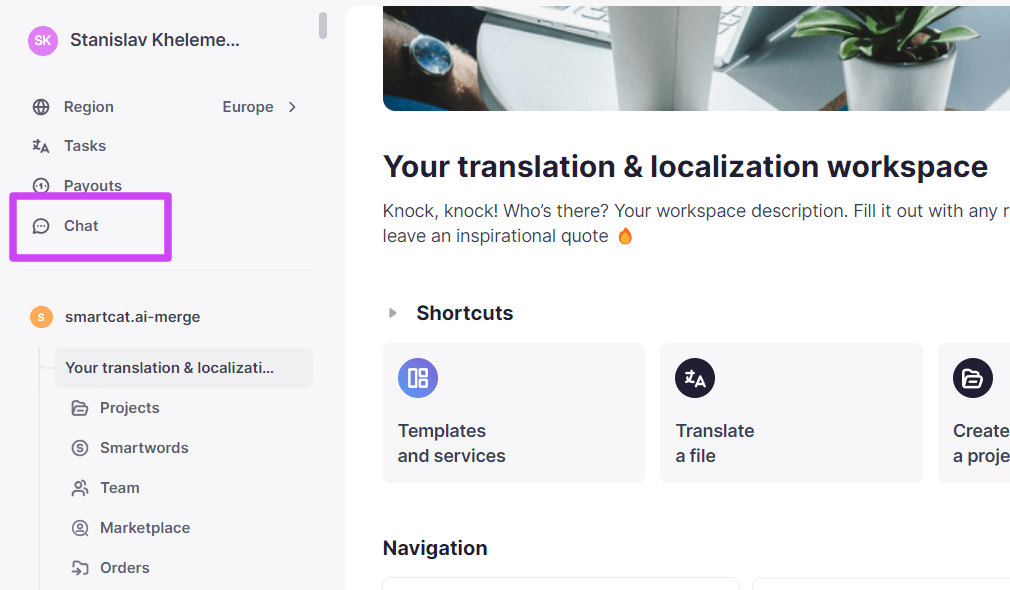
After assigning a reviewer, you can track the task's progress in the Overview tab. To communicate with assigned reviewers, use the built-in chat. Access the chat via the message icon in your workspace.
FAQs
What format is my translated audio file delivered in?
The translated output downloads in DOCX format by default; if you choose the Special formats option in the download dropdown, you can also export as TMX, XLIFF, or CSV.
Can I check which audio file formats Smartcat supports before uploading?
Yes — Smartcat's full list of supported file formats lets you confirm your audio file type is supported before you start a project.
Do I need to manually confirm every segment after AI translation?
No — you can confirm segments one at a time using the checkbox next to each, or confirm all segments in the file at once using the checkbox icon in the toolbar.
How do I get a human reviewer for my translated audio content?
From the CAT editor, go to the Tasks tab, select the Post-editing task, and click Invite. You can then use AI suggestions (matched from a Marketplace of vetted linguistic reviewers), or invite via agencies, your team, email, or a shareable link.
Can I upload my audio file to an existing project instead of creating a new one?
Yes — open the project, go to the Files tab, click Upload, choose Upload documents, and select your file(s) from your computer.
Want to learn more?
See how Smartcat can transform your localization workflow.
Still need help?
Our support team responds within one business day.