Setting up the Editor
Overview
User settings allow you to automate work in the Editor to improve the process of working with segments that have been translated previously. To open Editor settings, click on the Settings menu at the top-right corner and click Editor settings.
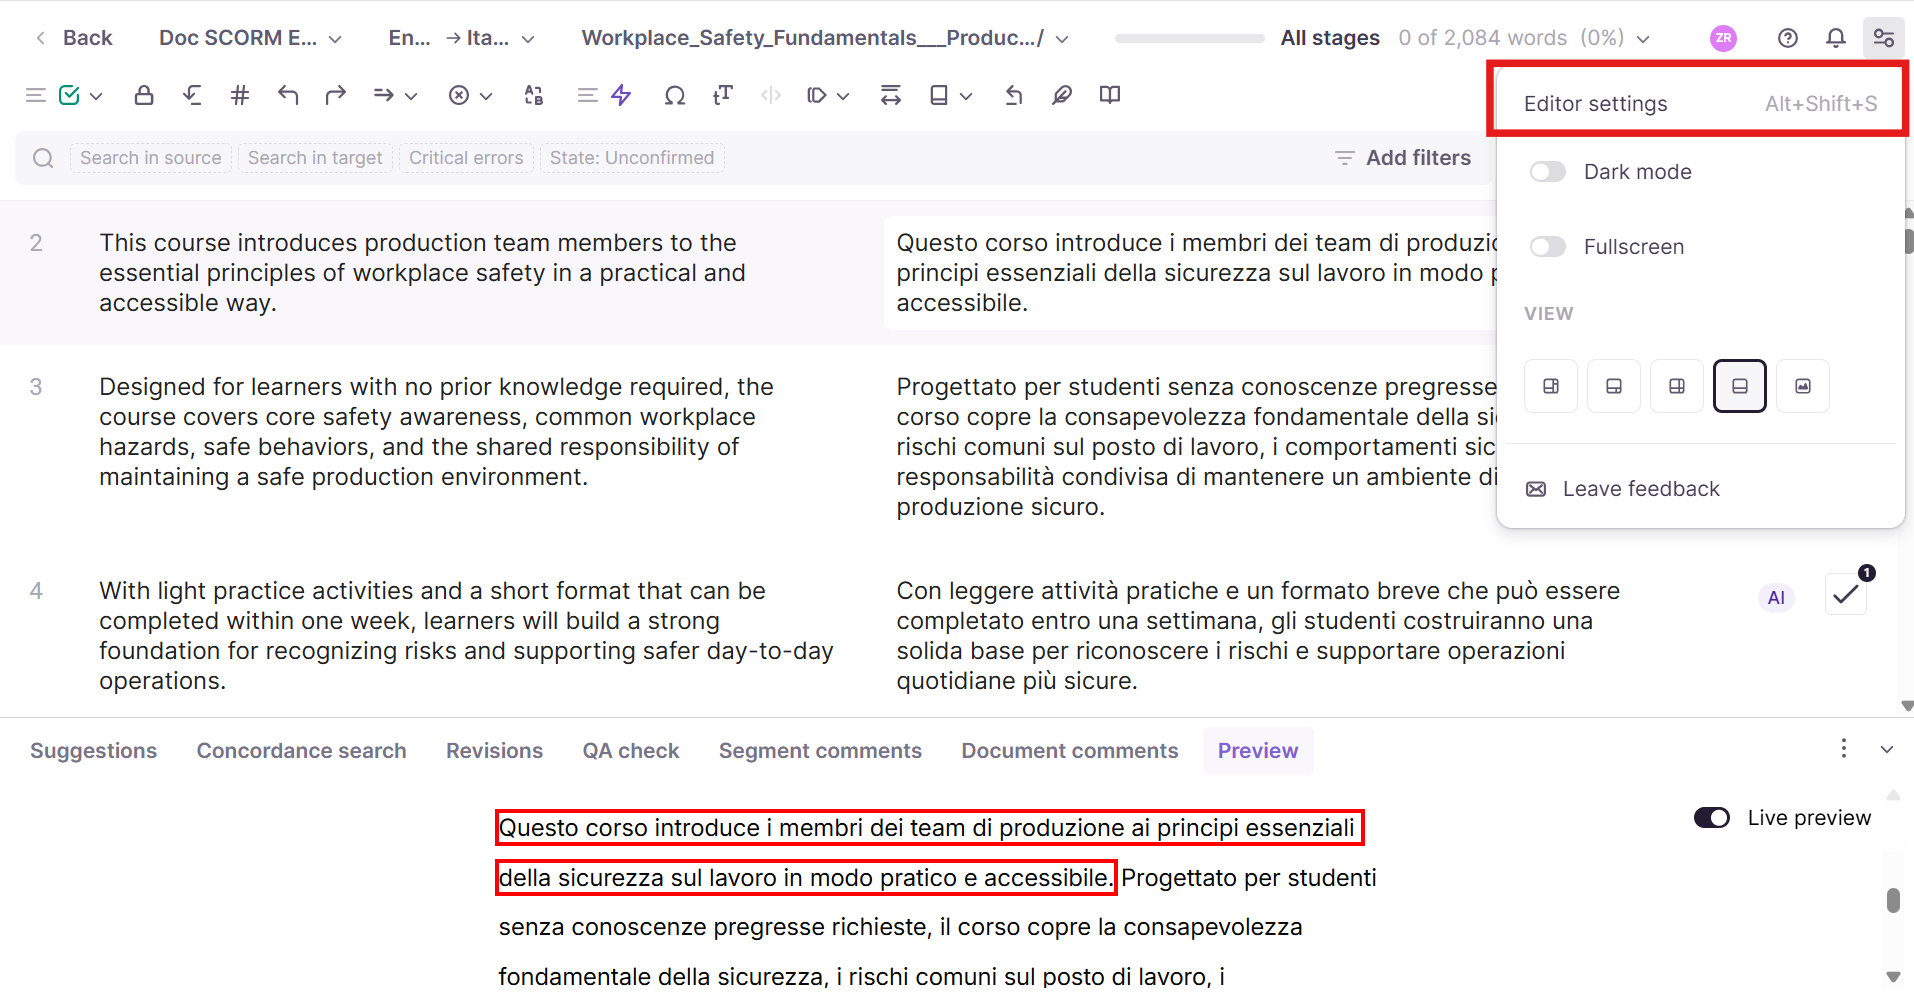
Your settings work only for you and apply to all the projects you work with. You can change the settings at any time.
View Options
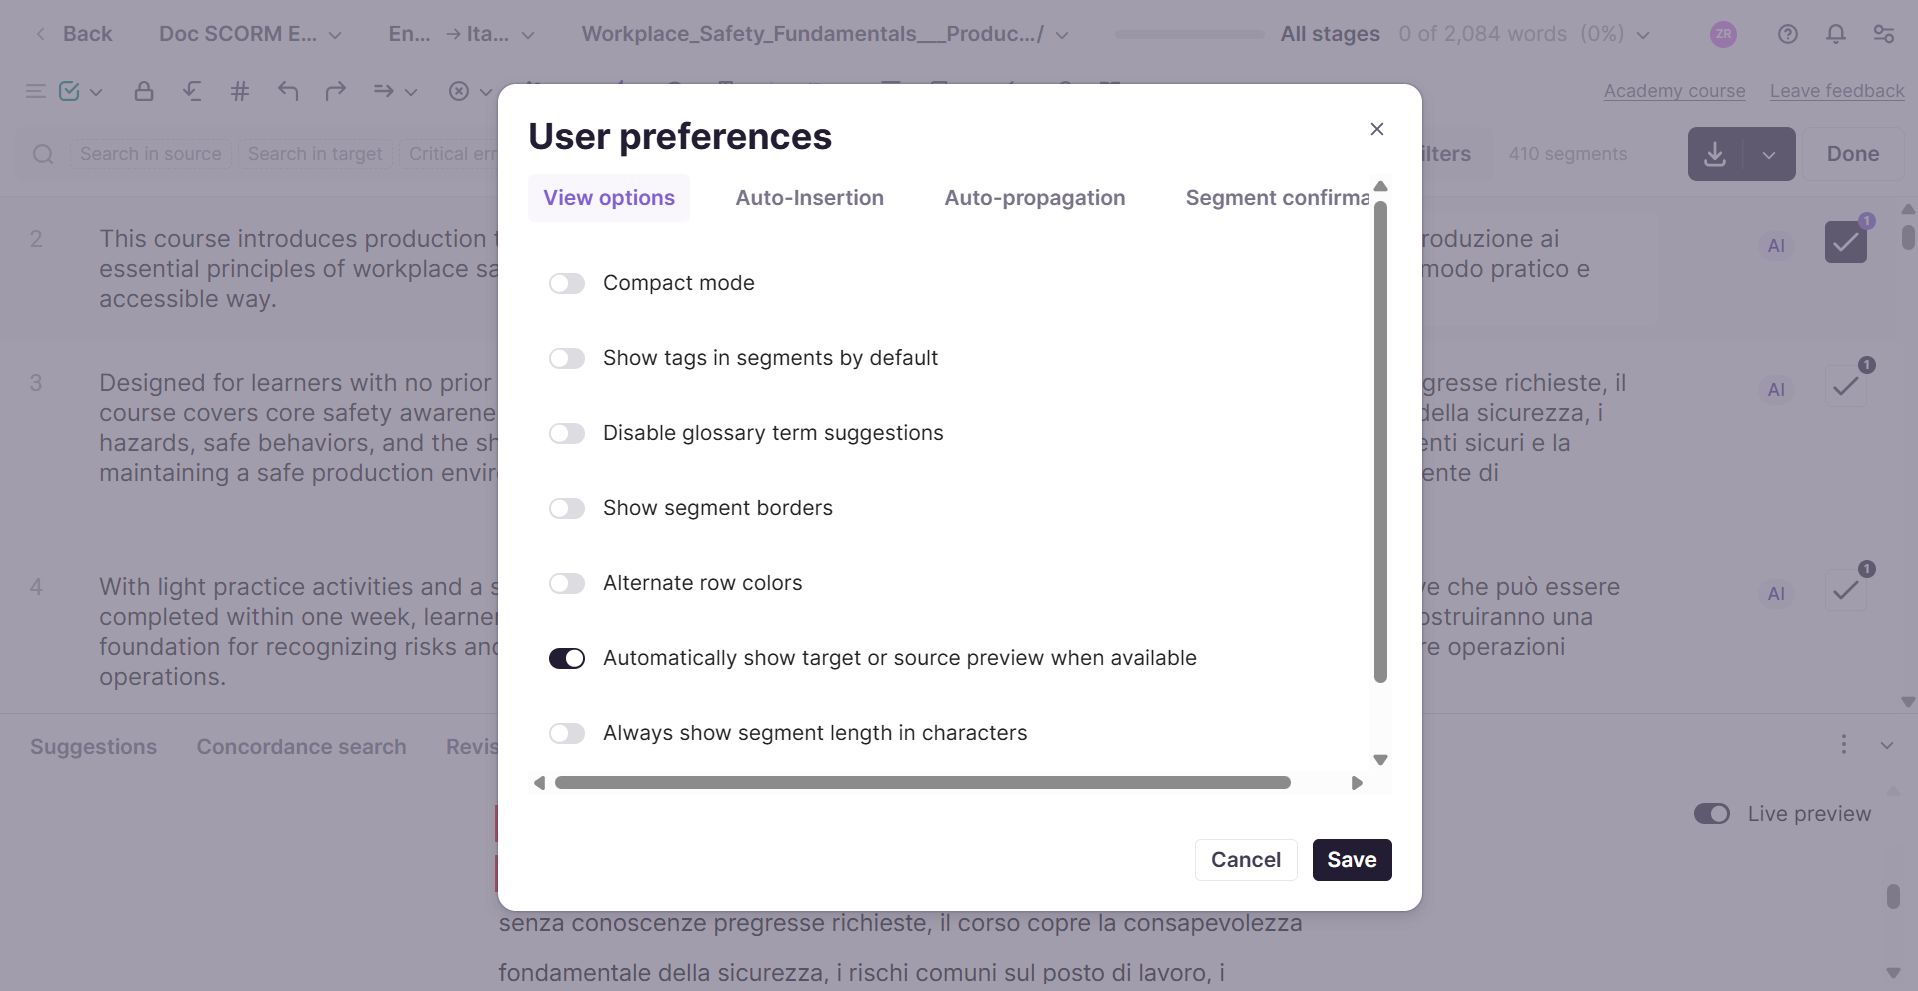
To work comfortably you can set up your own Editor view.
-
Compact mode. Minimizes the menus and panels in the Editor so more of the screen is given to the source and target text. A denser layout for users who want fewer surrounding controls.
-
Show tags in segments by default. Tags are non-textual elements used to maintain the formatting or internal code of your original document — such as markup, links, or cross-references — transferred from the source file into the Editor. In the Editor they appear as five-sided orange shapes with numbers inside them. When this setting is enabled, tags are shown in all segments by default rather than hidden until needed.
-
Disable glossary term suggestions. Turns off the automatic in-segment highlighting/suggestion of glossary terms as you translate. The glossary itself and the Glossary tab in the CAT Panel still work. This only suppresses the inline term-suggestion prompts.
-
Show segment borders. Each segment is surrounded by a thin borderline for simpler text scanning.
-
Alternate row colors. Every second row has a darker color, making it easier to track your place across long documents
-
Automatically show source and target preview. The target preview will be displayed next to the translation if available.
-
Always show segment length in characters. Permanently displays each segment's character count in the row, rather than only surfacing it on selection or when a length limit applies.
-
Always show non-printable symbols in text. Permanently renders otherwise-invisible characters, like spaces, tabs, line breaks, and other whitespace/control characters, inside the source and target cells, so you can spot and control exact spacing.
Automatic Translation Insertion
When working with a text, you can insert reviewed translation (translation memory) matches, AI translations, or original text into segments. But you can configure the system so that as you move to each new, un-translated segment, the best match from the TM, AI translation, or the source text is automatically inserted.
Note that a translation is applied only if the target field of the segment is empty when you place the cursor in it.
You can configure Automatic insertion by selecting rules in the editor Settings → Auto-insertion tab. Check the boxes next to the rules which you want to apply. As you move to each new segment, the system executes the rules you selected one after another until one of them succeeds.
If you want the system to copy the source of segments which contain only digits and non-alphabetic characters into the target (for example, arithmetic operators, the paragraph symbol and percentage symbol, etc.), enable the rule Copy the source text containing only numbers and non-alphabetic characters into target. You can specify that the system must confirm such segments right away.
To configure the system for automatically inserting TM matches, enable the rule Insert translation memory matches no less than X% and specify starting from what match (in percentages) an entry of the translation memory should be inserted.
You can also check the Confirm matches that are 100% and higher box to confirm a TM match after insertion. Even if you don't like the inserted translation, you will be able to correct it and confirm it again.
If you use AI translation in your project, we suggest you enable the rule Insert AI Translation output. Then, the system will insert AI translation into segments for which no matches from the translation memory have been found, and this rule will be in effect on all projects for which AI translation is enabled.
You can also use the Copy the source text to the target segment rule, so the system copies the original text into a segment that has neither TM match nor AI translation output.
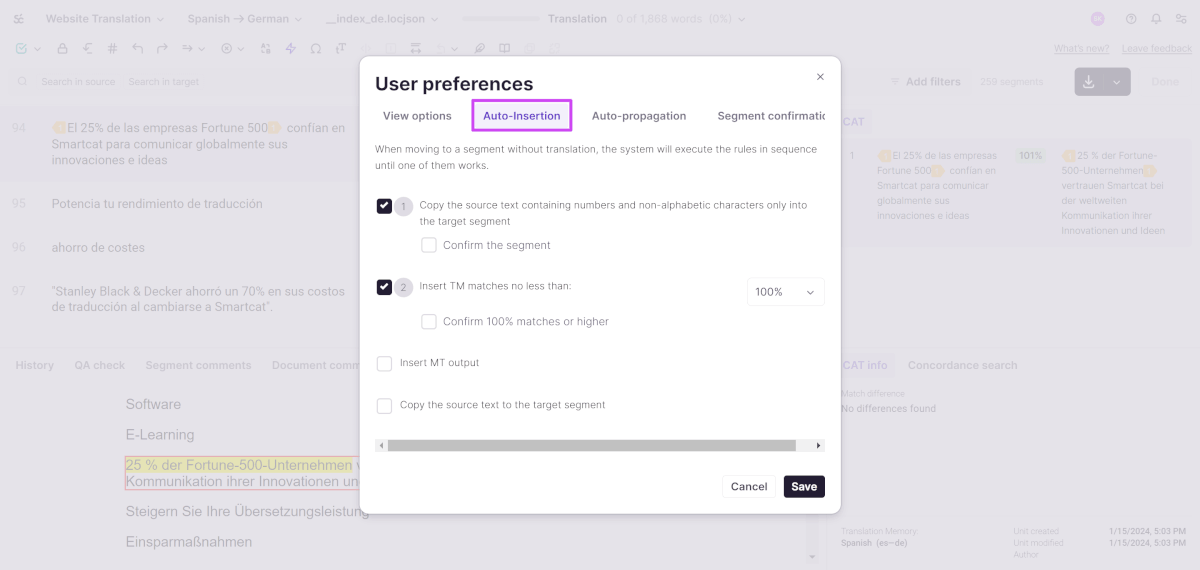
After configuring translation insertion, press the Save button.
Auto-Propagation of Repetitions
In most cases, repeated segments are translated in the same way, but, depending on the context, they may require different translations.
To automate your work with repetitions, you can set up auto-propagation by clicking the editor Settings → Auto-propagation tab. Then, after you confirm a segment, the translation is automatically copied to all its instances within the document.
To enable the automatic insertion of translations into repeated segments, check the Auto-propagate repetitions box and specify if you want the repetitions to be propagated from the beginning of a text, or only from the current segment to the end of the document.
The Propagate to segments with differences in case option allows you to auto-propagate repetitions when the text in the target differs from source by case.
If you enable the Propagate to confirmed segments option, the translation is copied into segments with repetitions even if they have already been confirmed. Otherwise, the system inserts translations only into unconfirmed segments.
Use the Confirm auto-propagated segments option if you want the system to immediately confirm the propagated translations.
Note that the auto-propagation settings is applied to all of your projects and accounts. If you work in a corporate account, the manager can configure the auto-propagation settings for the project. In this case, you cannot change the settings.
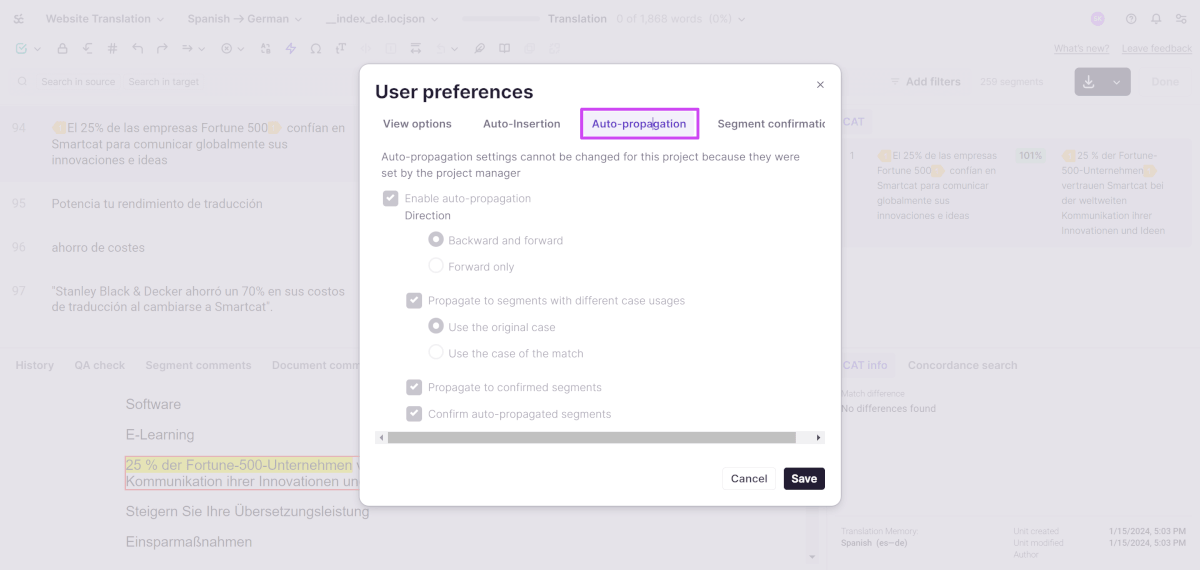
After configuring auto-propagation, press the Save button.
You'll see an arrow icon to the left of each segment that is repeated within a document.
If you want to exclude a segment from repetitions, click the arrow icon to its left. Thus, the target won't propagate to segments with the same source. Changes made to segments with the same source will not apply to the excluded segment.
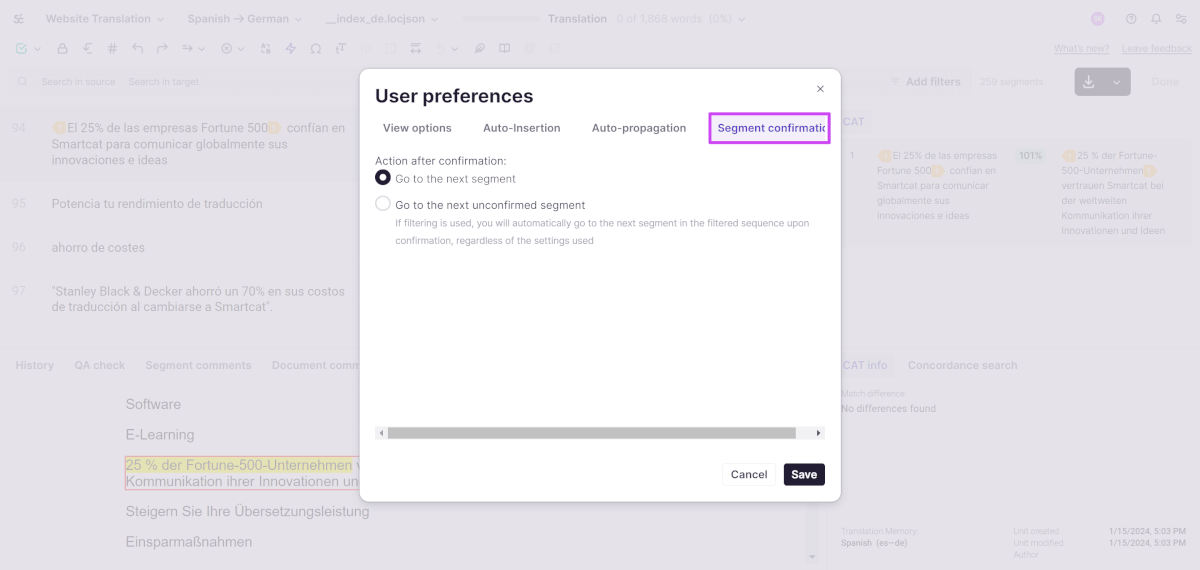
Segment Confirmation
By default, the system moves the focus to the next segment when you confirm a segment. As an option, you can set to go to the next unconfirmed segment.
Want to learn more?
See how Smartcat can transform your localization workflow.
Still need help?
Our support team responds within one business day.