Connect Drupal with Smartcat
Overview
The Smartcat integration with Drupal lets you send content from Drupal to Smartcat for translation, manage the translations in your Smartcat account, and then send them back to Drupal — all through the TMGMT connector.
Integration type: Module — content is managed within Drupal's native interface (via TMGMT), not inside Smartcat's integration view.
Supported Drupal versions: 8, 9, and 10
Prerequisites
Before setting up this integration, ensure you have:
-
A Smartcat workspace with an active account and API access
-
A Drupal website with Admin panel access
-
The following modules installed:
-
TMGMT (Translation Management Tool)
-
Smartcat plugin for TMGMT
-
Cron manager module (Ultimate Cron — required for Continuous Translation)
-
Installation and setup
Install the TMGMT module
-
Download the ZIP archive or copy the tar.gz download link from the official website.
-
Enable the Update Manager Module in the Admin panel of your Drupal website by ticking the relevant box.
-
Select Add a new module and paste the link into the archive (or upload the archive) into the window that opens.
-
Choose Enable recently added modules from the Next Steps list and select the modules used by TMGMT in the Translation Management section. Click Proceed.
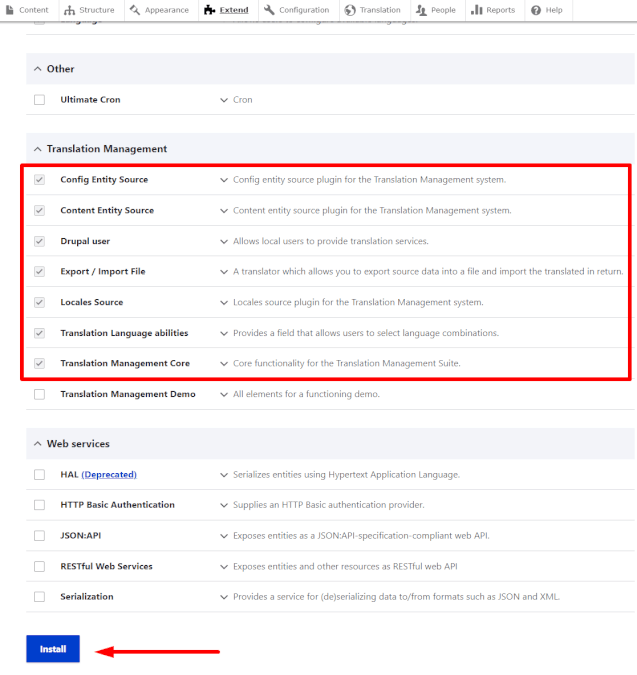
- Select the languages you want to work with in the Language and Region settings of your website.
If successful, you see a new Translation tab in the Drupal interface.
Install the Smartcat module
-
Download the ZIP archive or copy the tar.gz download link from the official website.
-
Add it to your website as a new module as described above.
-
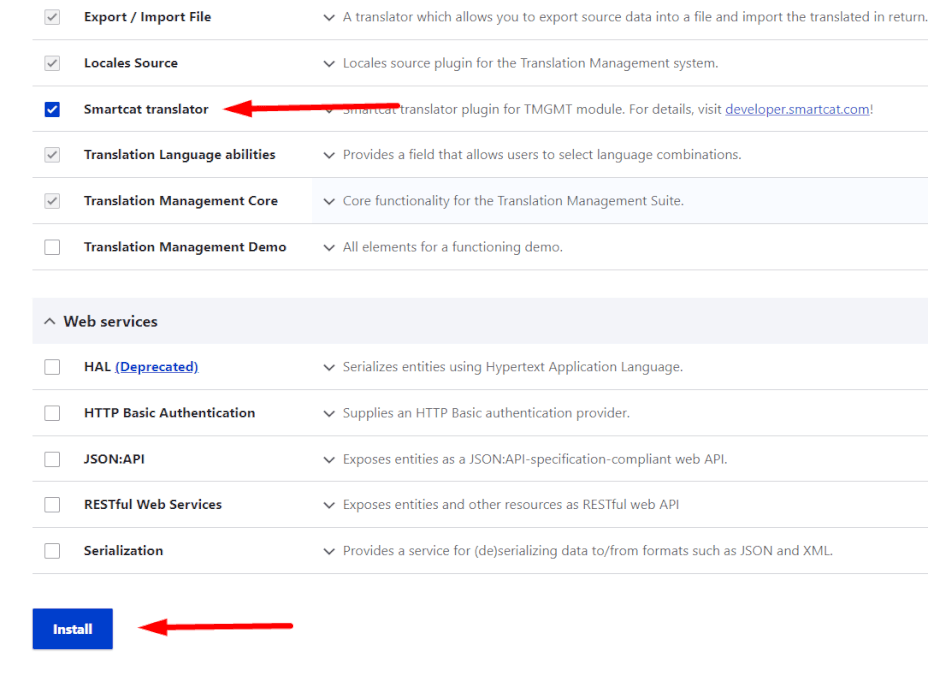
Enable the Smartcat Translator by ticking the relevant box in the Translation Management section.
Install the Cron manager module
-
Download the ZIP archive or copy the tar.gz download link from the official website.
-
Add it to your website as a new module as described above.
-
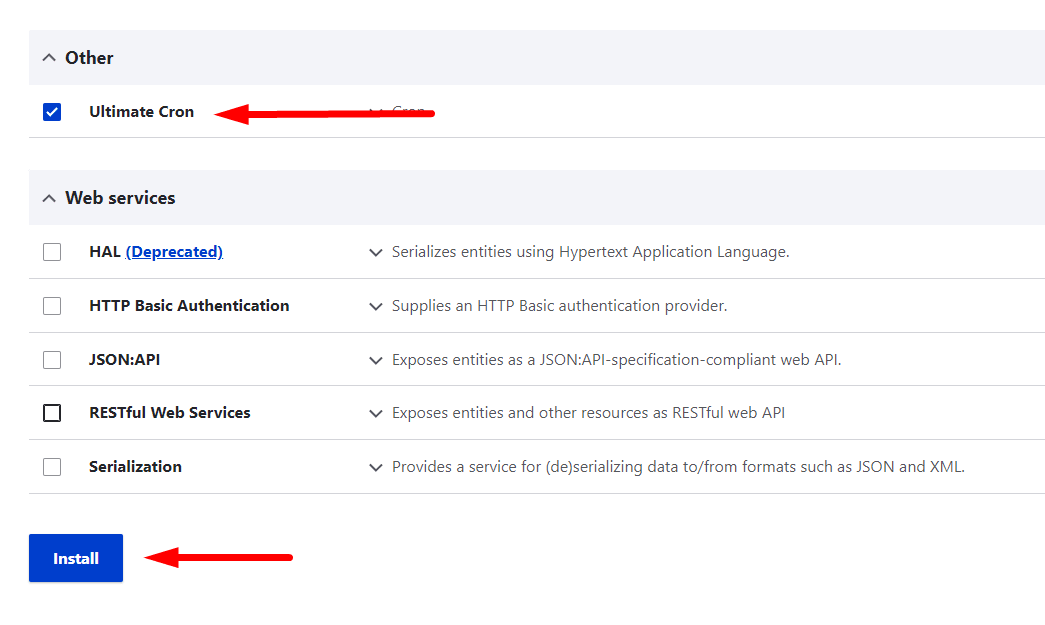
Enable the Ultimate Cron by ticking the relevant box in the Other section.
Connect Smartcat
In your Smartcat account:
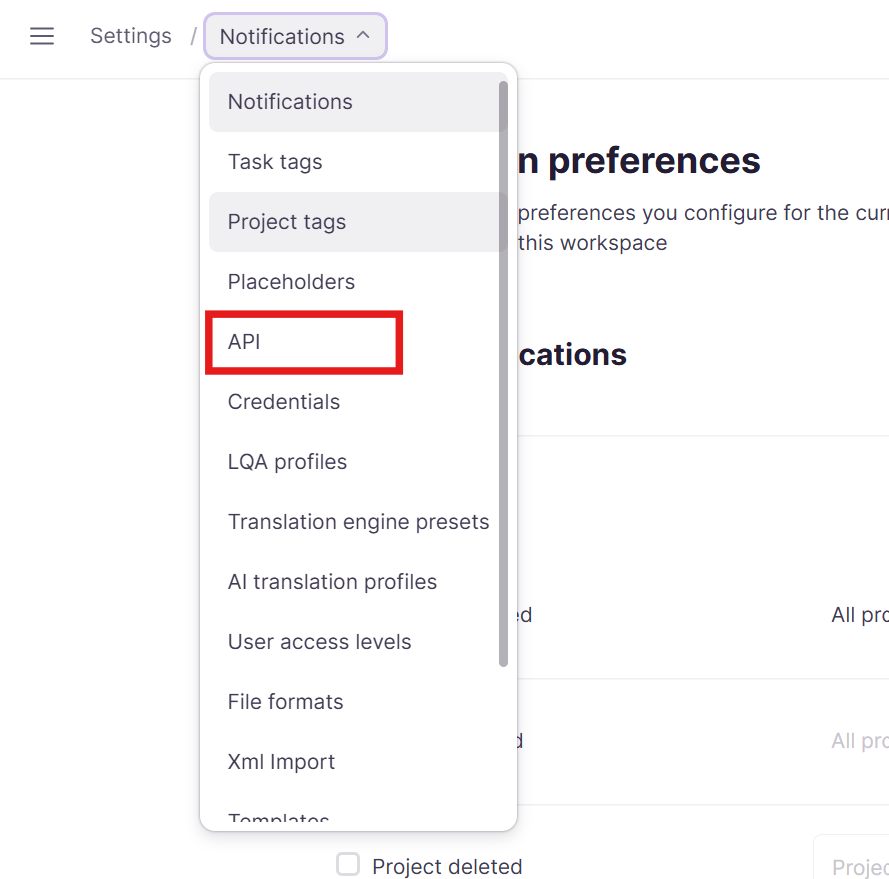
- In the left navigation sidebar, click Settings → API to generate API key.
- Click Create New Key to open the dialog.
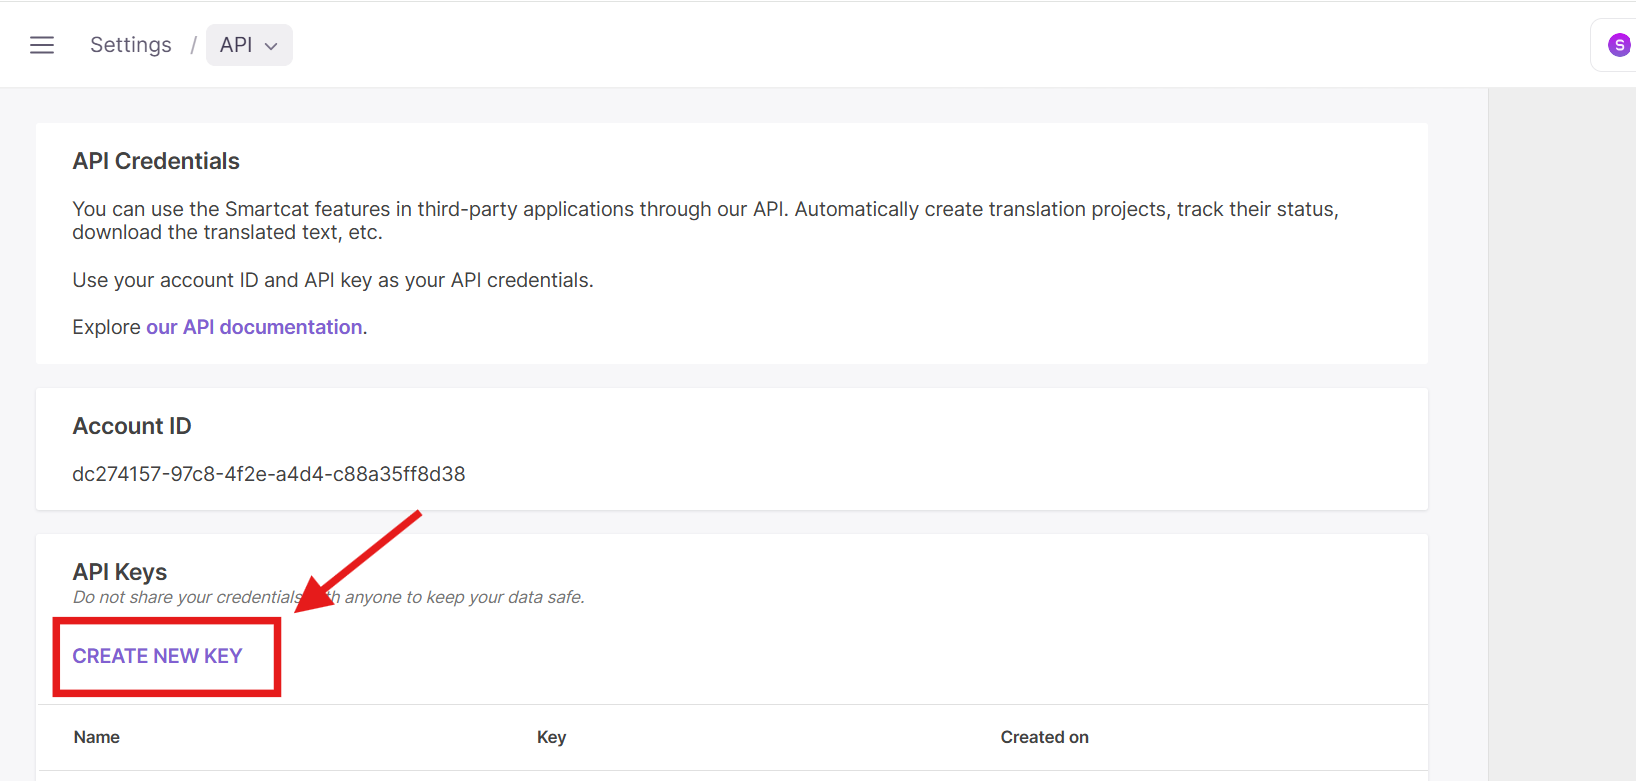
- Copy the API key as well as your account ID.
On your Drupal website:
-
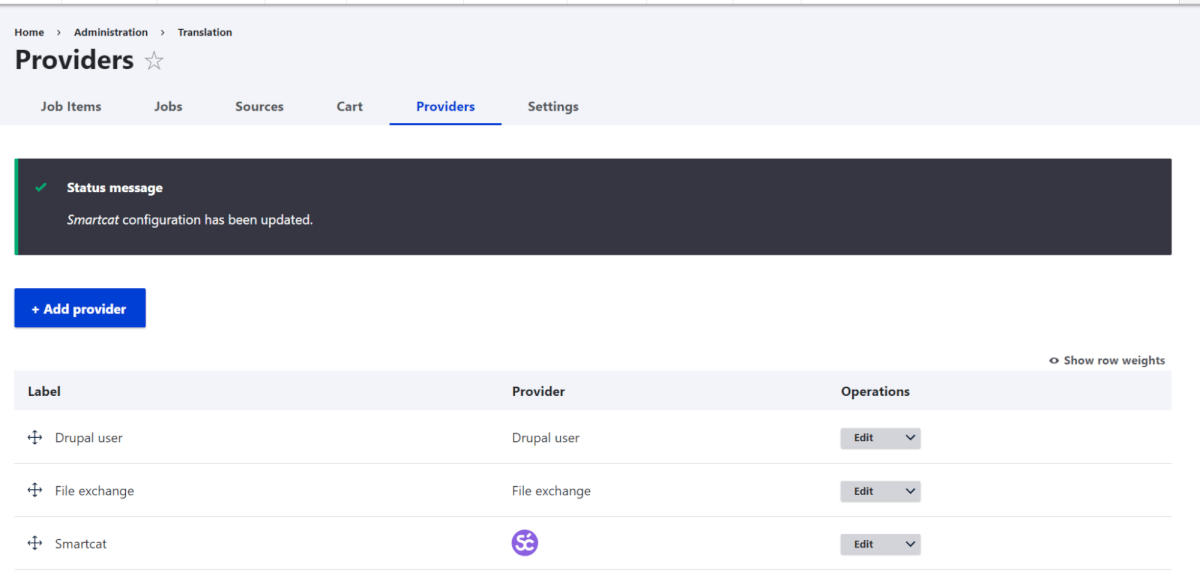
Navigate to the Providers tab in the Translations section of your Drupal website and select Smartcat.
-
Paste your API key and the account ID into the corresponding sections, and select your preferred server.
-
Click Save.
Translating content
There are two ways to set up the translation workflow:
-
On Demand Translation — manually send required articles for translation.
-
Continuous Translation — automatically send each newly created or updated article (of the specified type/s) as a new job item to the preconfigured translator.
On Demand Translation
-
Navigate to Structure → Content Types and select Operations → Edit for each content type you want to translate.
-
Navigate to the Language settings tab and select Enable translation and Show language selector for these content types.
-
The selected sources will be available in the Sources section of your Providers tab.
-
Tick the ones you want to translate right away, select the source and target languages, and click Request translation.
-
Select Smartcat as your translation provider and submit the job.
📌 A job is created for each target language. To translate one text into several languages at once, tick the relevant box.
-
Smartcat creates a project for each job you submit. These are also available in the Jobs section of your Drupal website. You can monitor the progress of translations in the Translation Job Messages.
-
To complete the job, approve all the selected segments in Smartcat.
-
To push the translations back, enter the relevant job on your Drupal website and click Download translations.
-
Enter the job, approve the translations, and click Publish. The target language version of your article will be generated and published.
Translating custom fields
-
Navigate to the Content types section of your website's Structure, and add a new field for the material you want to edit.
-
Select the type of field, e.g. plain text, list, or image.
-
Fill in the rest of the data (e.g. alt-text, category, or tags) and click Save.
-
Return to the Configuration section and tick the fields you want to translate (e.g. title, tags, etc.) and click Save. If you tick no fields, only the title will be translated.
📌 Make sure the fields you select can be translated. The only field that cannot be translated for now is the Category field, as it is uploaded from Drupal as a numeric value.
- Submit the material for translation as described above. Review the translations in the Editor and push them back to Drupal.
Continuous Translation setup
-
Go to the main translation page by clicking Translation from the toolbar.
-
Confirm there is a configured continuous translator on the Providers page (the Smartcat provider).
-
Open the Jobs menu tab and click Add continuous job.
-
Configure options including translator selection, label, source and target language, and content types available for translation.
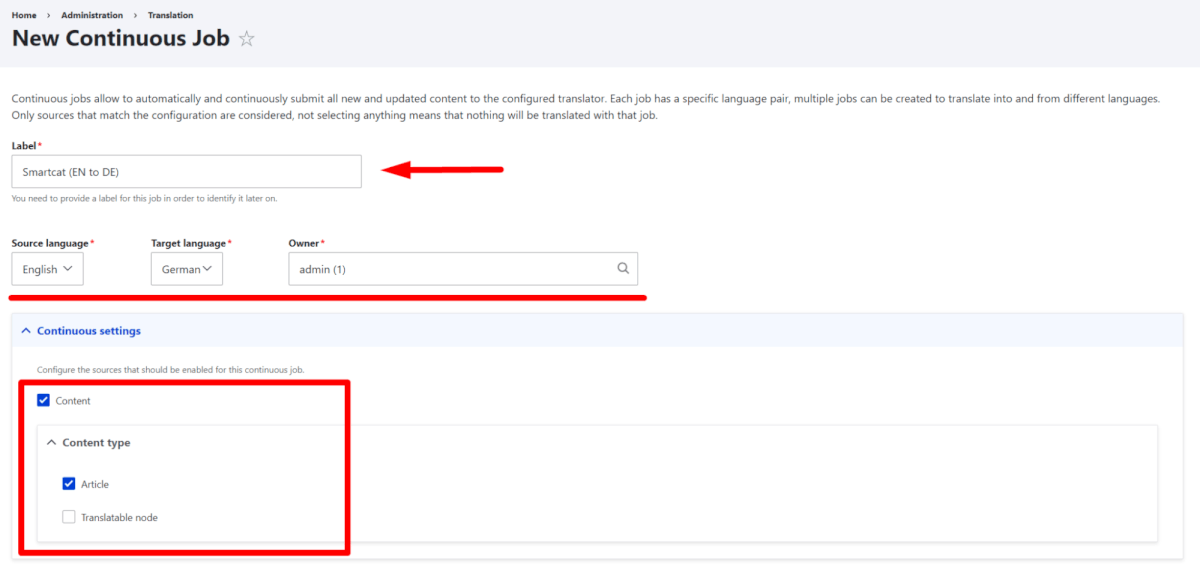
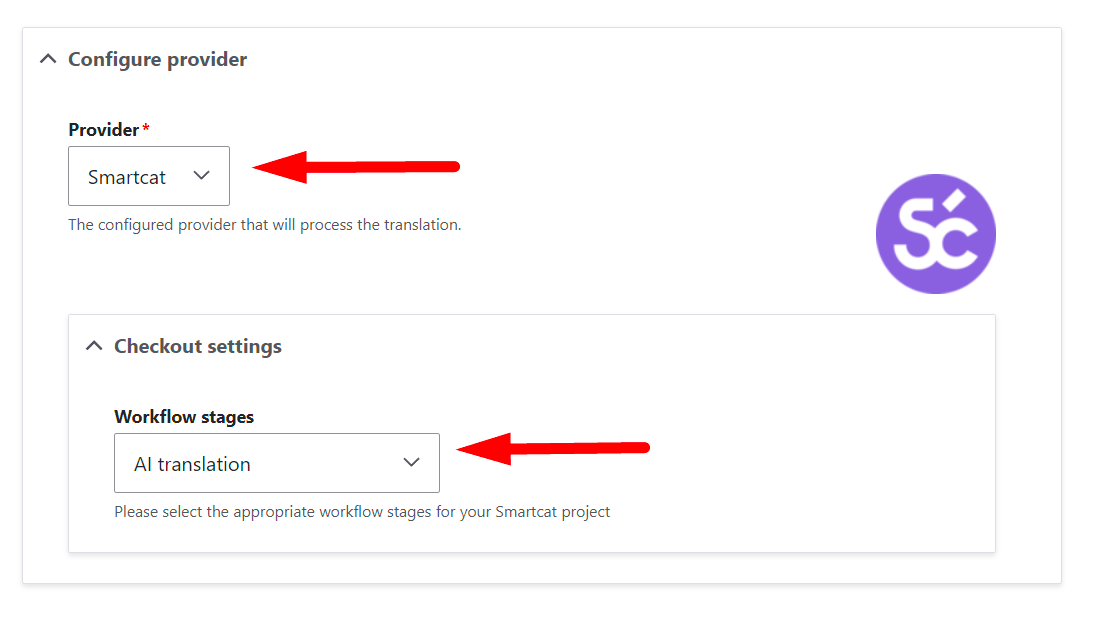
- Click Save job to complete the process.
Each newly created article of the selected type/s is automatically created as a new job item and sent to the preconfigured translator.
The continuous translation process is provided via a scheduler thanks to Cron. TMGMT and Smartcat provide special scheduler tasks that automatically send and receive translations from Smartcat.
To configure Cron for continuous translation:
-
Make sure the Ultimate Cron module is installed. It extends Drupal's native cron features and expands control over repeating jobs.
-
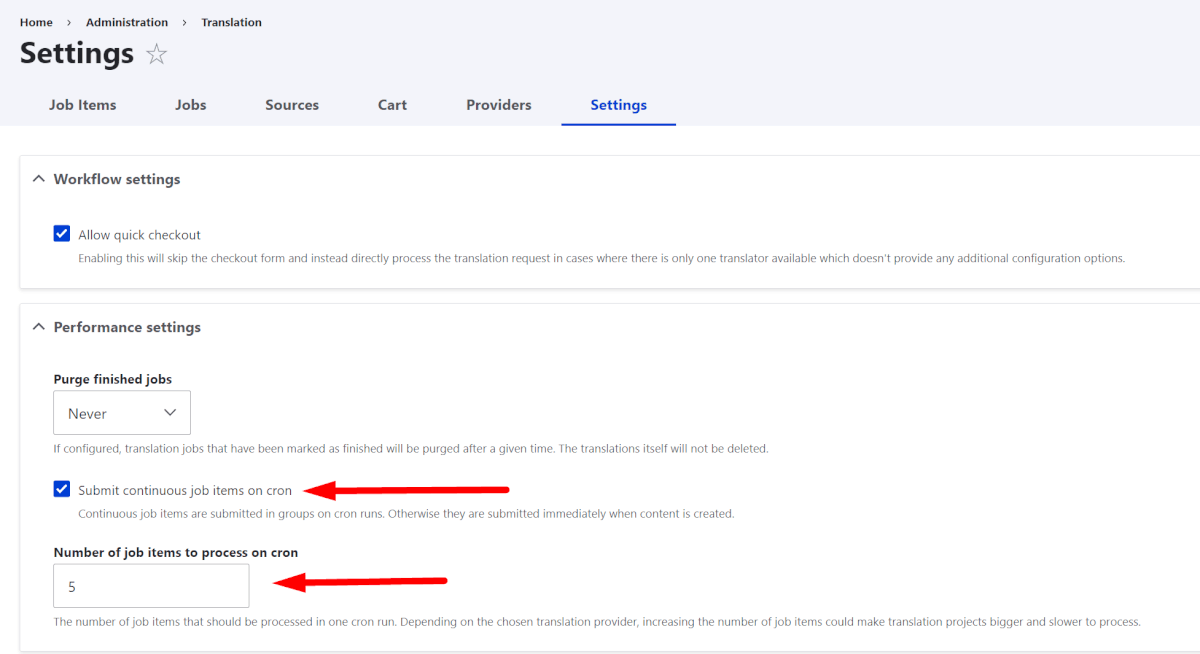
Go to the TMGMT settings page: Translation → Settings.
-
Enable Submit continuous job items on cron under the Performance settings block. We recommend specifying the value 5 in the Number of job items to process on cron field.
-
Marke sure Ultimate Cron is enabled. Extend → Install new module enables site administratores to install new modules.
-
Go to Configuration → Cron → Cron Jobs. Look for the Default cron handler provided by Translation Management Core and Smartcat translator, and click Edit.
-
Translation Management Core: Responsible for submitting and updating translations in the Smartcat project.
-
Smartcat translator: Responsible for receiving translations from Smartcat and importing them into Drupal.
-
-
Use the Run cron every option to set an interval for the cron job to run.
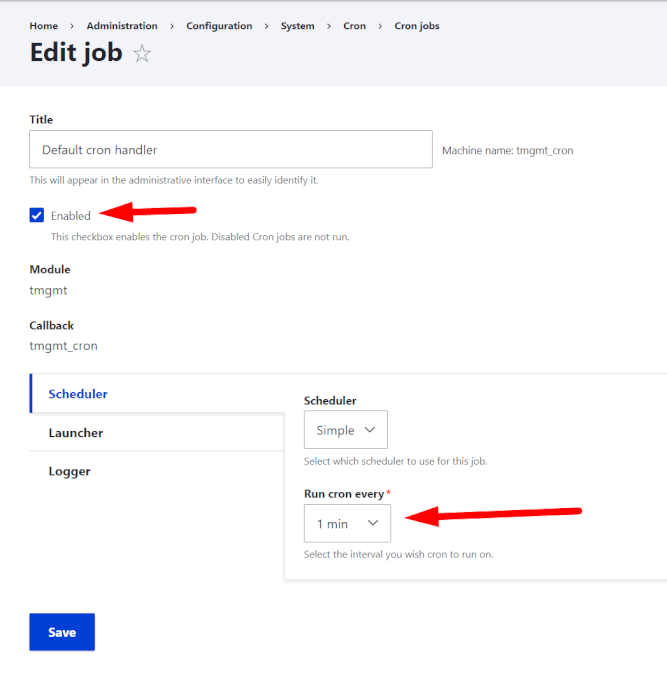
- Make sure the cron job is enabled and click Save.
Automatic run of cron tasks
To ensure tasks run automatically every minute or every 15 minutes, you need the Cron trigger to always be running.
- Go to Configuration → System → Cron → Run cron to find your Cron link.
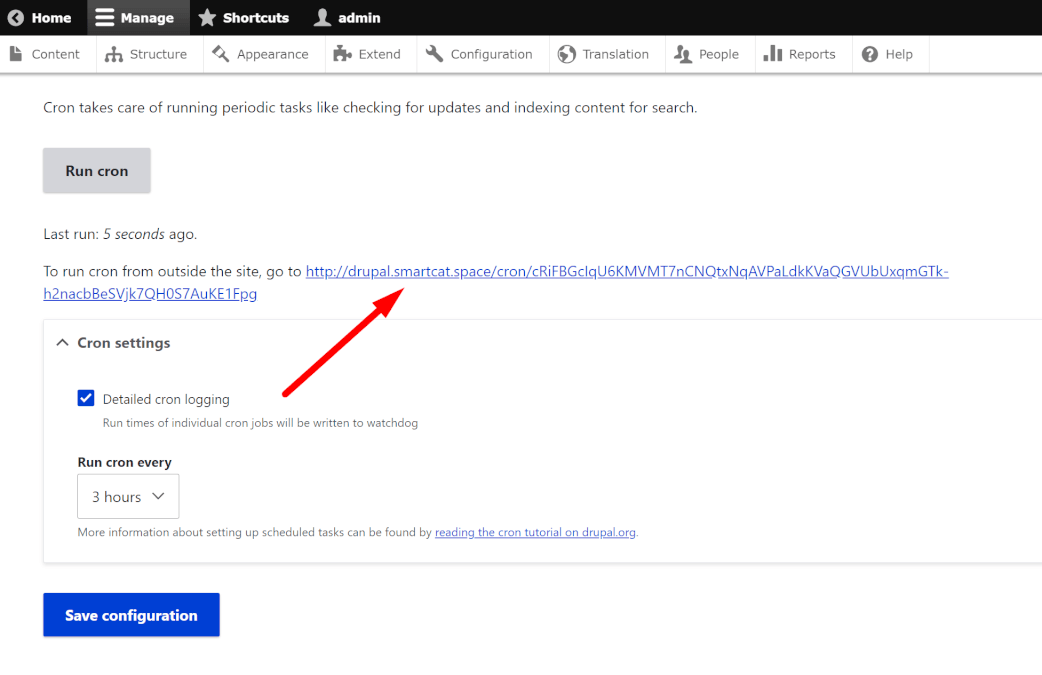
- Set up this link to be called automatically every minute by configuring your server. On Linux, run the following command:
crontab -e
*/1* * wget -O - -q -t 1 https://your_drupal_cron_link > /dev/null
Retrieving translations
When Smartcat finishes translating, return to Drupal and follow these steps:
-
Enter the relevant job in the Jobs section of your Drupal website.
-
Click Download translations to pull the completed translations back into Drupal.
-
Approve the translations and click Publish.
Monitoring progress: In the Translation → Jobs items tab, articles sent to Smartcat will have the status In progress. Job items with the status Inactive are waiting to be sent to Smartcat.
Sending is done in batches (5 items at a time by default) to avoid timeout problems. You can run cron jobs manually for testing without waiting for the scheduled interval.
How to check if everything works
Let's imagine that you have 10 articles that are in your continuous job.
When you run a cron task from Translation Management Core, the first 5 articles will be sent to Smartcat. There is currently no option to select an existing project in Smartcat. Therefore, if this is the first content submission, the project will be automatically created and linked to the continuous job. In the future, all content will go into this project.
In the Translation → Jobs items tab you can find articles sent to Smartcat; they will have the status In progress. Job items with the status Inactive are those that are waiting to be sent to Smartcat.
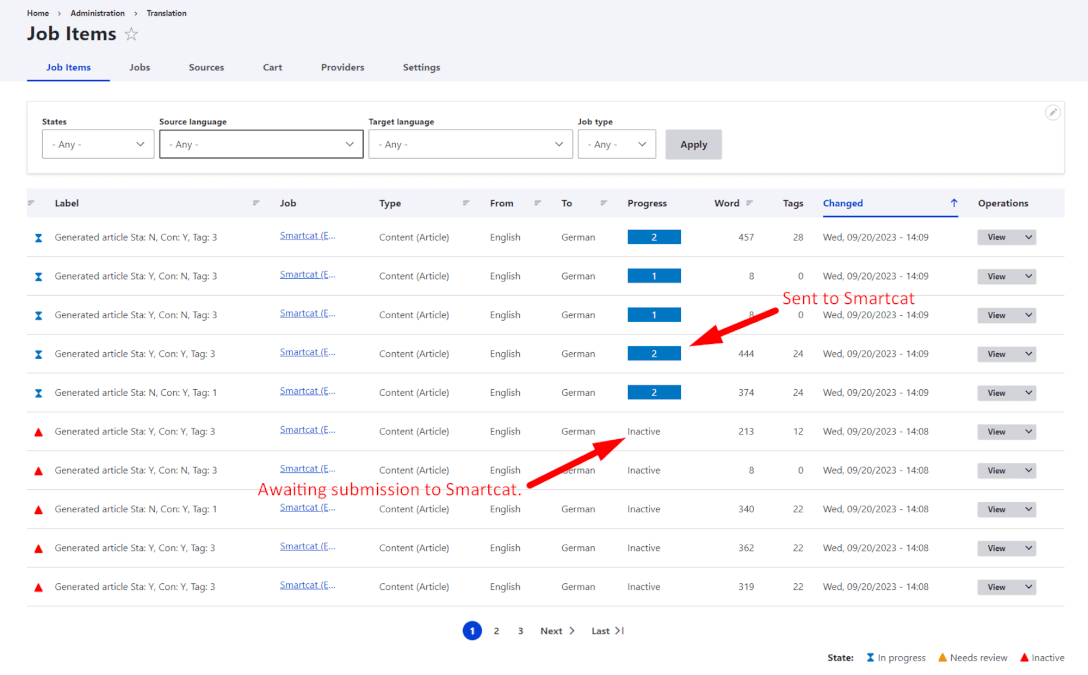
Don't forget to filter items by the states parameter.
If you run the cron job from Translation Management Core again, the following 5 articles (which are in Inactive status) will be sent to Smartcat.
Sending in batches is necessary in order to avoid "timeout" problems during task execution.
This way you can run the cron job until all documents are sent to Smartcat. As a reminder, this will happen automatically if Cron is configured.
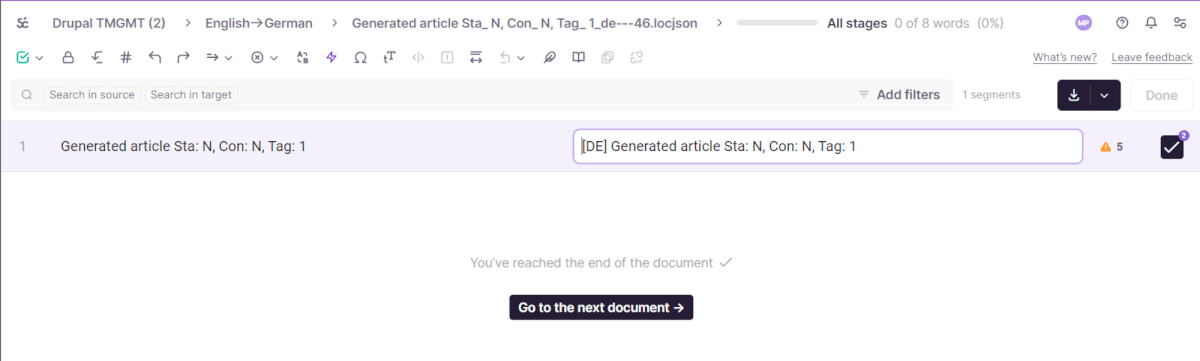
Now let's translate one of the articles in Smartcat and try to get the translation back into Drupal.
To get translations back into Drupal, you need to run a cron task from Smartcat translator.
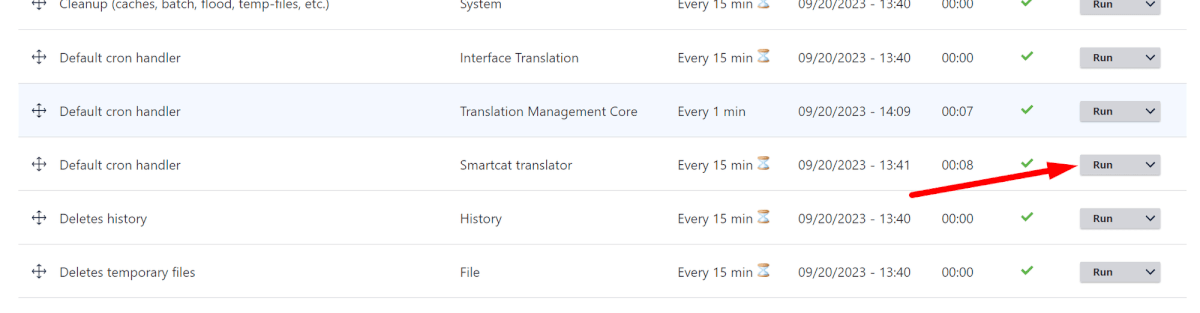
This task automatically receives all job items that are in the In progress status and tries to get translations from Smartcat.
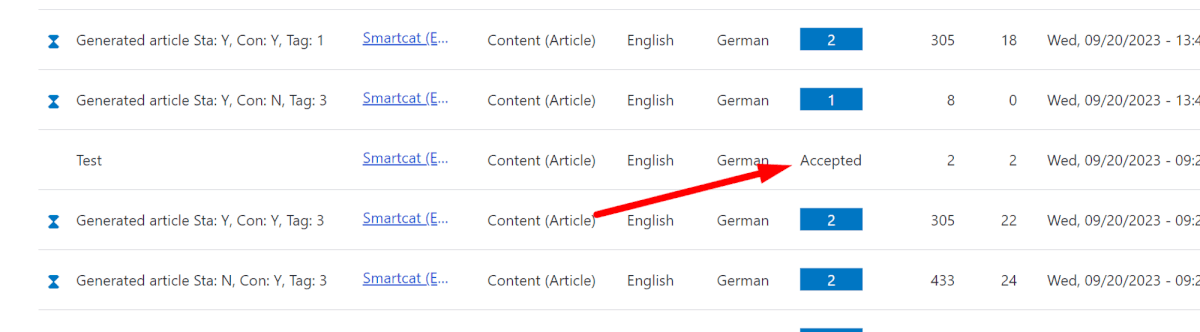
Articles that have been translated and successfully imported into Drupal will receive an Accepted status.
FAQs
Which Drupal versions does this integration support?
Drupal 8, 9, and 10, connected through the TMGMT (Translation Management Tool) module plus the Smartcat plugin for TMGMT.
Do I need any additional modules besides TMGMT and the Smartcat plugin?
Yes — the Ultimate Cron module (Cron manager) is required if you want to use Continuous Translation, since it powers the scheduler that automatically sends and receives translations.
What's the difference between On Demand Translation and Continuous Translation?
On Demand Translation means manually selecting and sending specific articles for translation, while Continuous Translation automatically sends every newly created or updated article of a specified content type as a job to Smartcat.
Why are my articles sent to Smartcat in batches instead of all at once?
Sending is done in batches (5 items by default) specifically to avoid timeout problems during task execution; running cron repeatedly processes the next batch each time.
Can I control which custom fields get translated?
Yes — in Content Types configuration you tick which fields (e.g. title, tags) should be translated; if you leave all fields unticked, only the title is translated. Note the Category field cannot be translated since it's stored as a numeric value.
Want to learn more?
See how Smartcat can transform your localization workflow.
Still need help?
Our support team responds within one business day.