Connect Zendesk with Smartcat
Overview
Zendesk is a cloud-based help desk management solution for building customer service portals, knowledge bases, and online communities.
The Smartcat Zendesk integration lets you manage the translation of your Zendesk help center content. Smartcat pulls the source and, optionally, translation data automatically or manually, then sends the translated content back to Zendesk.
Prerequisites
Before you set up the Smartcat Zendesk integration, collect the following parameters:
-
Zendesk URL
-
Zendesk email address
-
Zendesk API key
To collect this information, follow the steps below.
Zendesk URL
This is the URL of your Zendesk domain as shown in the address field of your Zendesk instance homepage, for example, http://smartcat.zendesk.com/.
Zendesk email address
This is the primary email address associated with your Zendesk profile and specified in your Zendesk account.
📌 In Zendesk, content access permissions depend on the account. The integration is accessible only for the account with the email address you provide.
To find your Zendesk email address:
-
Log in to Zendesk
-
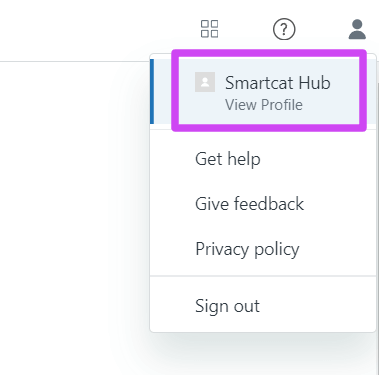
Click your profile icon in the upper-right corner of the page header, then select View Profile
- In the sidebar of your profile, copy the address in the Primary email address field and save it
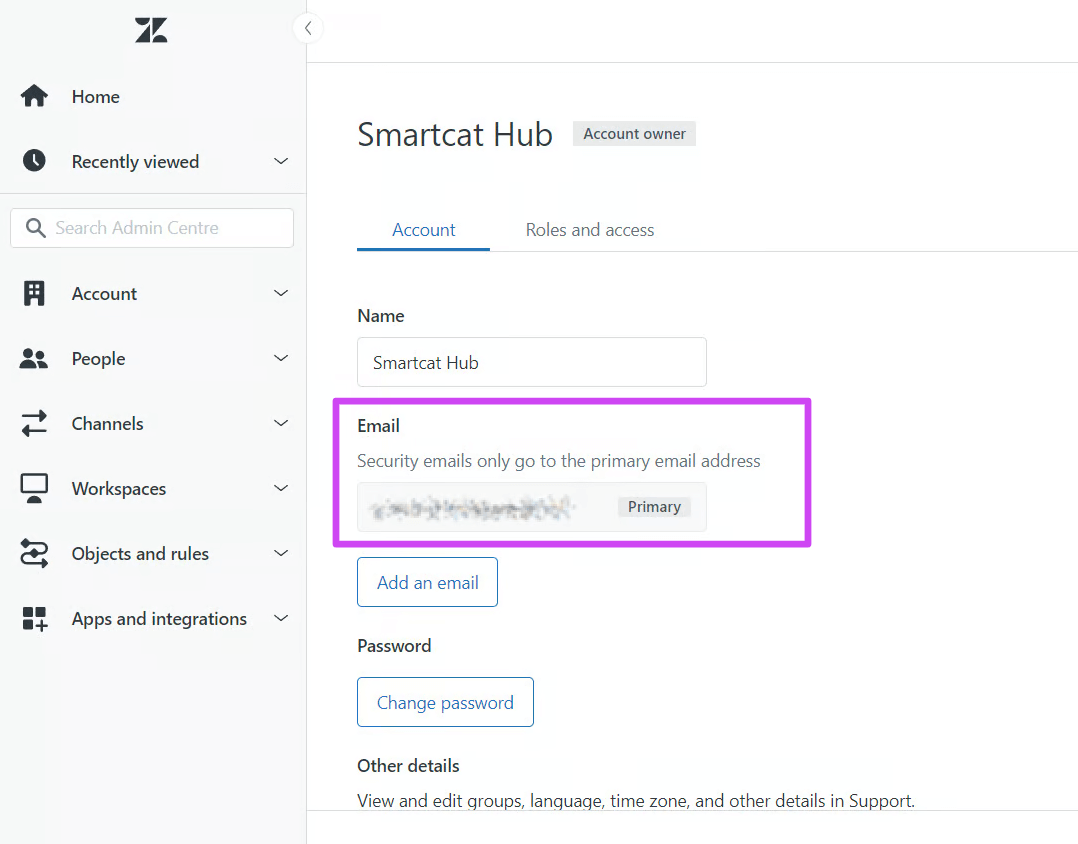
You now have the email address needed for the integration.
Zendesk API key
The API token is used as part of two-factor authentication for the integration. To generate an API token:
-
Log in as an administrator
-
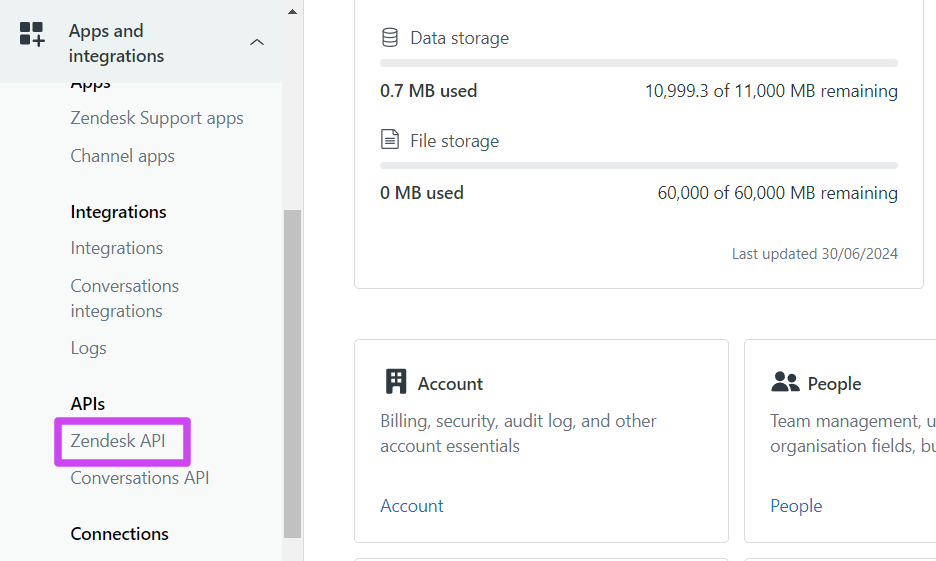
Click Apps and integrations in the sidebar, then select APIs → Zendesk API
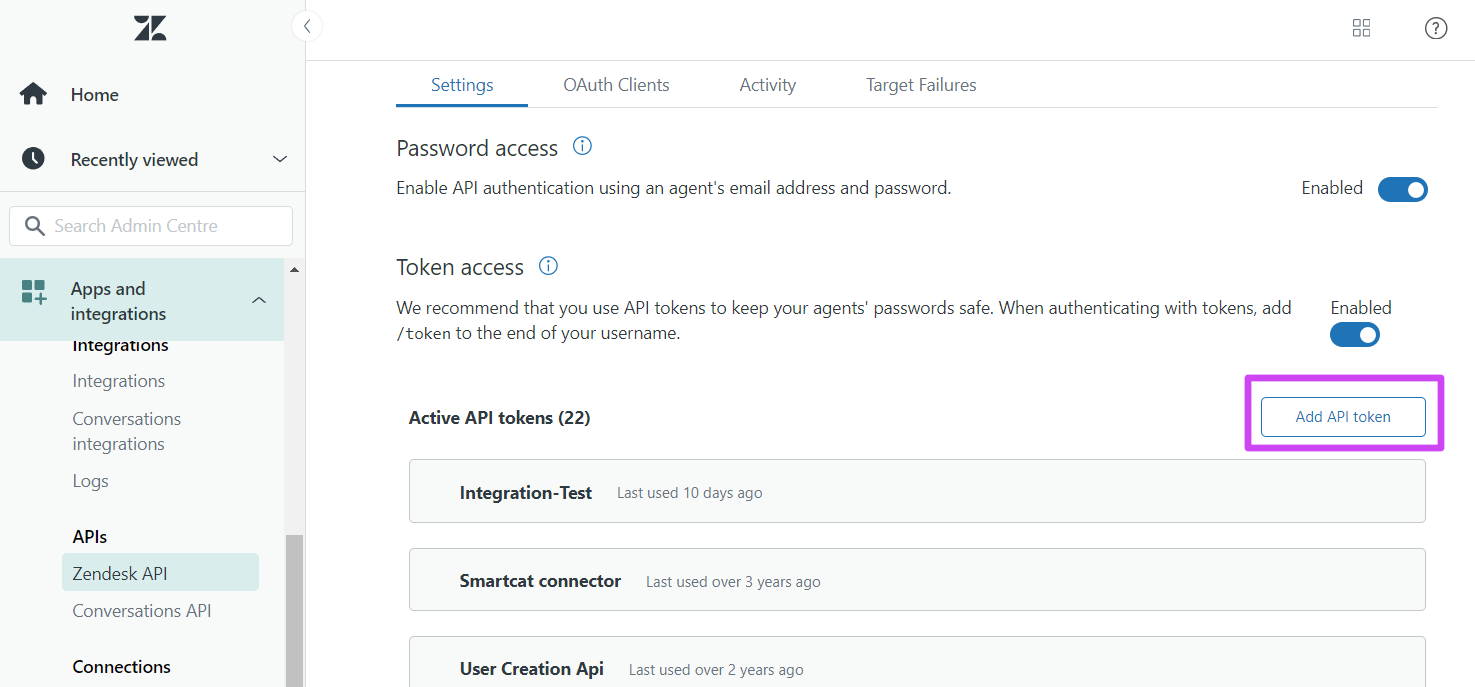
- Click the Settings tab and make sure Token Access is enabled
-
Enter a name for the token and click Create. Smartcat generates the token and displays it in a pop-up window
-
Copy the token and paste it somewhere secure
⚠️ Once you close the token window, the token is never displayed again. Save it before closing.
You now have all three parameters needed to set up the integration.
Configuring the integration
To configure the Zendesk integration, complete the following steps.
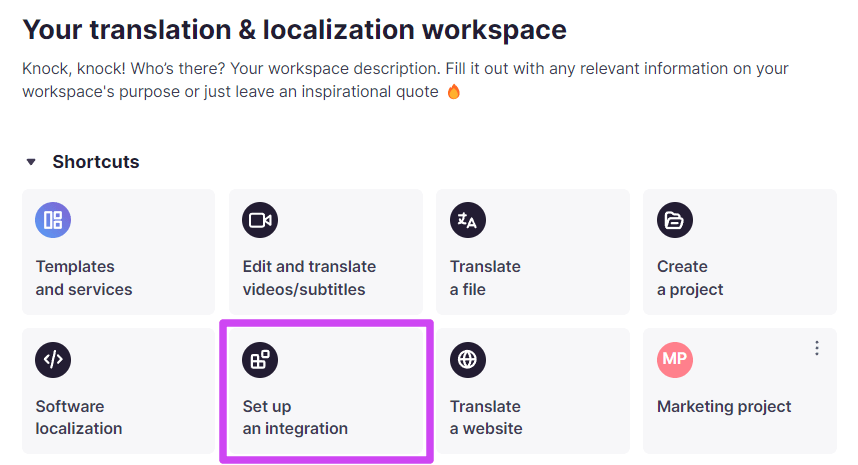
- Select the Set up an integration shortcut
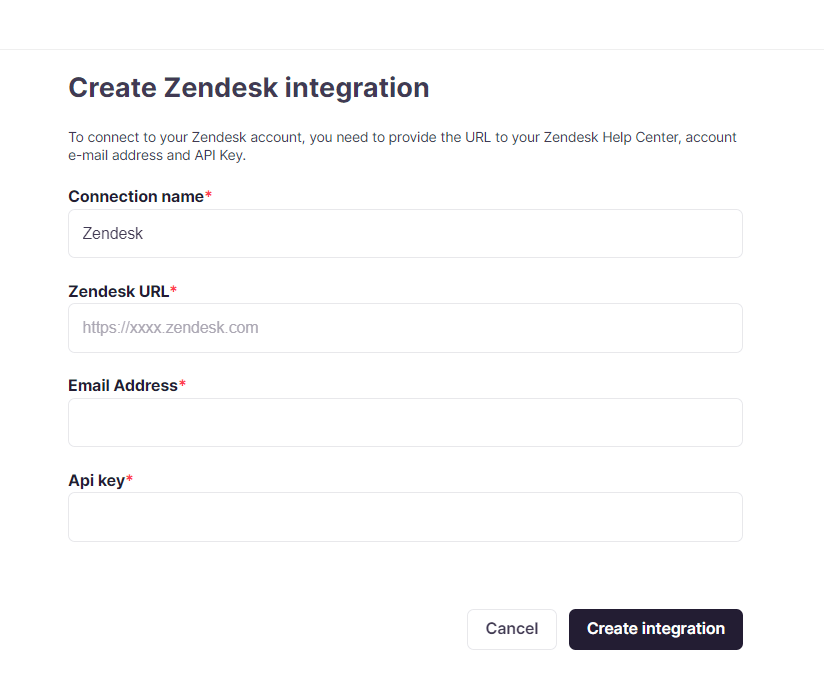
- In the Integrations list, click the Zendesk integration tile
-
Paste the Zendesk URL, email address, and API key that you collected as prerequisites
-
Click Create integration
The Zendesk integration page opens and displays the hierarchy of your content.
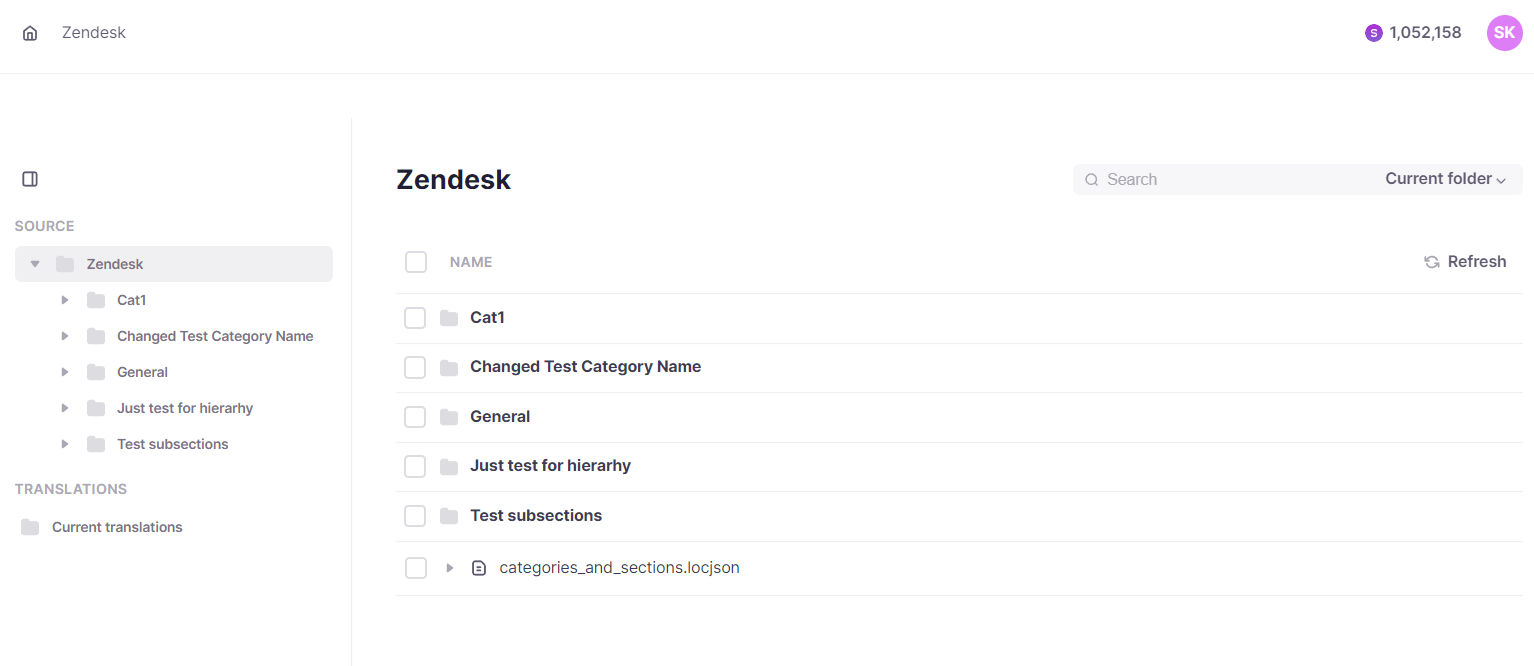
The integration is now configured and ready to use.
Using the integration
- To start the translation process, select your content (for example, an article) and click Create translation
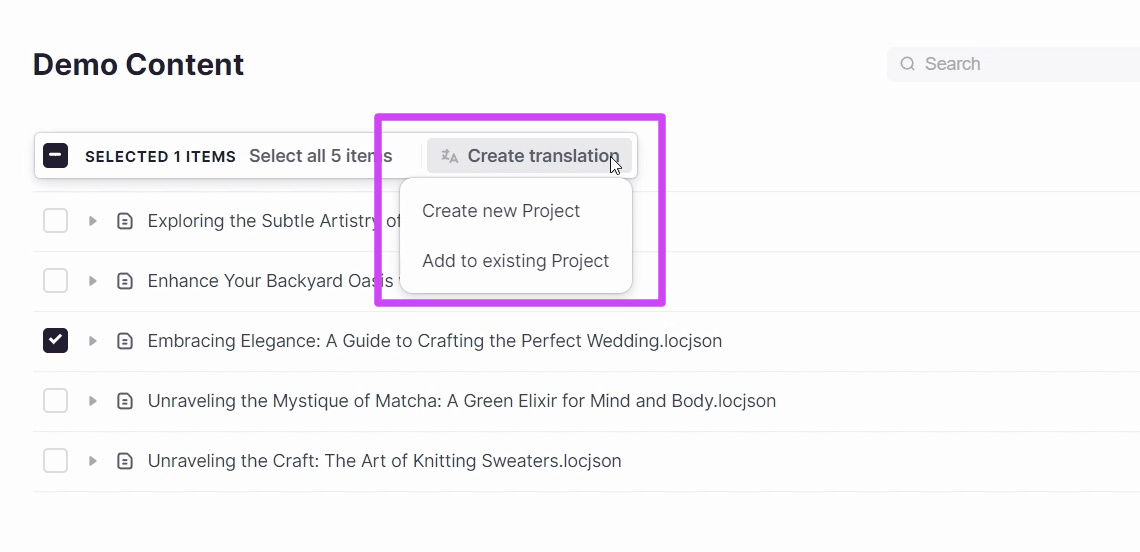
- Select whether to create a new project in Smartcat or upload a file to an existing project. Enter the project data, such as name, deadline, and source and target language
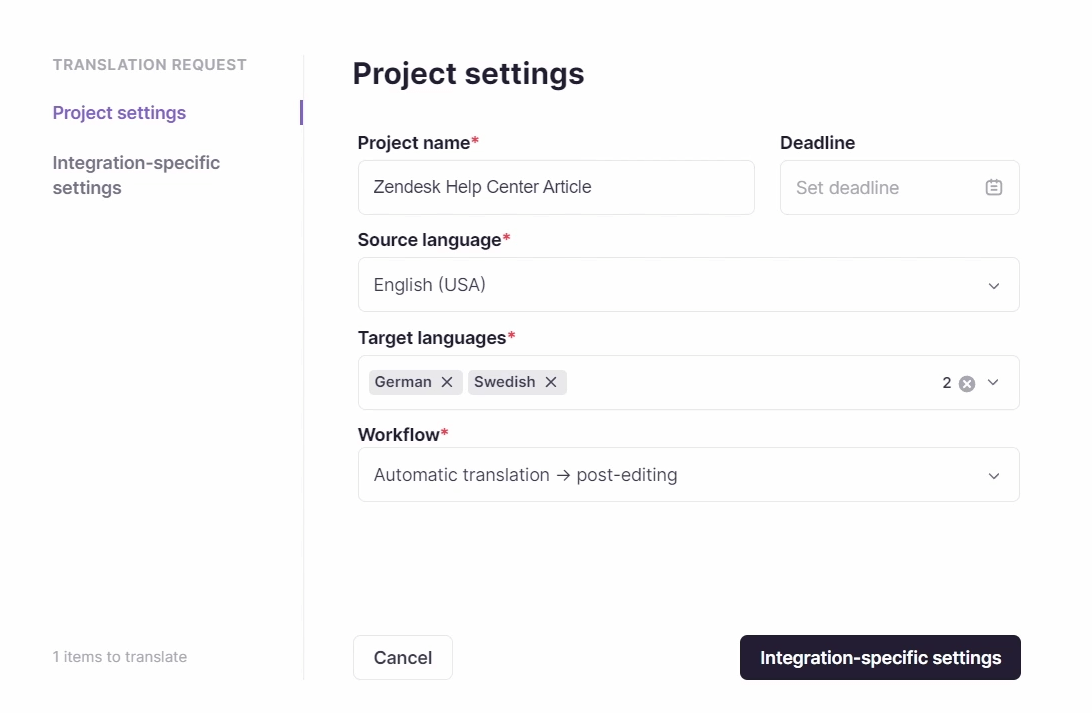
You can select multiple target languages.
-
Select the appropriate workflow for your translation. The Automatic Translation → Post-Editing workflow lets Smartcat select the most suitable AI engine for the initial translation. After that, you can review the translation yourself or invite a collaborator to your project in Smartcat
-
Go to the Integration-specific settings by clicking the respective button. Select the import mode for your translation: import existing translations or skip this step
-
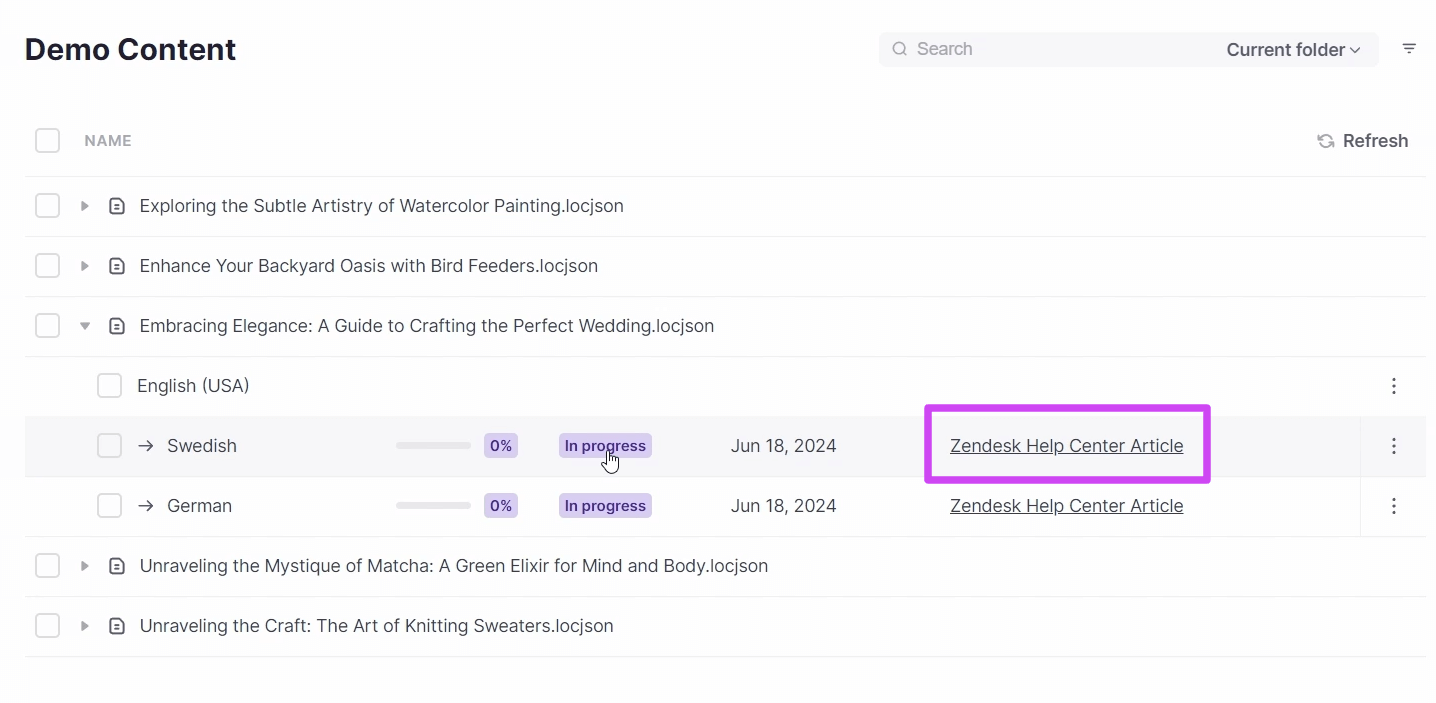
After synchronization completes, you see a list of target languages under the title of the original file. Click the underlined title on the left to open your project in Smartcat
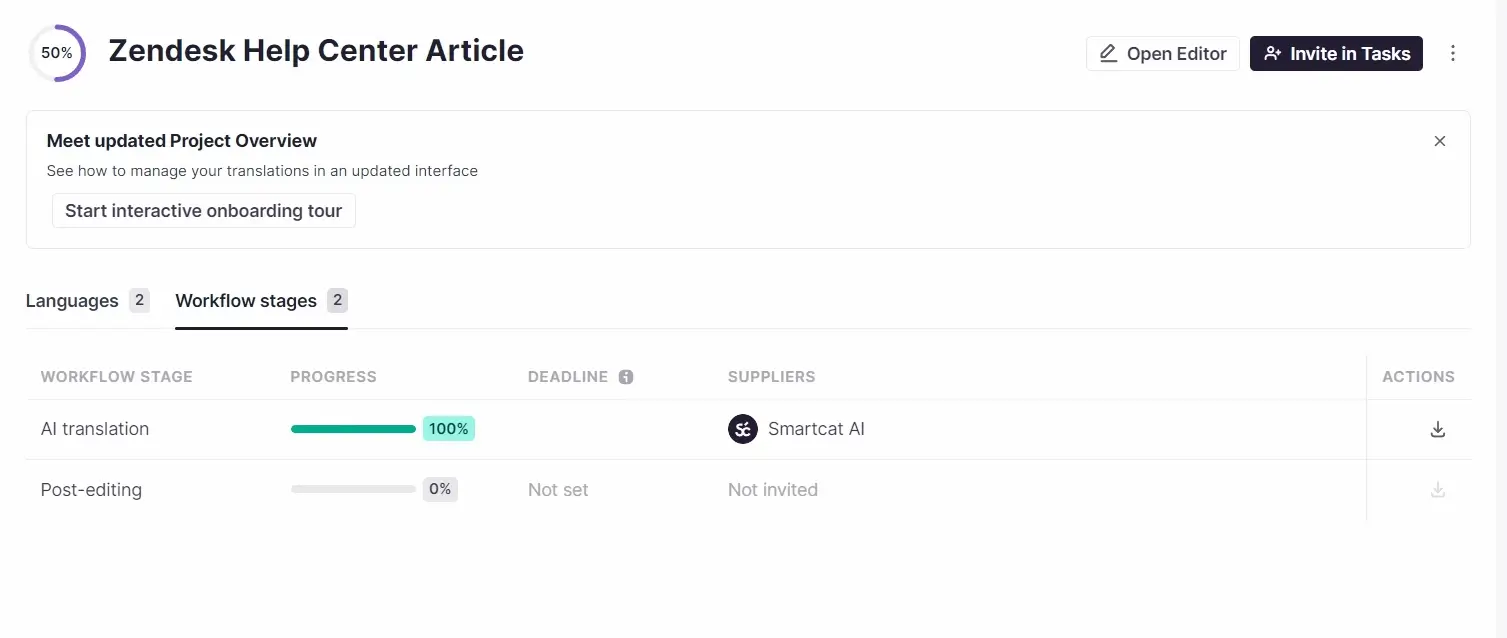
The Overview tab opens. When the progress bar reaches 100%, the AI translation workflow stage is complete.
Go to the Files tab and click your file to open the CAT editor.
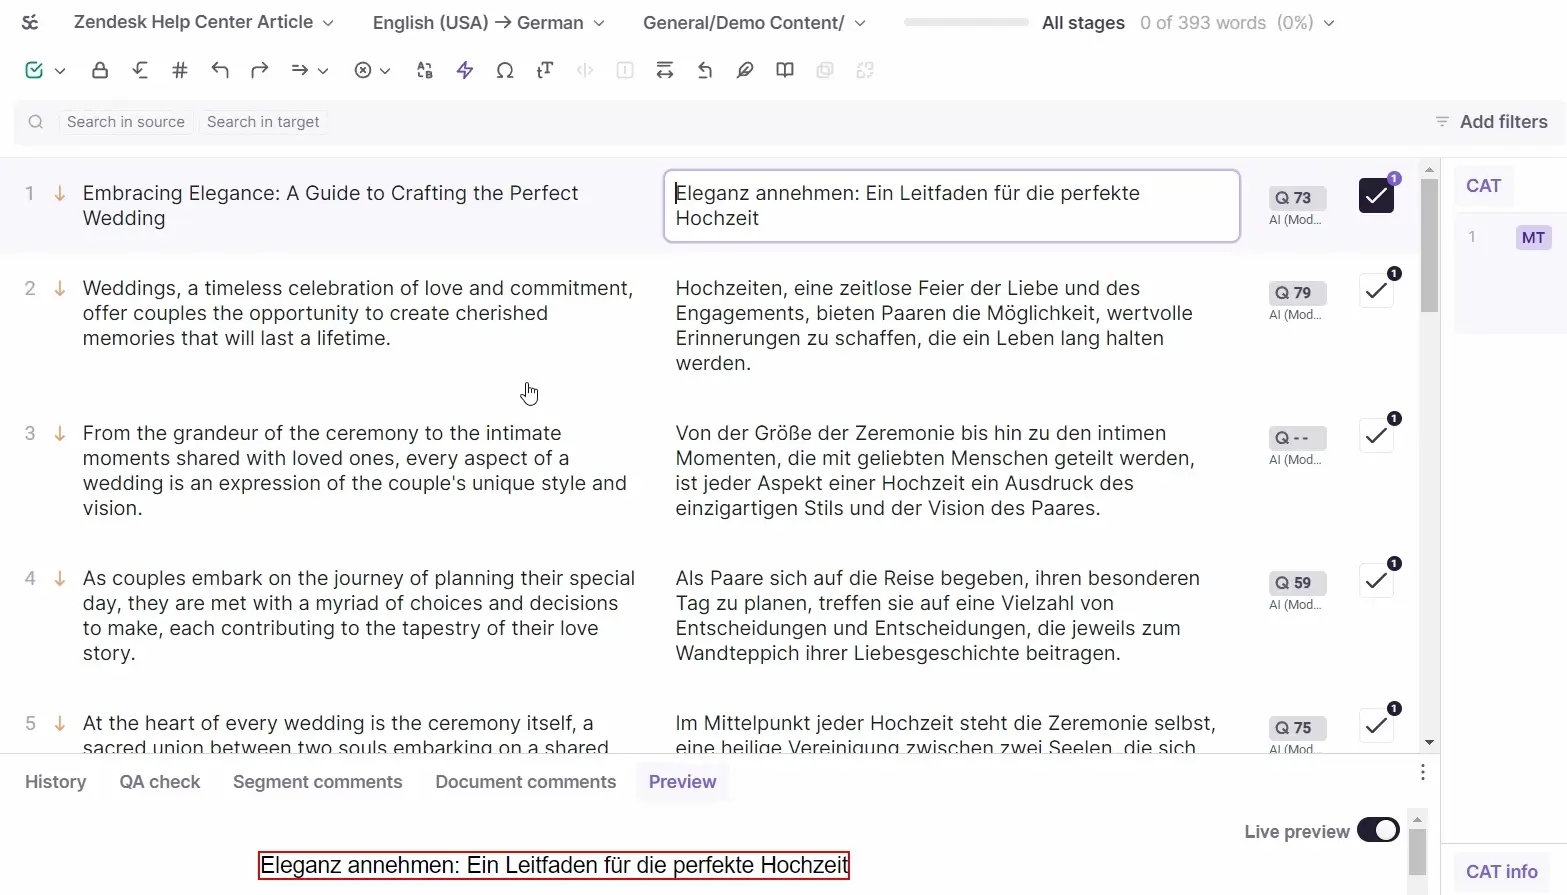
The editing area is divided into segments. Edit your translation as needed. Check the Quality Assurance tab for inaccuracies, and access the history of changes on the History tab.
To review your translation, confirm one segment after another. To confirm all segments at once, click the green button in the toolbar above on the left.
When you finish reviewing your translation in the CAT editor, click Done to finalize the reviewing stage.
Assign a human reviewer
You can assign a human reviewer to ensure the quality of your translation.
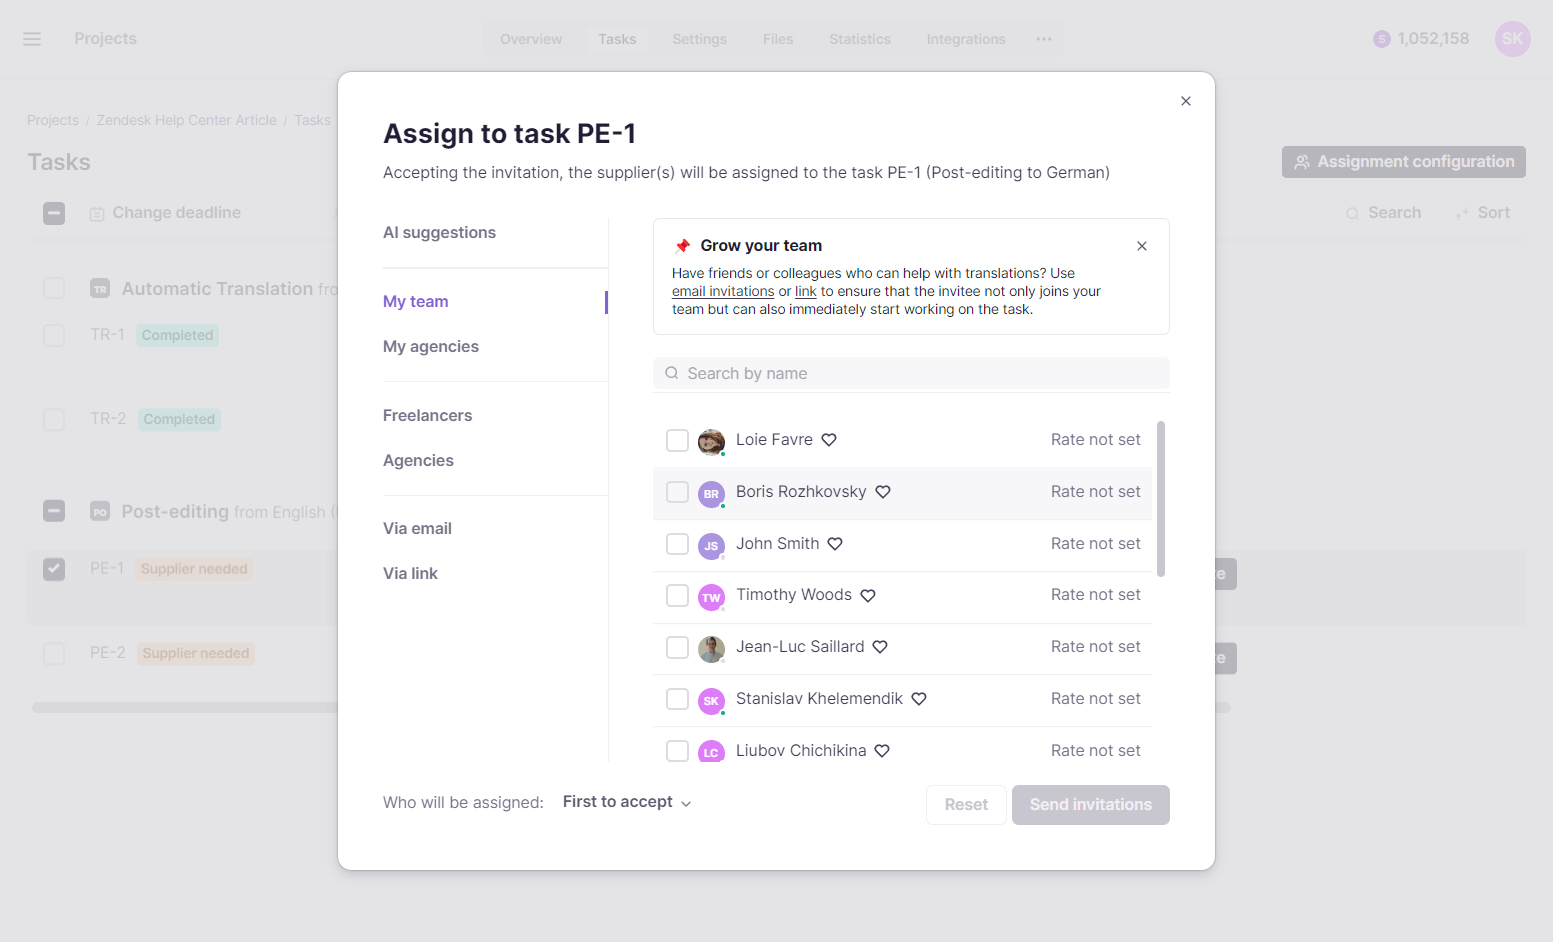
- Open the Tasks tab in your Smartcat project and select the Post-editing task, then click Invite
-
Choose the option that suits you: invite a human reviewer from your team, from agencies, or from Marketplace. Alternatively, invite a human reviewer to the Smartcat workspace using an email or link
-
Specify the role of the human reviewer and the monetary rate in the Additional Options section
-
Click Send Invitations. Track your invitation status on the Tasks page
Your invitation is sent and the reviewer can join the project.
💡 Learn more about collaboration in Smartcat in this article.
Sending translations to Zendesk
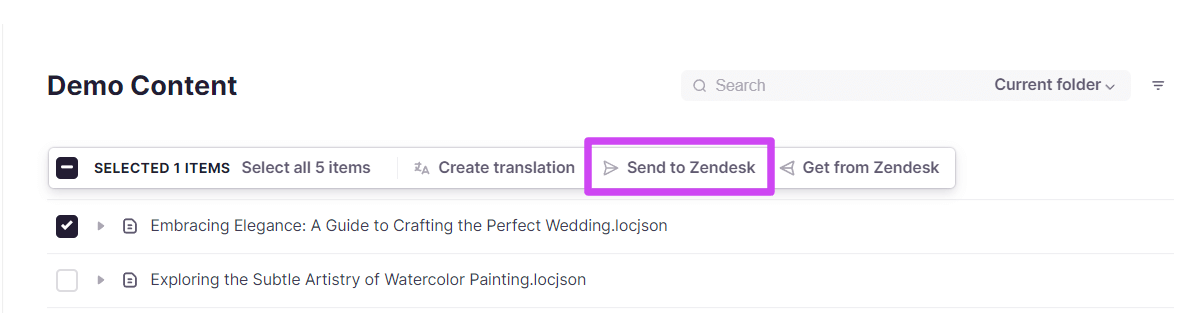
- After completing and reviewing an article translation, return to the integration page in Smartcat. Select the article you want to send and click Send to Zendesk
- In the next window, select the completion mode and the target languages to send to Zendesk
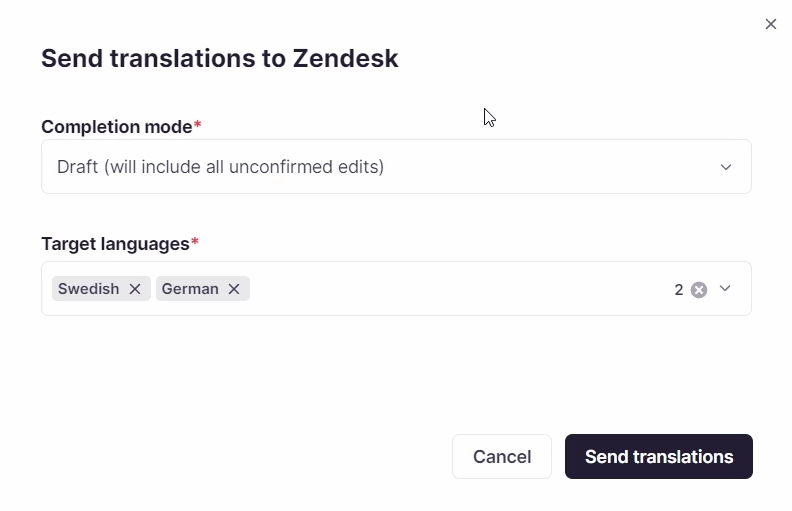
- Click Send translations. Smartcat pushes the translations to Zendesk
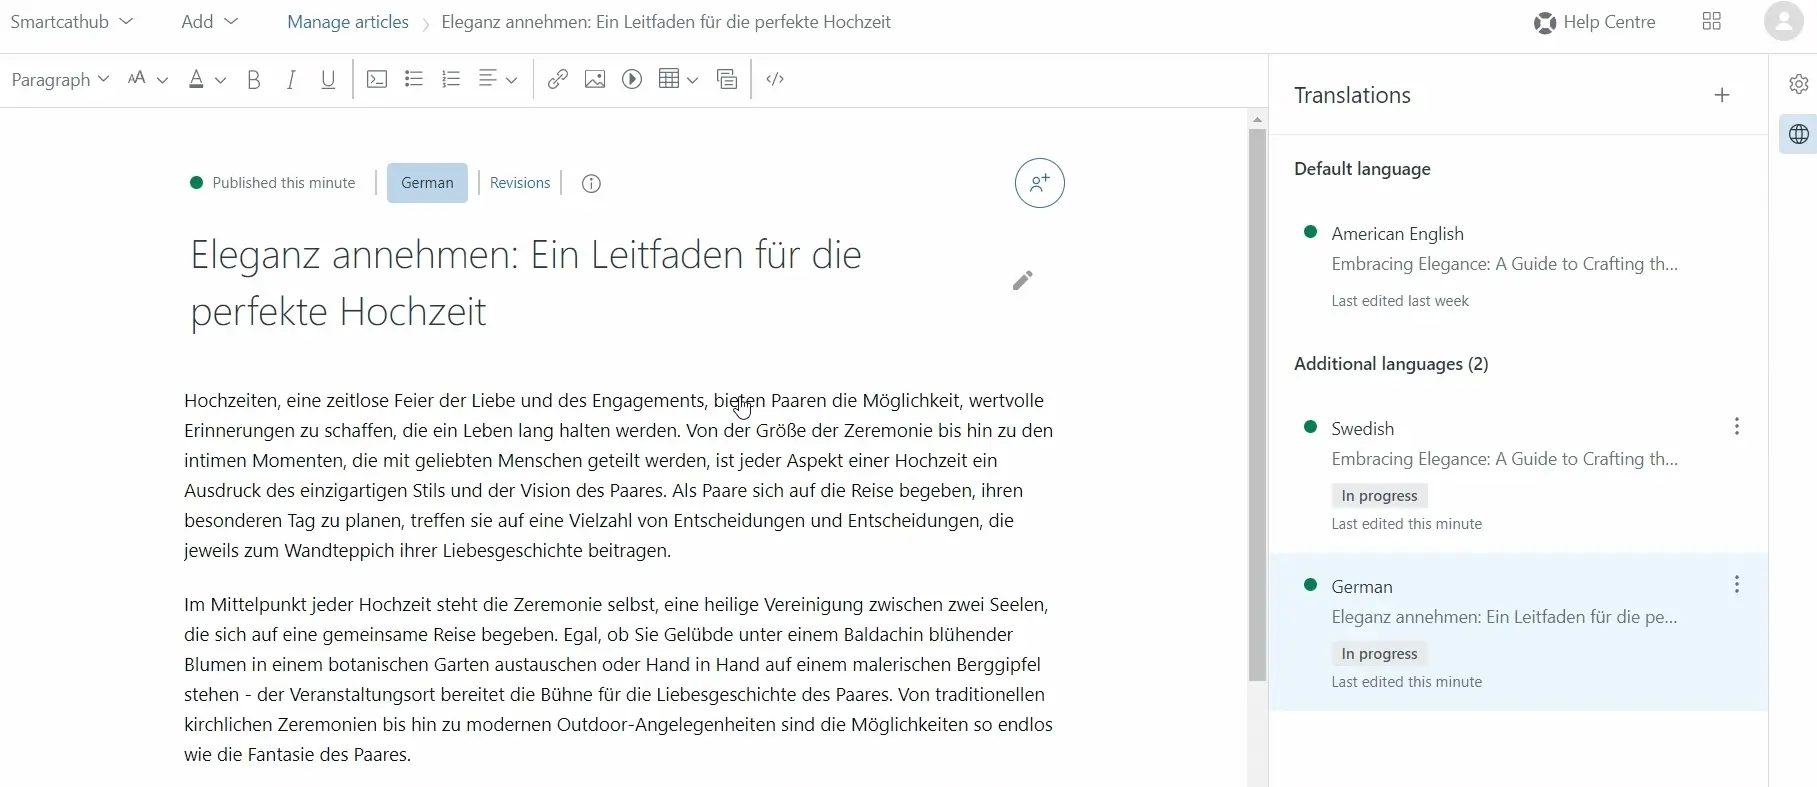
You can now check your translated content in Zendesk.
FAQs
What three pieces of information do I need before setting up the Zendesk integration?
Your Zendesk URL, your Zendesk email address, and a Zendesk API key/token generated from your admin account.
Whose Zendesk account controls what content the integration can access?
The account tied to the email address you provide during setup — content access permissions in Zendesk depend on that specific account.
Will I lose my API token if I close the token creation window?
Yes — once you close the token pop-up, the token is never shown again, so you must copy and save it immediately after creation.
Can I reuse existing translations already in Zendesk instead of starting from scratch?
Yes — during setup of an individual translation, you can choose an import mode that imports existing translations, or skip that step and start fresh.
Can I assign a human reviewer to check the AI translation before sending it back to Zendesk?
Yes — from the project's Tasks tab, you can invite a human reviewer from your team, an agency, or the Smartcat Marketplace to review the Post-editing task.
How do I get finished translations back into Zendesk?
From the integration page in Smartcat, select the translated article, click "Send to Zendesk," choose the completion mode and target languages, then click "Send translations."
Want to learn more?
See how Smartcat can transform your localization workflow.
Still need help?
Our support team responds within one business day.