Translate content in Adobe Experience Manager
Overview
This guide shows you how to translate Adobe Experience Manager (AEM) content with Smartcat once the AEM integration is set up. You create a translation job in AEM, send content to Smartcat, review the translation, and publish it back to AEM.
📌 If you want to learn more about the Adobe Experience Manager cloud installation guide, visit this link.
Creating a translation job
- Open AEM and go to the site area, then select the page(s) inside the site structure
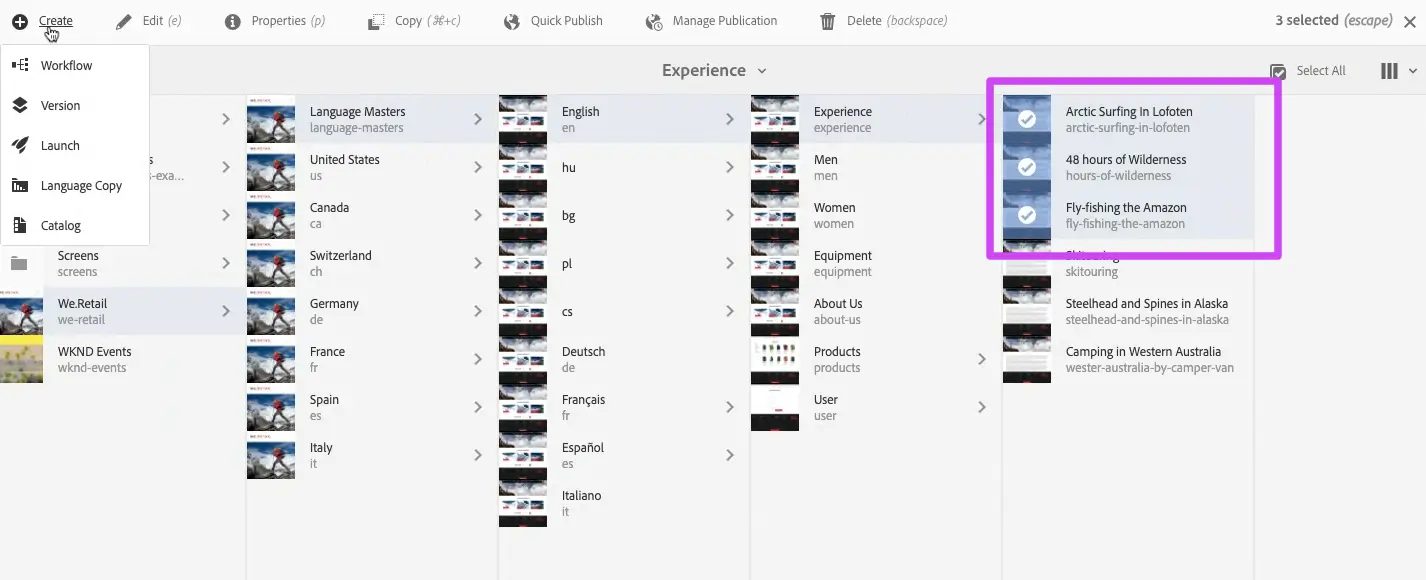
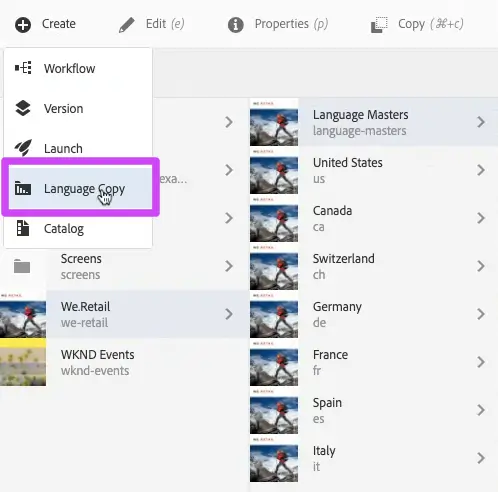
- Click Create and select Language copy
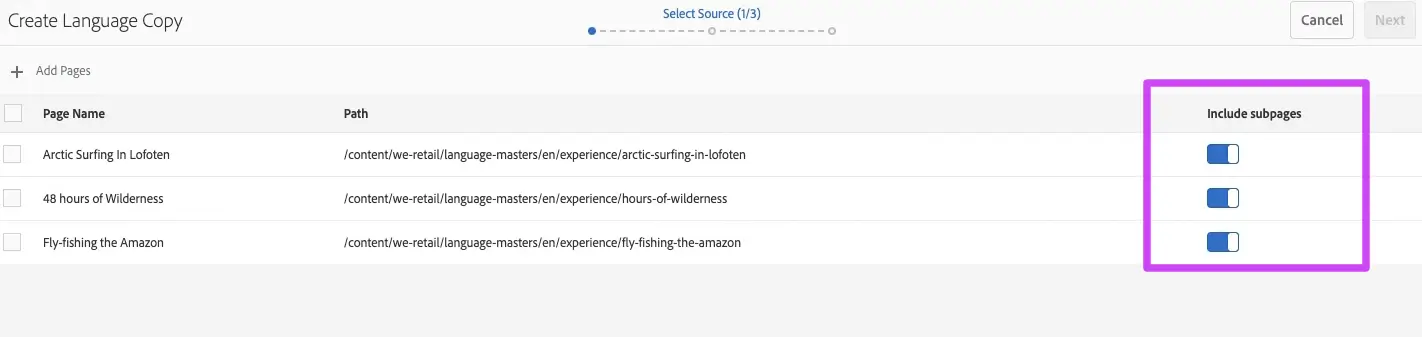
- In the next window, confirm that all pages are selected correctly for translation and add more pages if needed. To include subpages, use the toggle on the right
-
Use the checkbox to select all pages, confirm your choice, then click Next
-
On the next screen, specify the target language. Add as many as you need
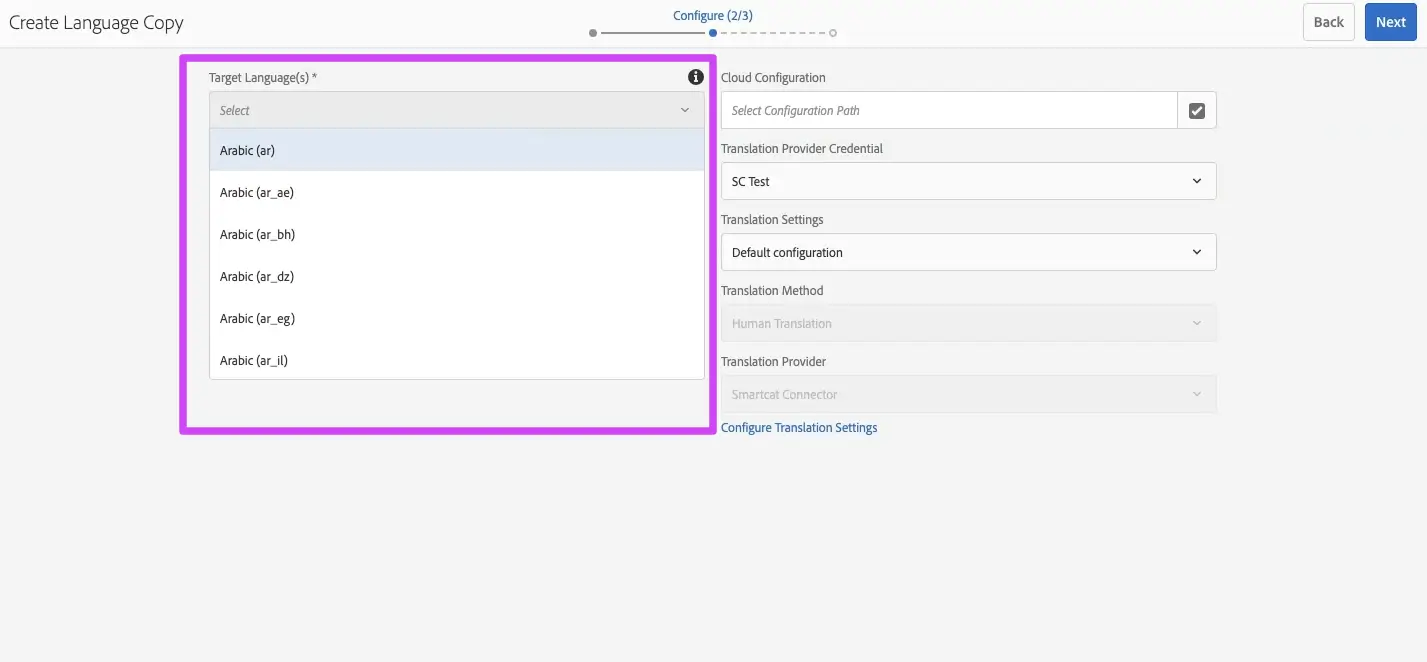
More information on Translation settings.
- Create a project. To avoid creating additional folders in AEM, you can create a multilingual project. Enter the title for your project and click Create
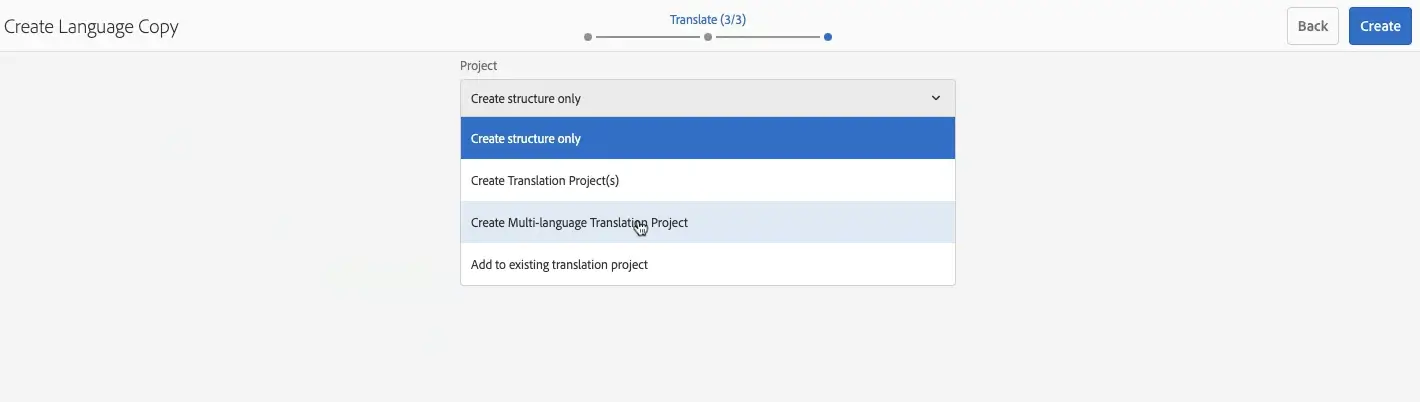
AEM redirects you to the projects area, where all translation projects are stored.
Translation process
- Open your project. You see a job for each language that you previously selected as the target language
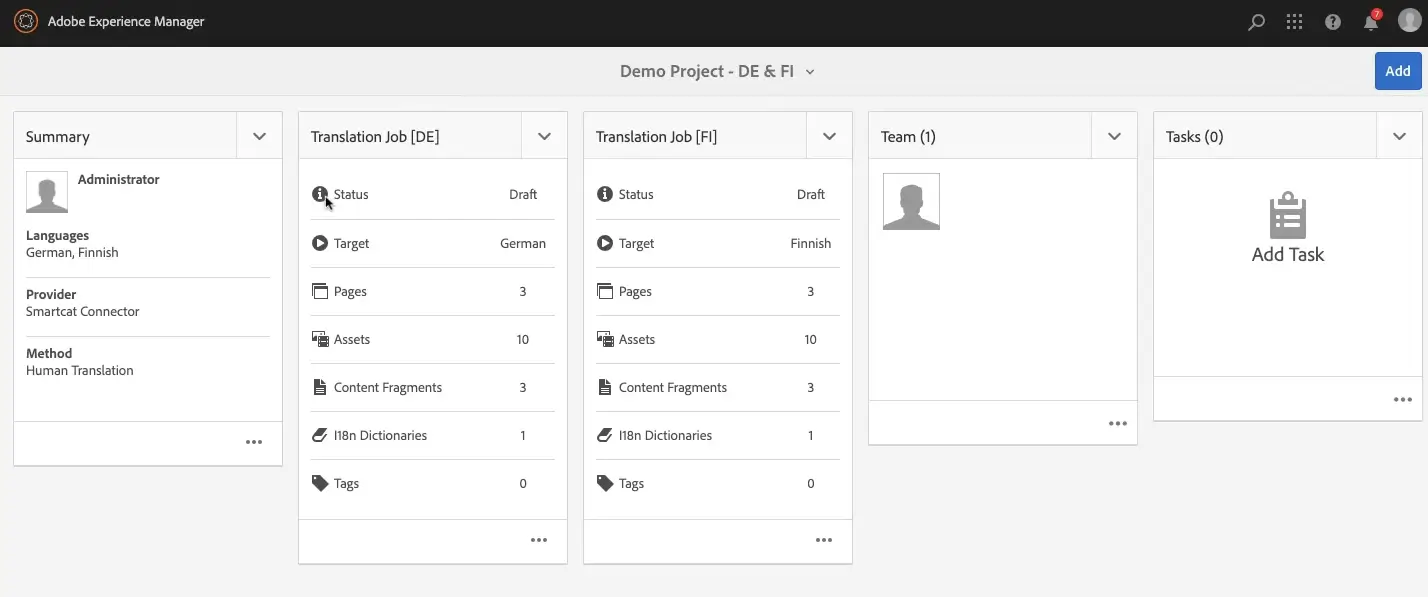
📌 AEM does not allow you to have one job for several languages.
-
Each translation job connects to a Smartcat project. At this point, these jobs are in the Draft stage
-
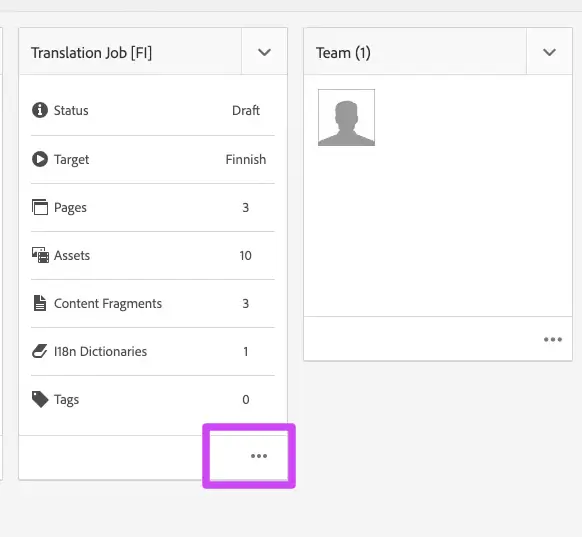
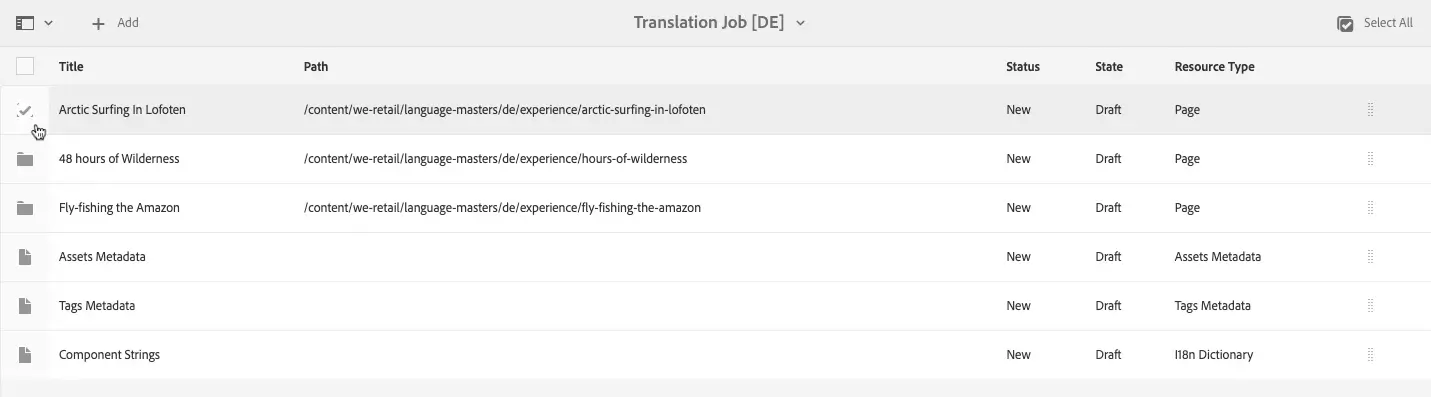
To check that all of your content was added to the translation job, click the three dots
📌 If your project contains content fragments or other assets, they appear as separate folders, not as single pages.
- To start the job, click the arrow-down icon and select Start from the context menu
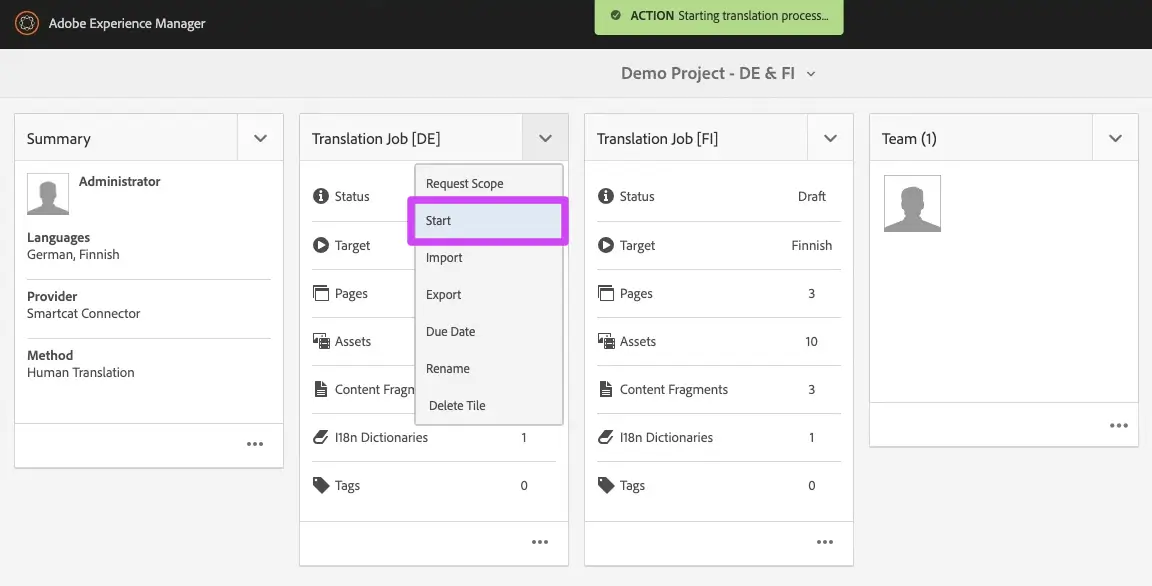
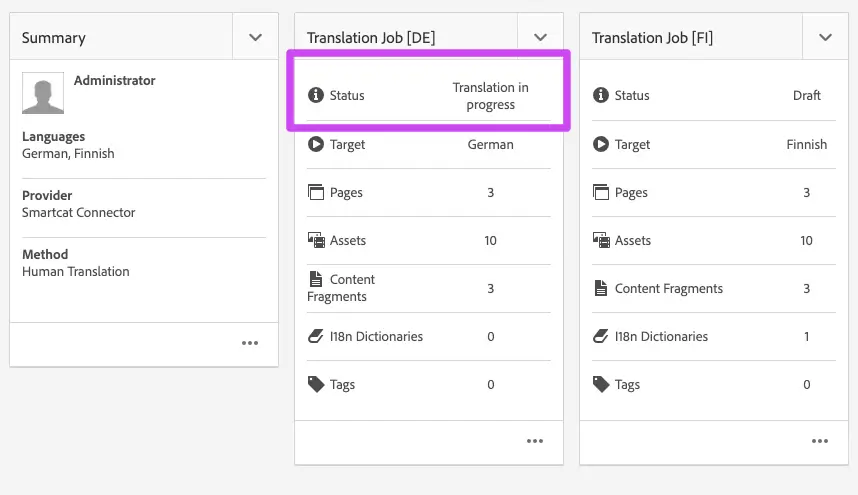
- After you see the green notification, refresh the page. The status changes to Translation in Progress, which means the content has been sent to Smartcat
-
Open your workspace in Smartcat and go to the Projects tab. A separate project is created for each language
-
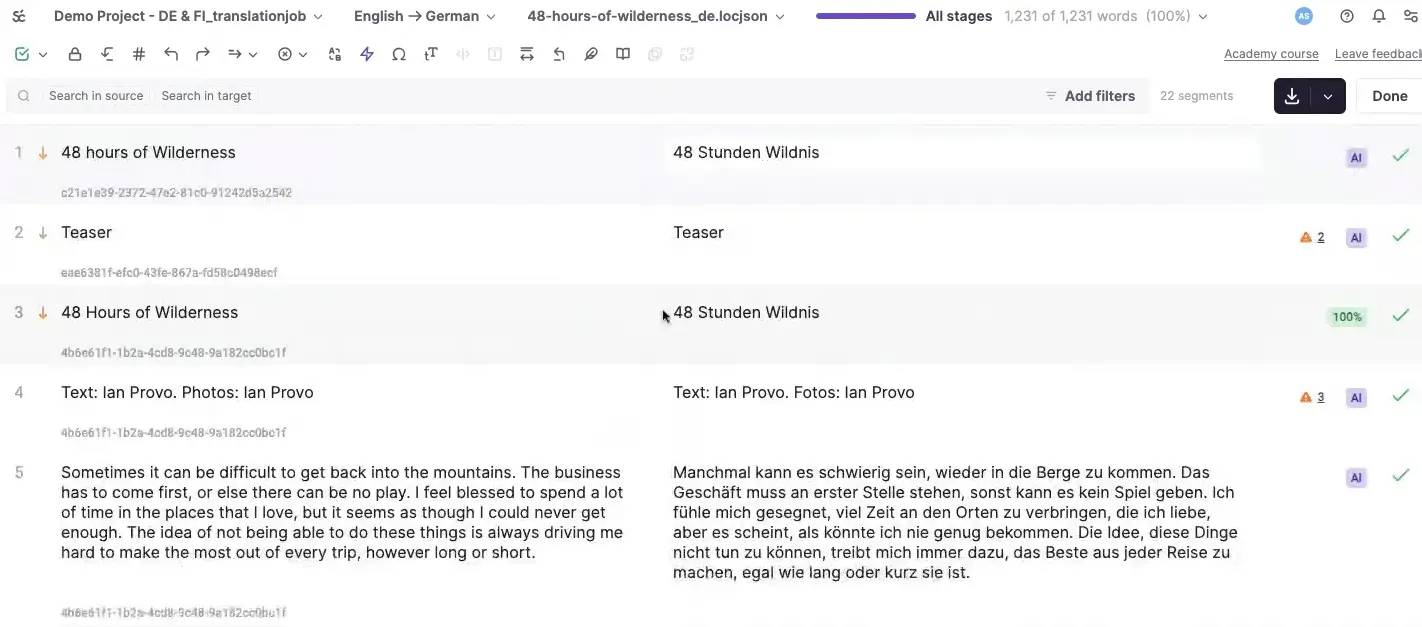
Open the Files tab. Review the translation for each content fragment by confirming segments in each file. You can assign the review to a human reviewer. Here is the best way to do it
-
After the translation review is done, go back to the AEM page and refresh it
-
Open your job. The status of the page changes to Ready for review
-
Select your page and click Preview in Sites
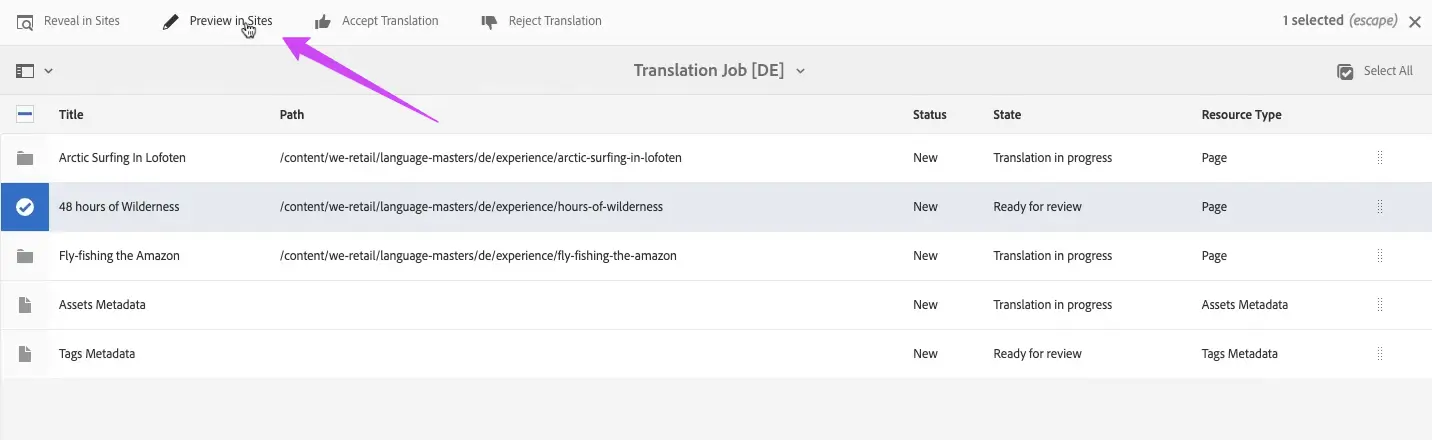
- Review your translated content
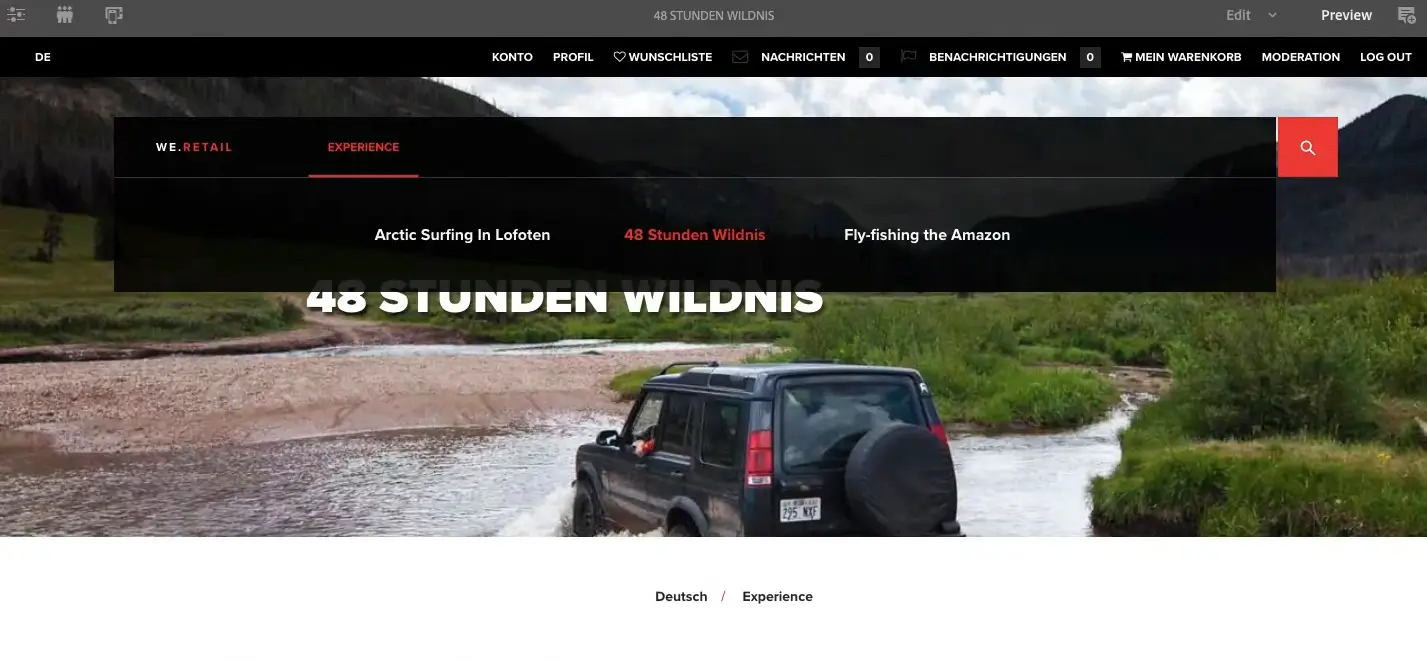
Your translated content is now available in AEM and ready to publish.
How to update translation
-
Select the updated page in the Sites area. You can update only one translation at a time
-
Click the window icon on the left, then select References in the list
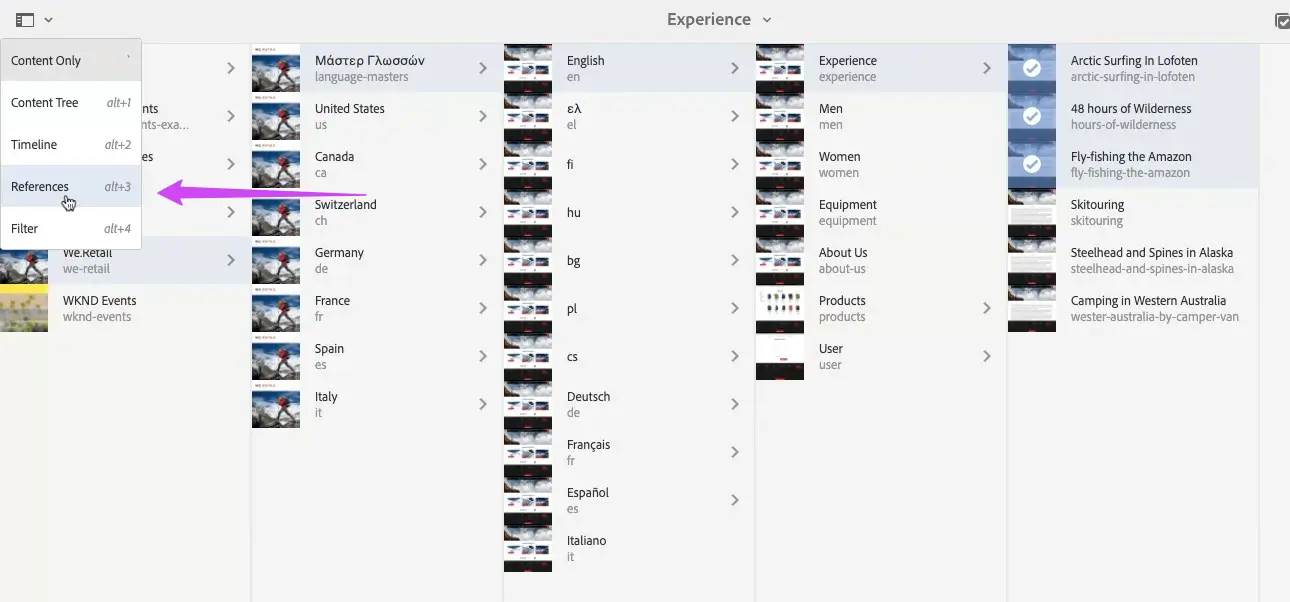
- In the sidebar on the left, go to the Language copies section and select the language version of the page that needs to be updated
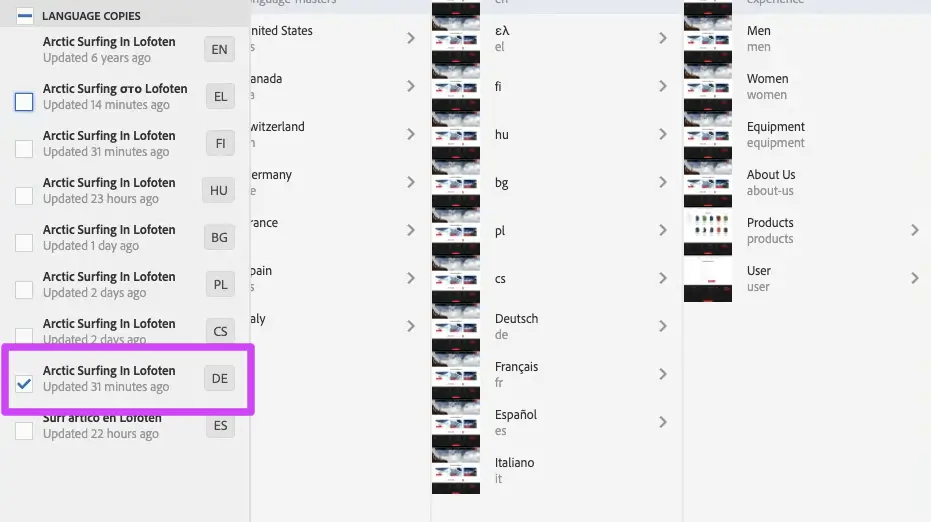
- In the same area, in the menu below, select Create structure only and click Update. This creates a new translation job
Smartcat picks up the updated content in the new job, ready for translation and review.
FAQs
Can one translation job cover multiple target languages?
No — AEM does not allow a single job to cover multiple languages; a separate job is created for each target language you select.
Where do content fragments and other assets show up within a translation project?
They appear as separate folders rather than as individual pages alongside your site pages.
How do I update a translation after the source content changes?
Select the updated page, go to References → Language copies, pick the language version to update, then choose "Create structure only" and click Update — this creates a new translation job for just that content.
Can I update multiple language copies of a page at the same time?
No — you can update only one translation at a time per the update workflow described.
What does "Ready for review" mean for a translation job?
It means the translated content has come back from Smartcat and is ready to preview in AEM Sites before you decide to publish it live.
Want to learn more?
See how Smartcat can transform your localization workflow.
Still need help?
Our support team responds within one business day.