Using the Project Manager Dashboard
Overview
Smartcat's Project Manager Dashboard provides folders to organize projects, status tabs for filtering and triage, and the ability to carry out bulk actions on projects and tasks.
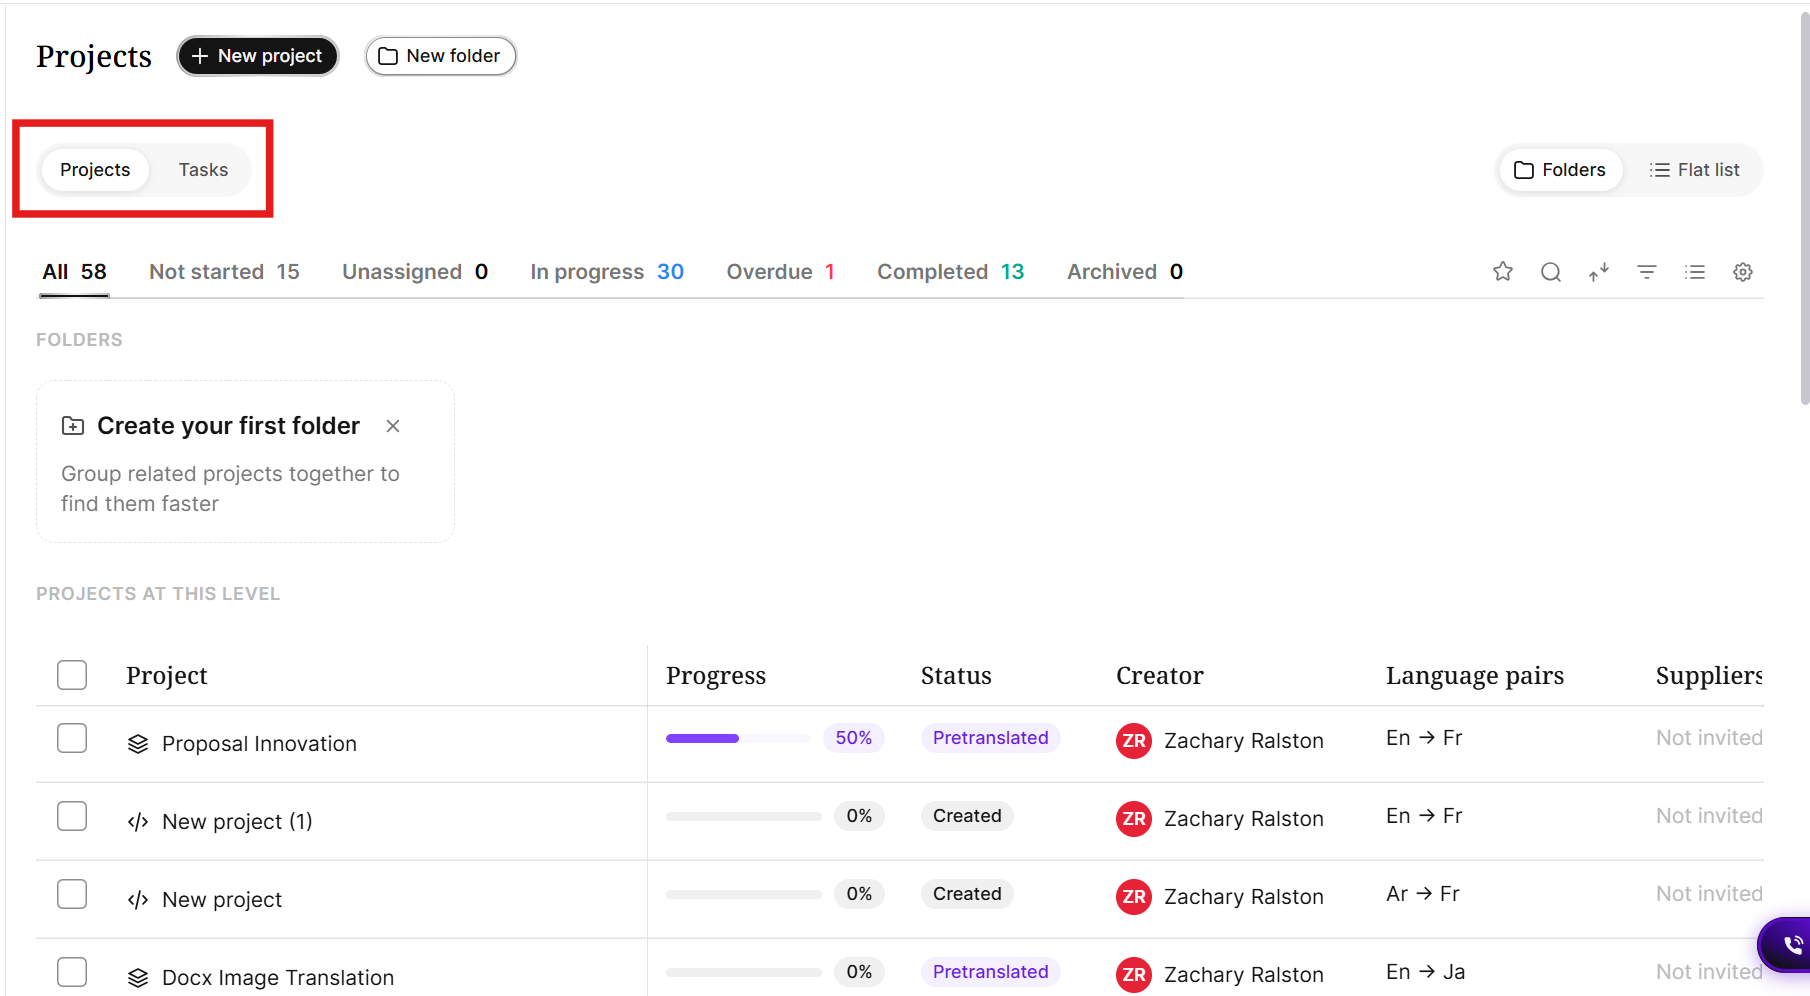
The Projects/Tasks toggle at the top of the page switches between two different views of the same workspace. Both views share the same Status terms.
-
Projects provides a list of projects and project folders
-
Tasks shows every task in the work space, with a different workflow stage on every row, without requiring you to open a project.
When to use it
-
You manage multiple projects and want a single place to see every task that needs action, instead of checking each project separately
-
You want to quickly find tasks with no assignee, tasks that have gone quiet, or tasks past their deadline
-
You want to assign or invite a supplier to a task without leaving the task list
How to use it
Status tabs
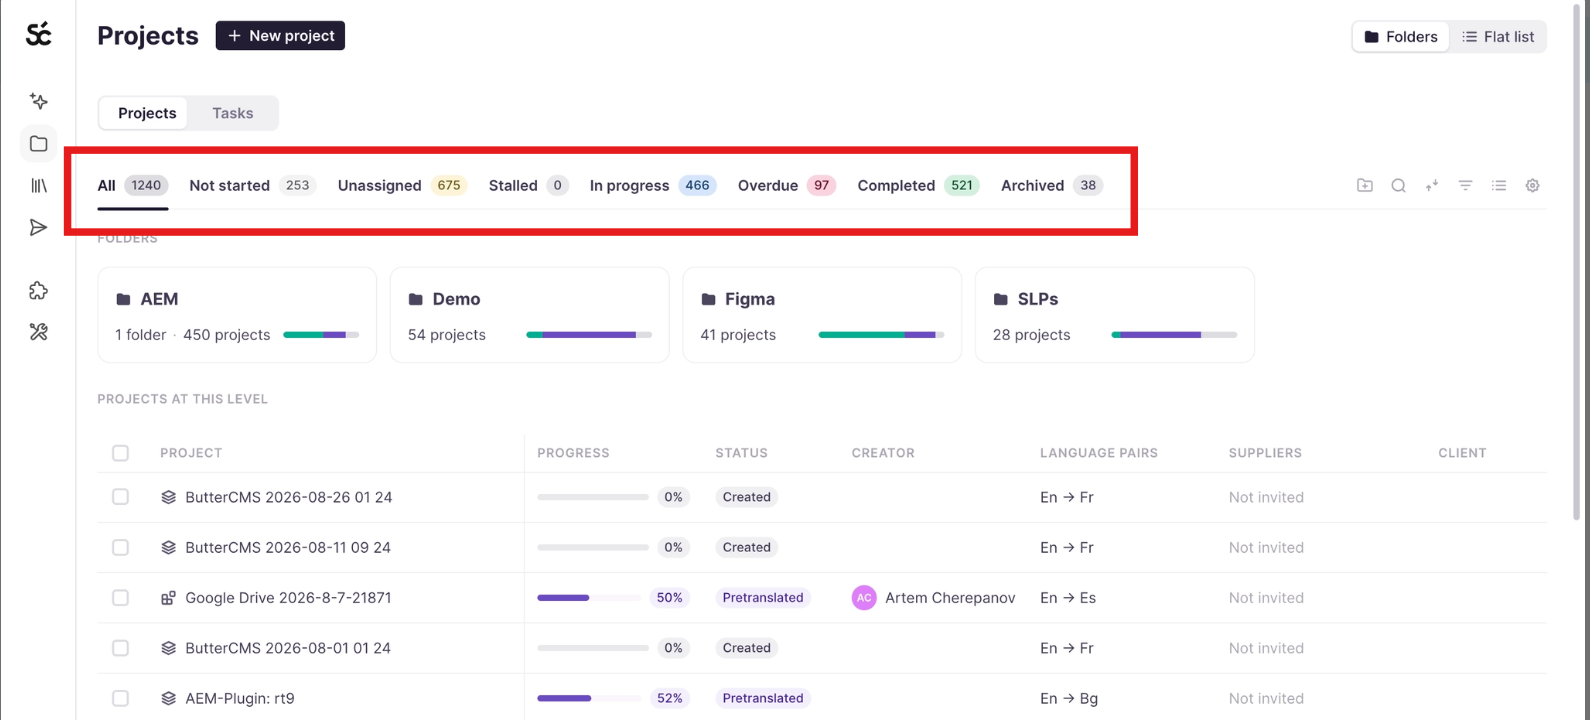
The Projects/Tasks page displays the status of every project or task, depending on the view. You can view the list of statuses, with live counts for the number of items in each status, at the top of the page. Both projects and tasks use the same statuses. Click a status on the top bar to filter your list.
-
All — Display all projects or tasks
-
Not Started — Display projects or tasks with no recorded progress
-
Unassigned — Display projects or tasks that don’t yet have a supplier assigned to them. Use this status to find work that is waiting to be staffed
-
Stalled — Progress on the project or task has stopped for longer than the workspace’s stall window.
-
In progress — Display projects or tasks when at least one document is actively being worked on
-
Overdue — Display projects or tasks in which the deadline, or the deadline of its earliest still-open task, has passed
-
Completed — Display projects or tasks where every document has finished the entire workflow
-
Archived — Display projects that have been inactive past the workspace's configured threshold; data has been moved out of the active project store into a read-only archive
Actions from the Project Dashboard
If you hover over a project, you can click the … (options) icon to carry out actions directly from the dashboard. These actions include:
-
Open project
-
Open in editor
-
Tasks for this project
-
Duplicate project
-
Move to folder…
-
Mark as complete
-
Cancel project
-
Delete project
Project Manager Views
Click the View icon in the top toolbar to change how your projects, tasks, and folders are displayed.
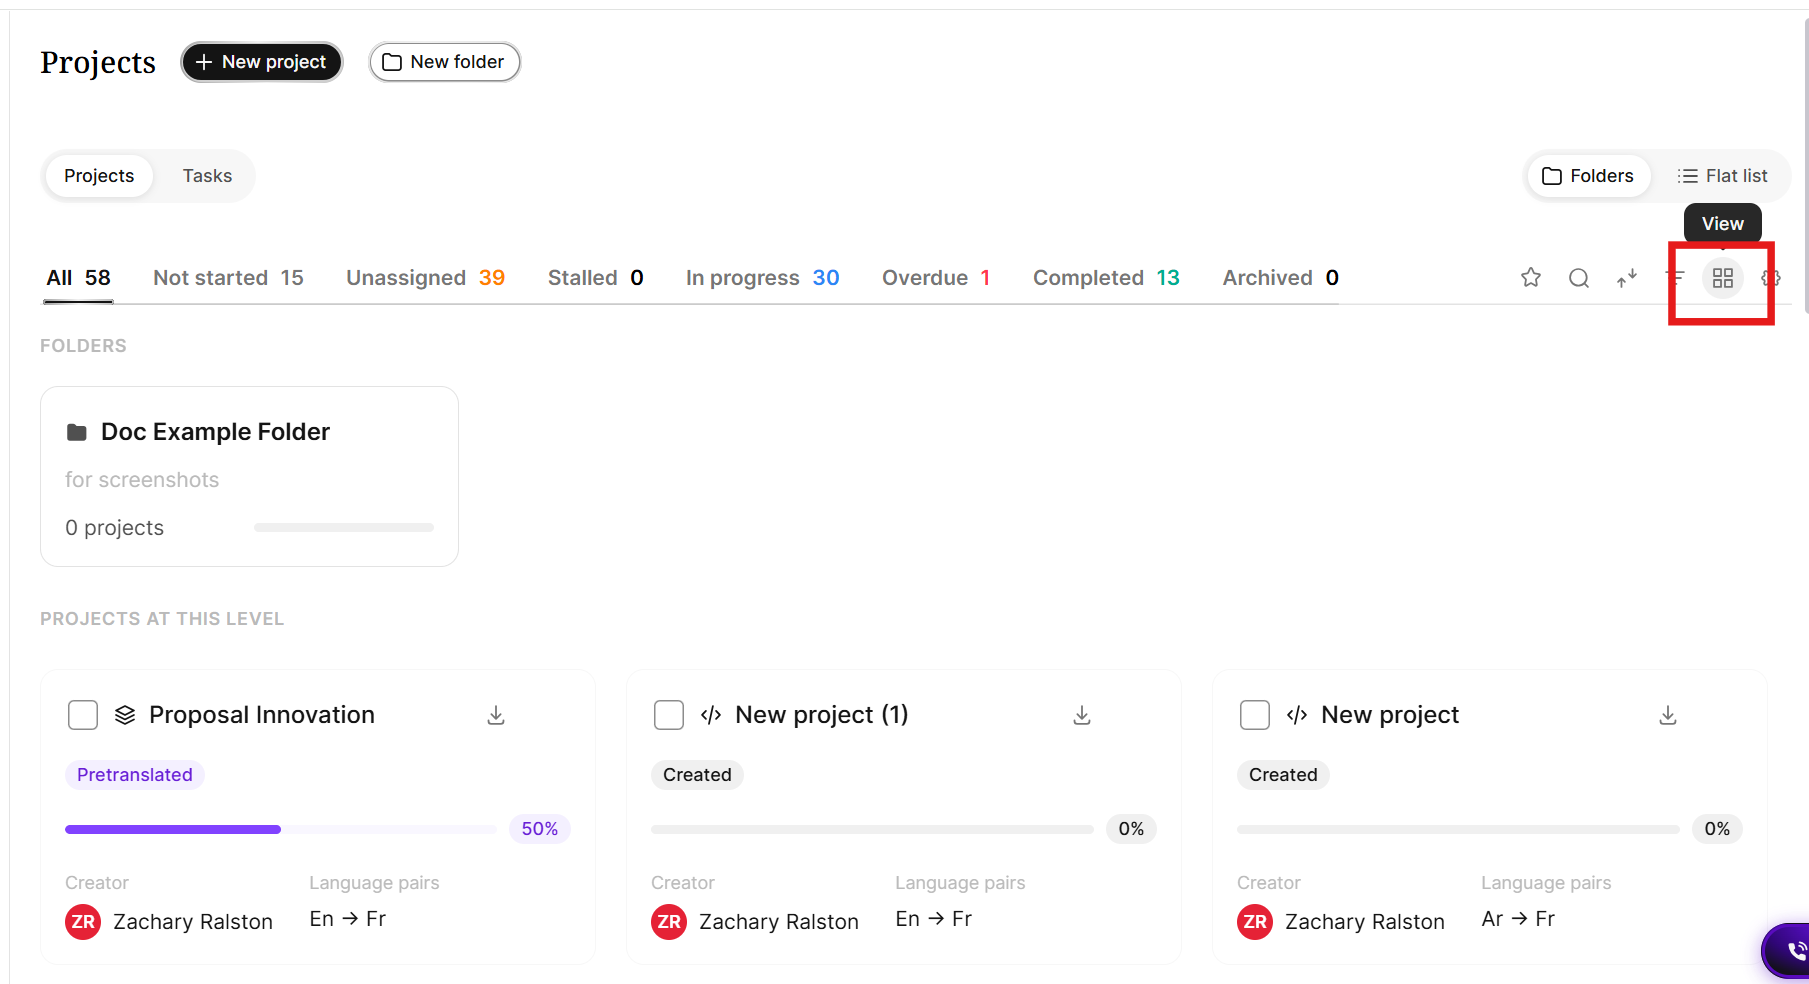
Three views are available:
-
Table — displays projects/tasks and folders as single rows in a table
-
Cards — displays projects/tasks and folders as cards
-
Folders & list — displays folders as cards at the top of the page and displays individual projects/tasks in a table
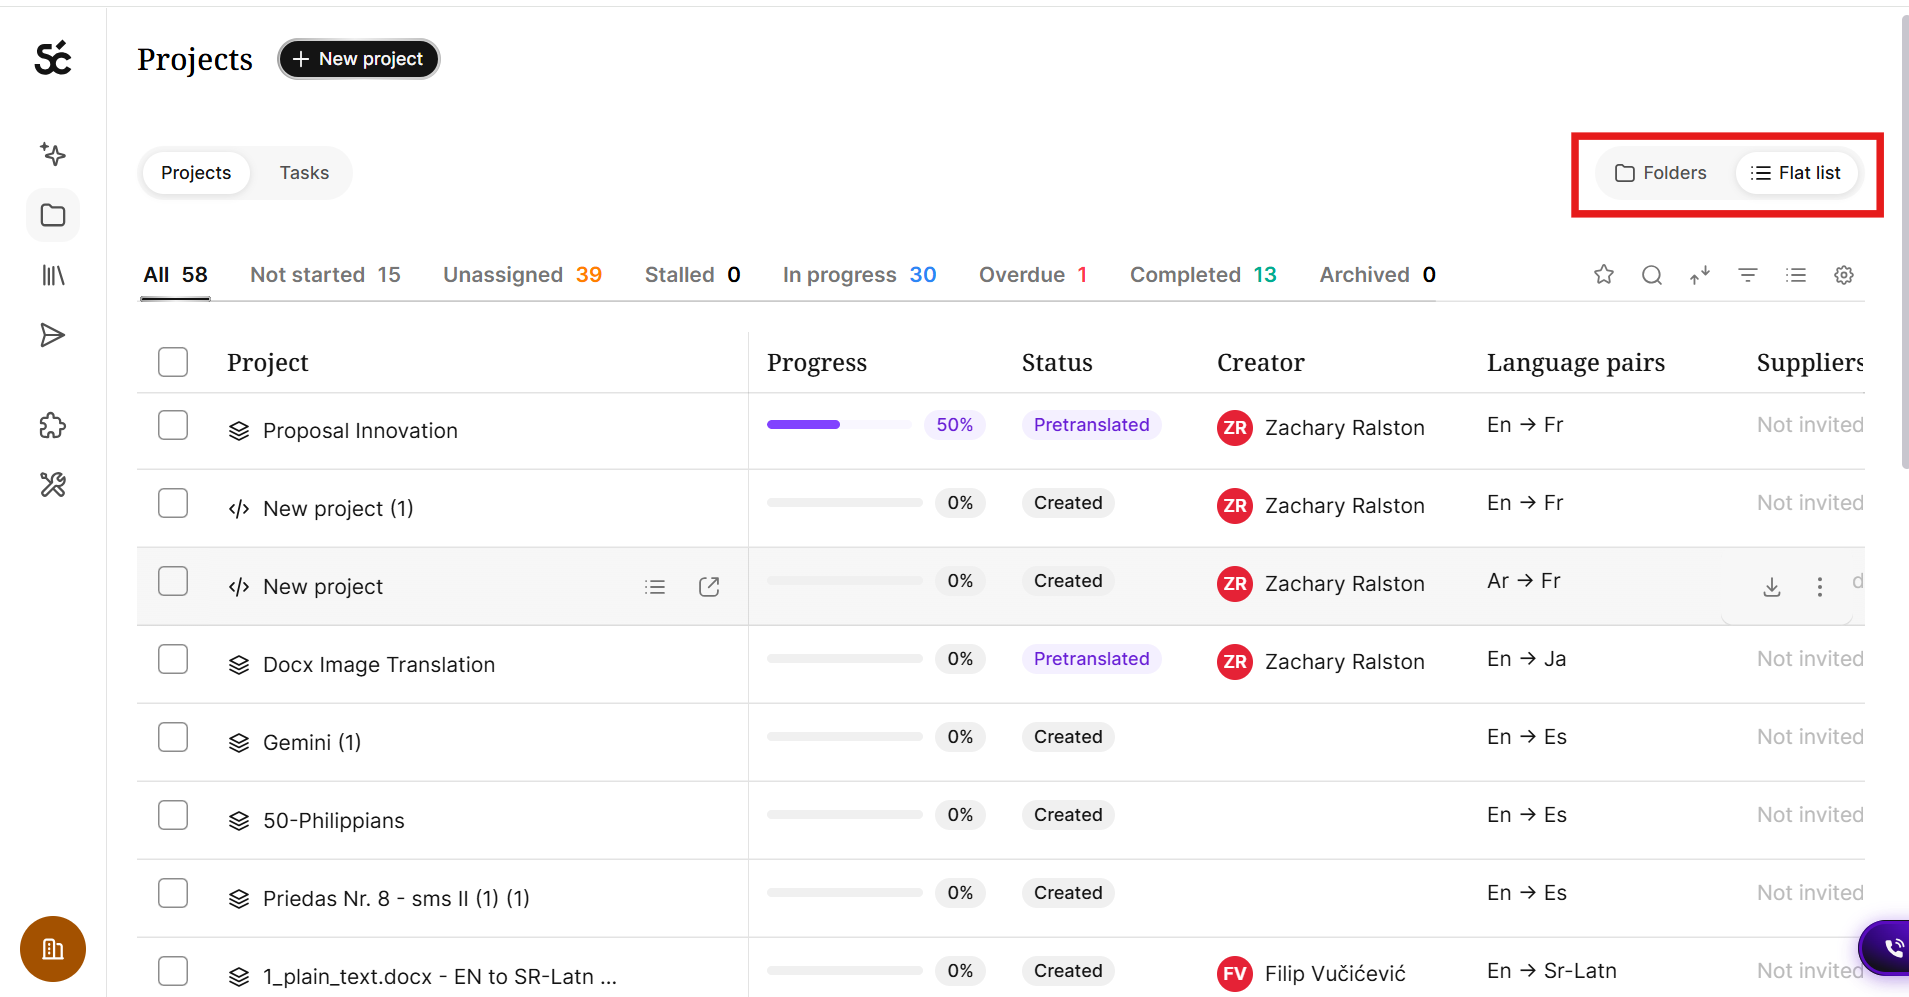
You can switch between the Folders and Flat list modes using the toggle at the top right corner. Switching to Flat list removes the folders and displays all projects in the table.
You can also determine which columns appear in the table by clicking the Columns icon and toggling on/off the desired columns.
Project Folders
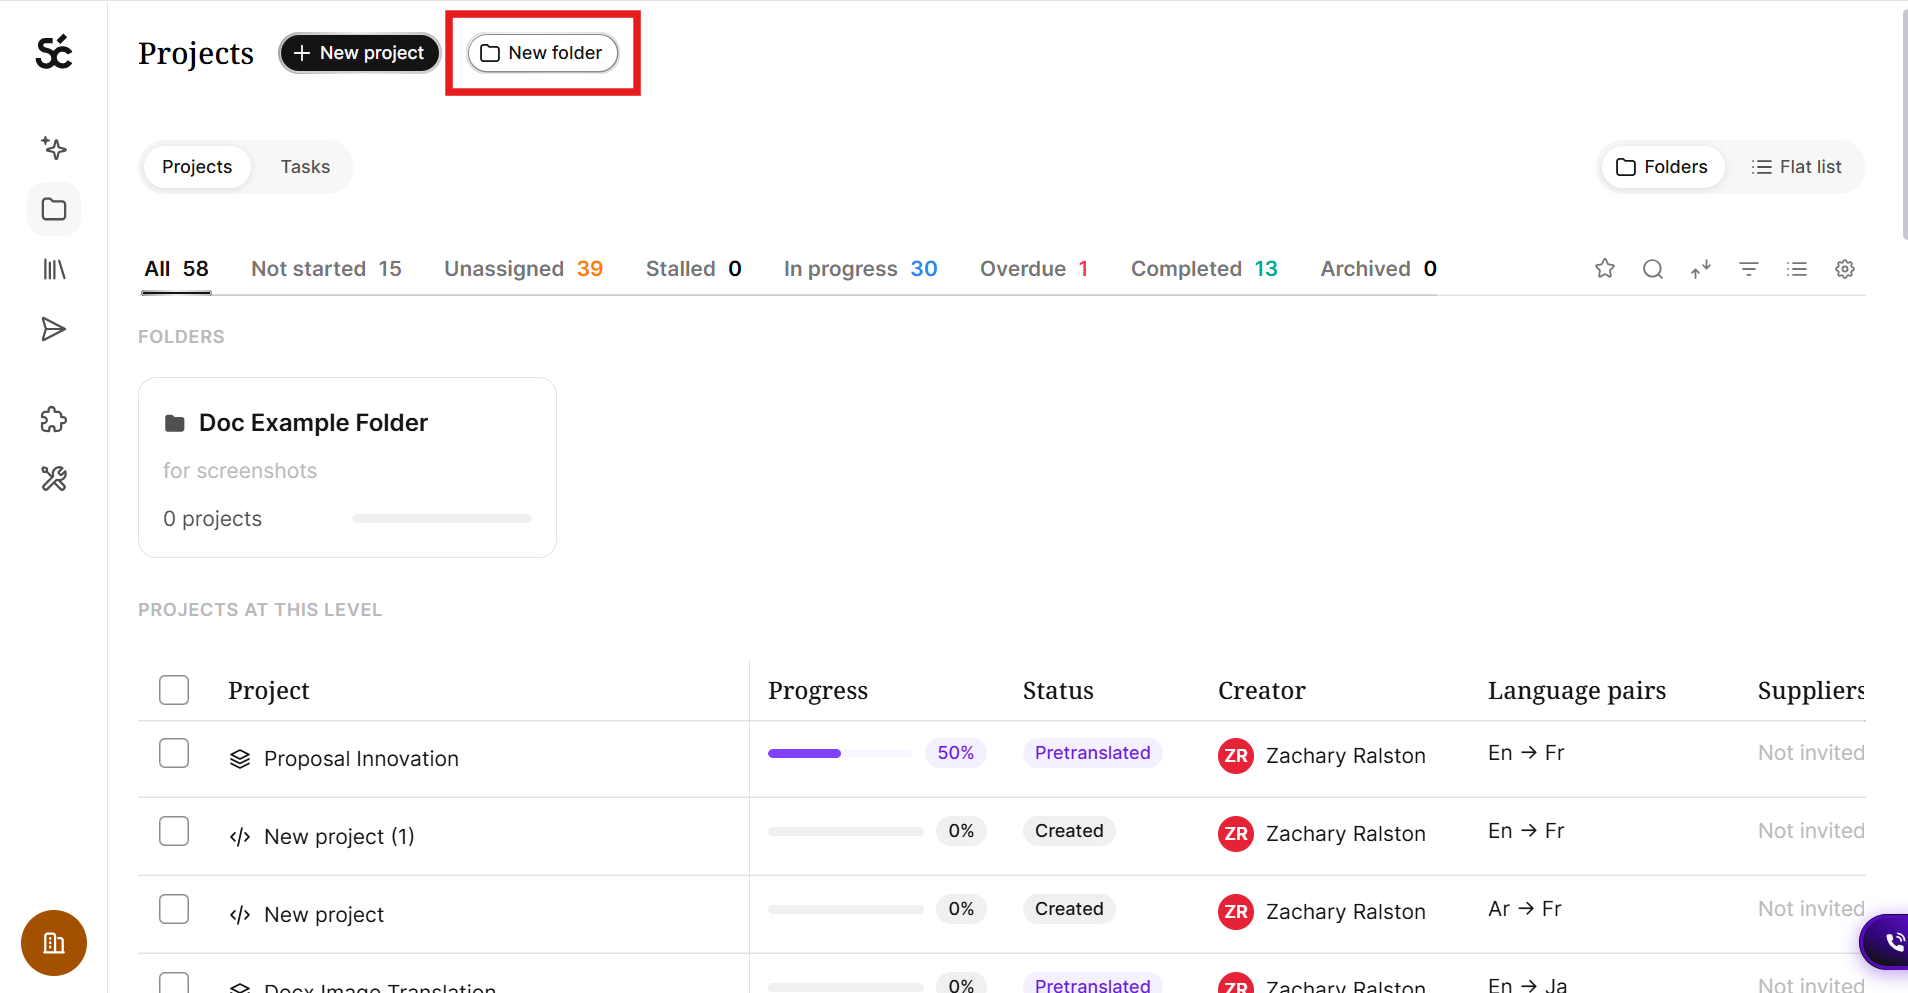
Project folders allow you to organize projects into a nested structure, rather than viewing all projects in one flat list.
To create a new project folder:
- Click New folder at the top of the Projects page
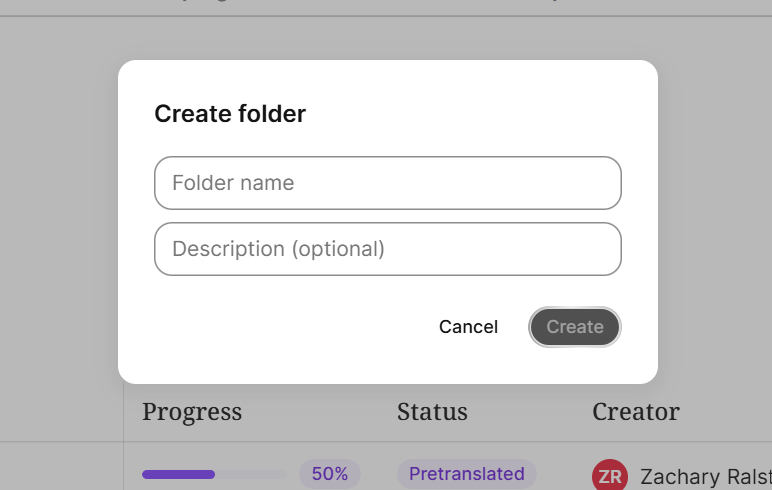
- Name the folder and provide a description (optional)
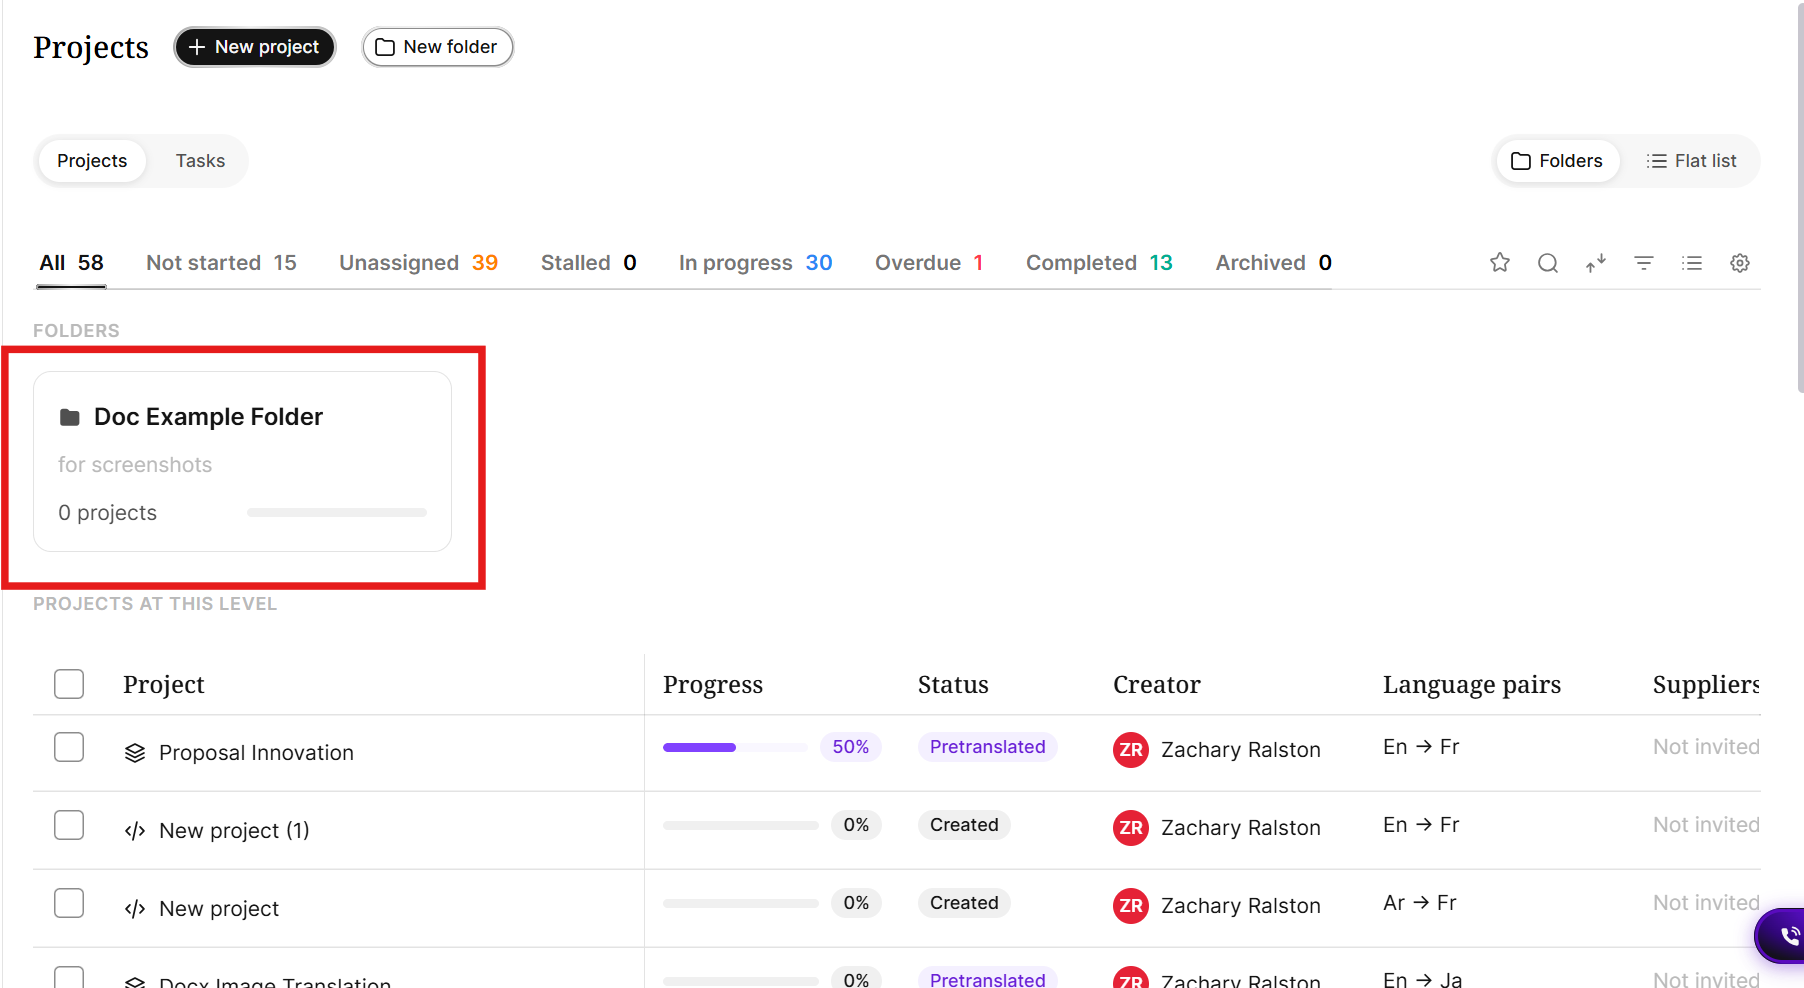
- Once created, click on a Folder card to view the contents of that folder
To delete a folder, click the three-dots icon next to the folder and select Delete. This moves all projects in the folder back to the top level.
The following operations are available for folders:
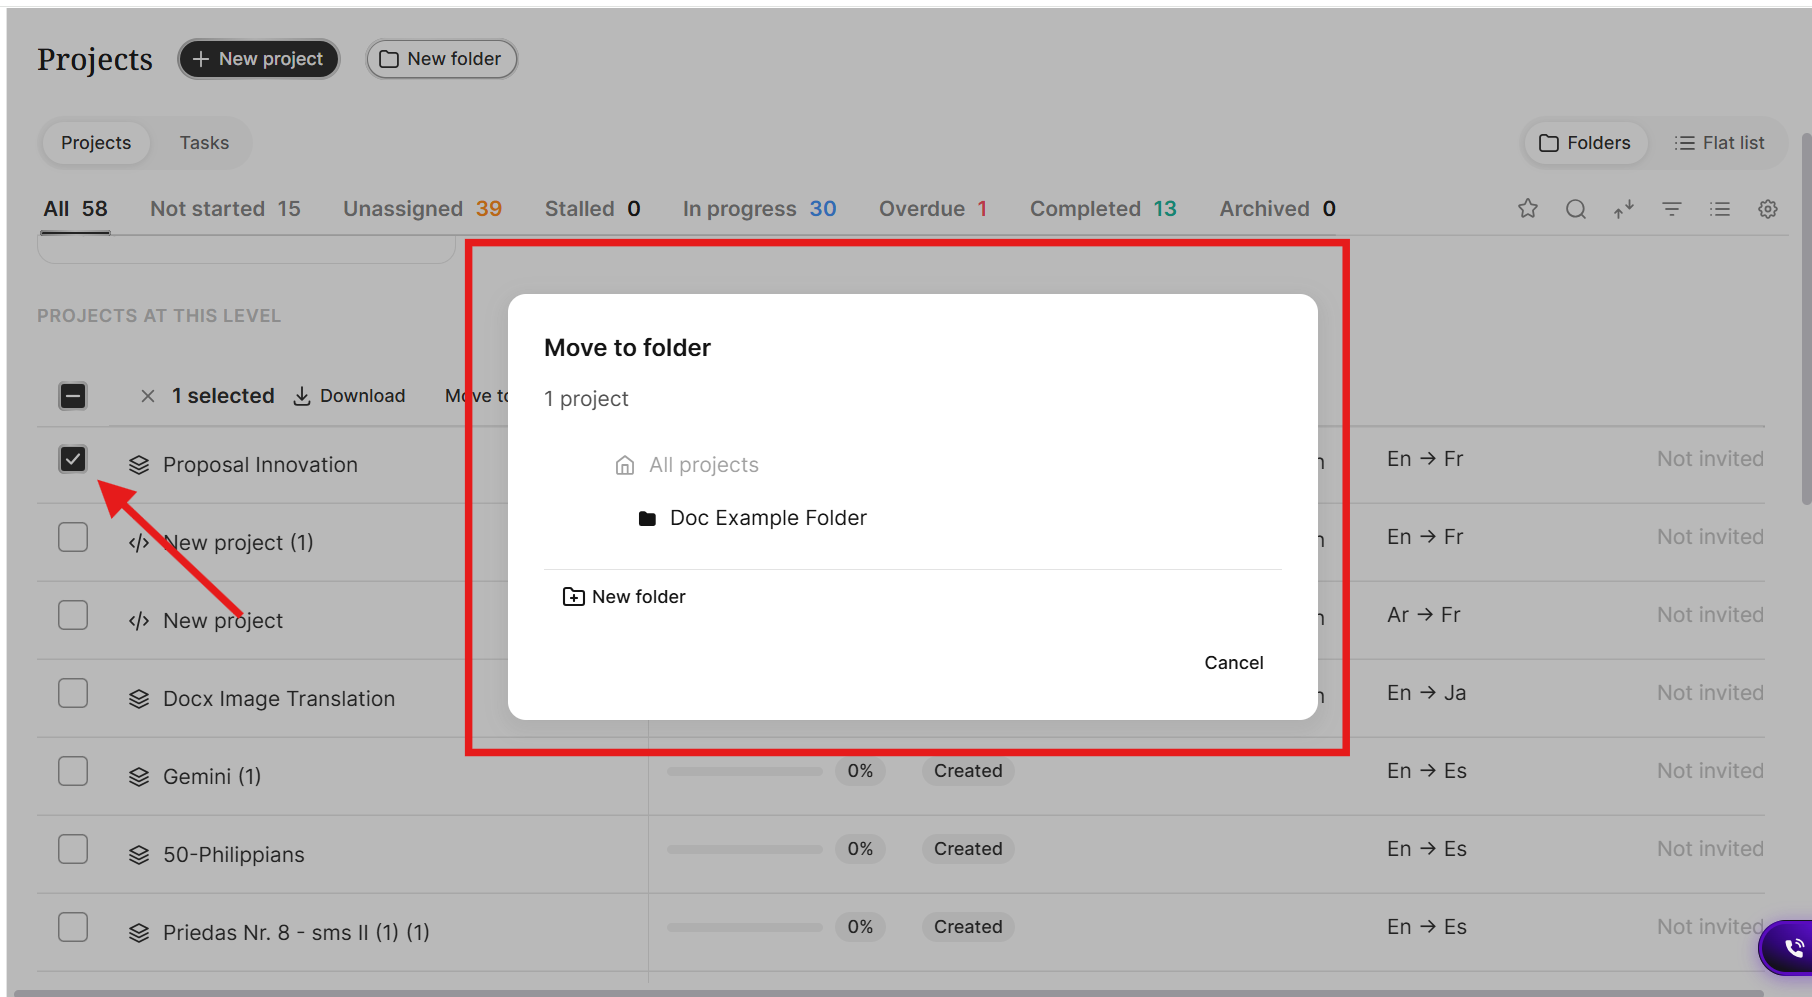
- Move projects — select a project from the project view and click Move to folder to move it into a folder of your choice. You can select multiple projects to move this way.
- Tab-aware metrics — the status tab in a folder displays the status for only projects in that folder
Switch to the Tasks view
-
Open the Project Manager Dashboard
-
Click Tasks in the switcher at the top of the dashboard — the view changes from the project list to a list of individual tasks across your workspace
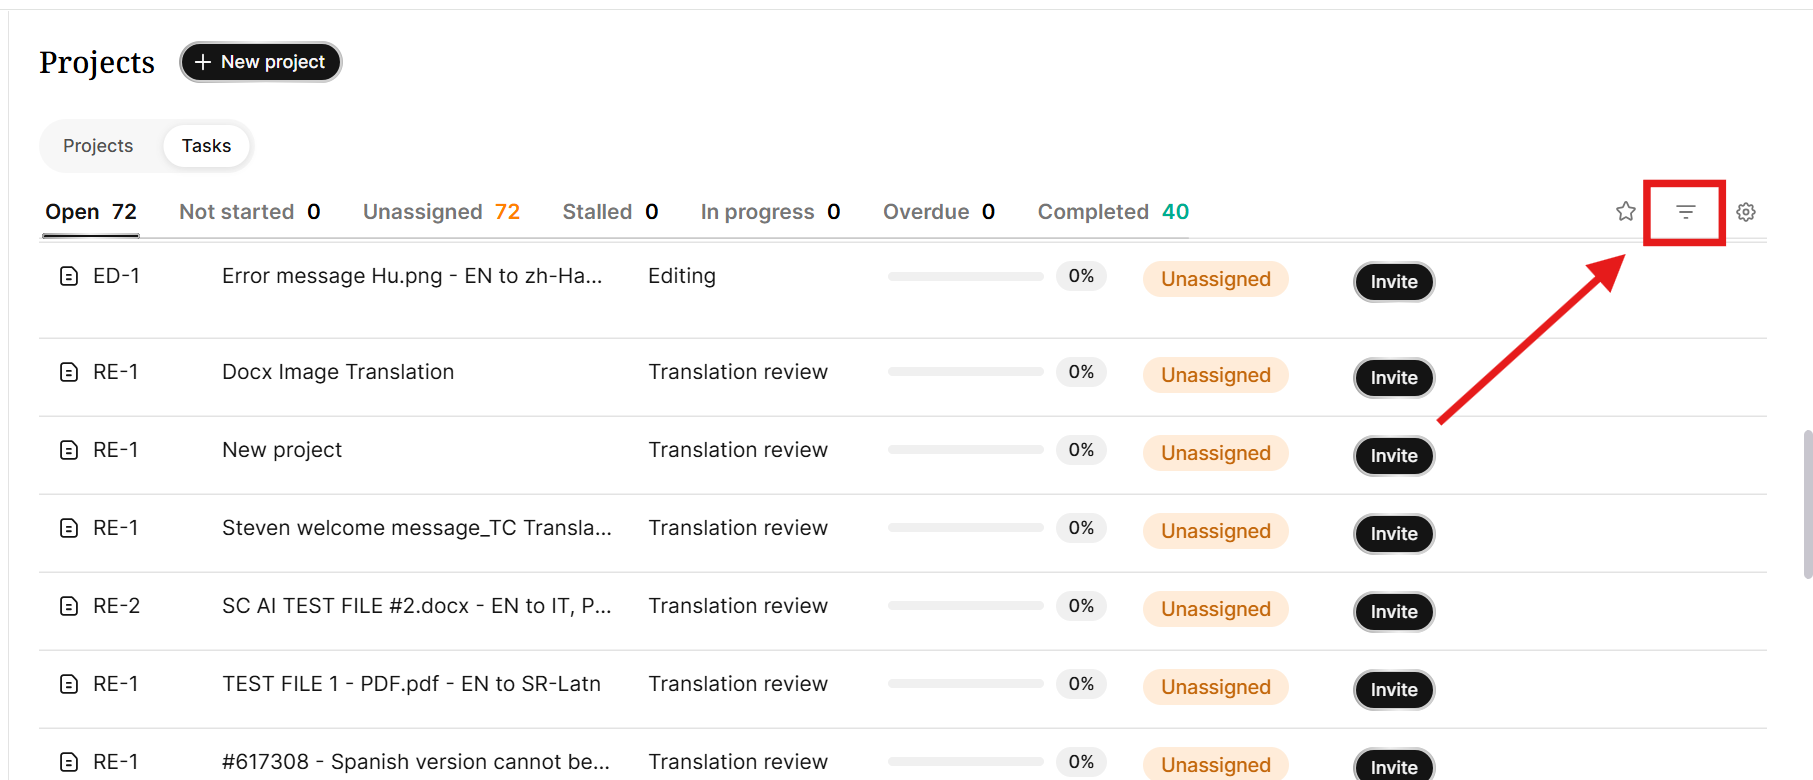
You are now viewing every task in your workspace instead of every project.
Read the task list
-
Click a status tab to narrow the list. The statuses are defined the same way as the project statuses described above.
-
(Optional) Use the filter controls to narrow the list to a single project or a single assignee — the filter button shows how many results match
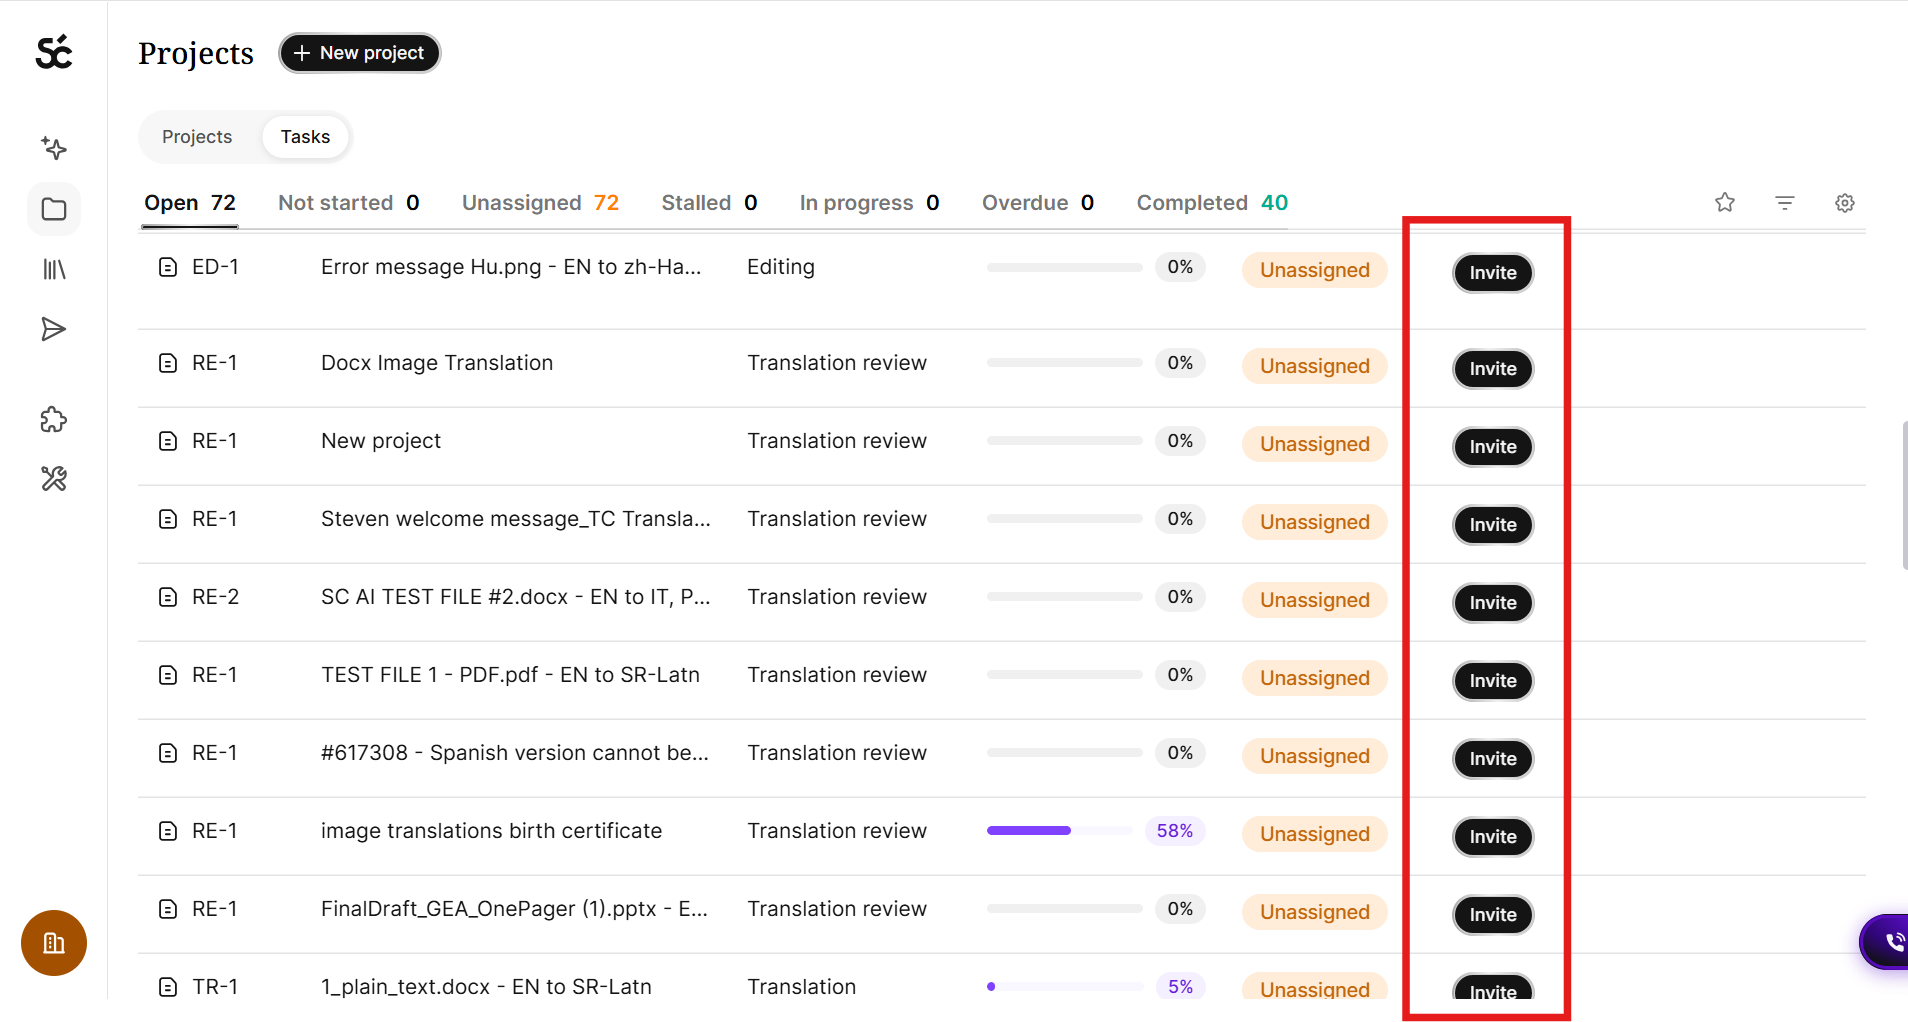
- Review each row for its Task, Project, Workflow stage, Progress, Status, Assignee, Deadline, Language pair, Files, and Volume left
💡 A task can only ever appear in one status tab, so the tab counts do not overlap.
Assign or invite a supplier from the task list
- Click the Invite button on any task row — the full supplier assignment flow opens without leaving the Tasks view
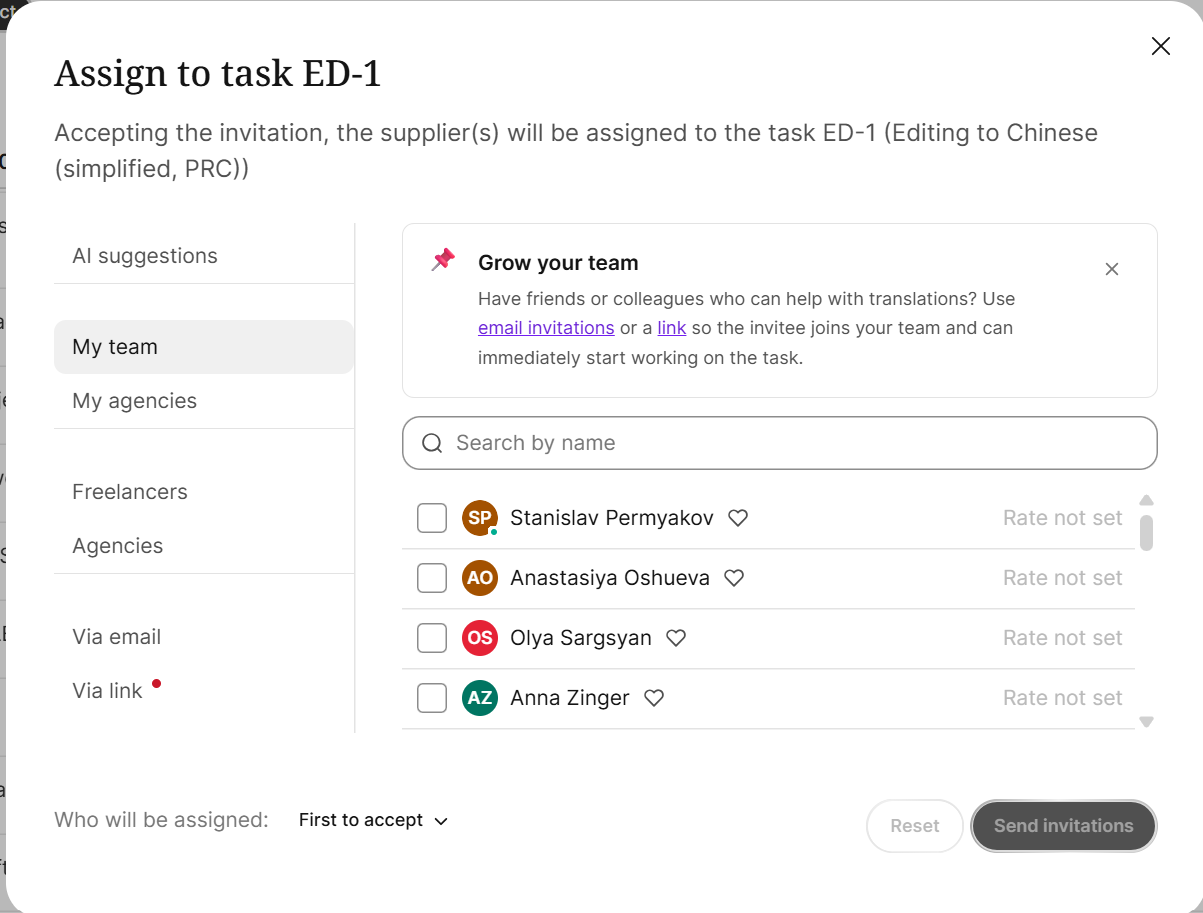
- Choose how to staff the task: select a freelancer, choose from my team, select an agency, or invite by email or invite by link
The task's assignee cell updates to reflect the new assignment or pending invitation.
Jump to a project's tasks from the Projects view
-
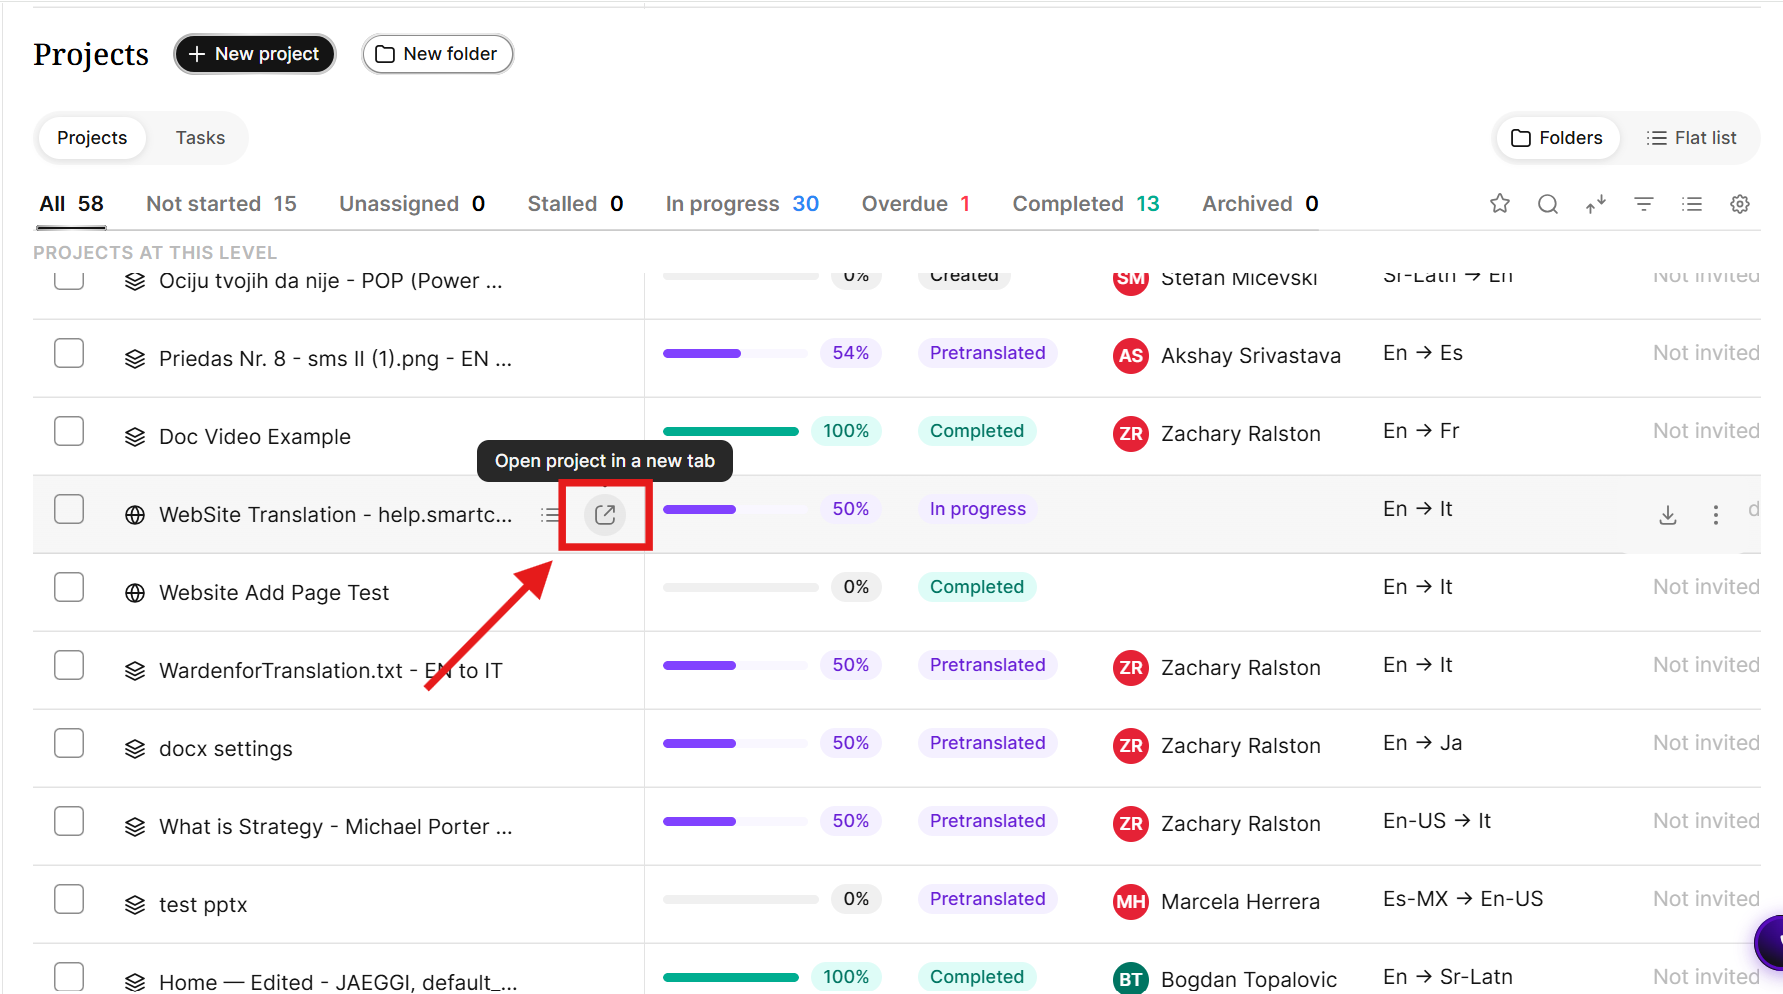
In the dashboard's Projects view, hover over a project row
-
Click Tasks for this project in the row's menu — the dashboard switches to the Tasks view, pre-filtered to that project
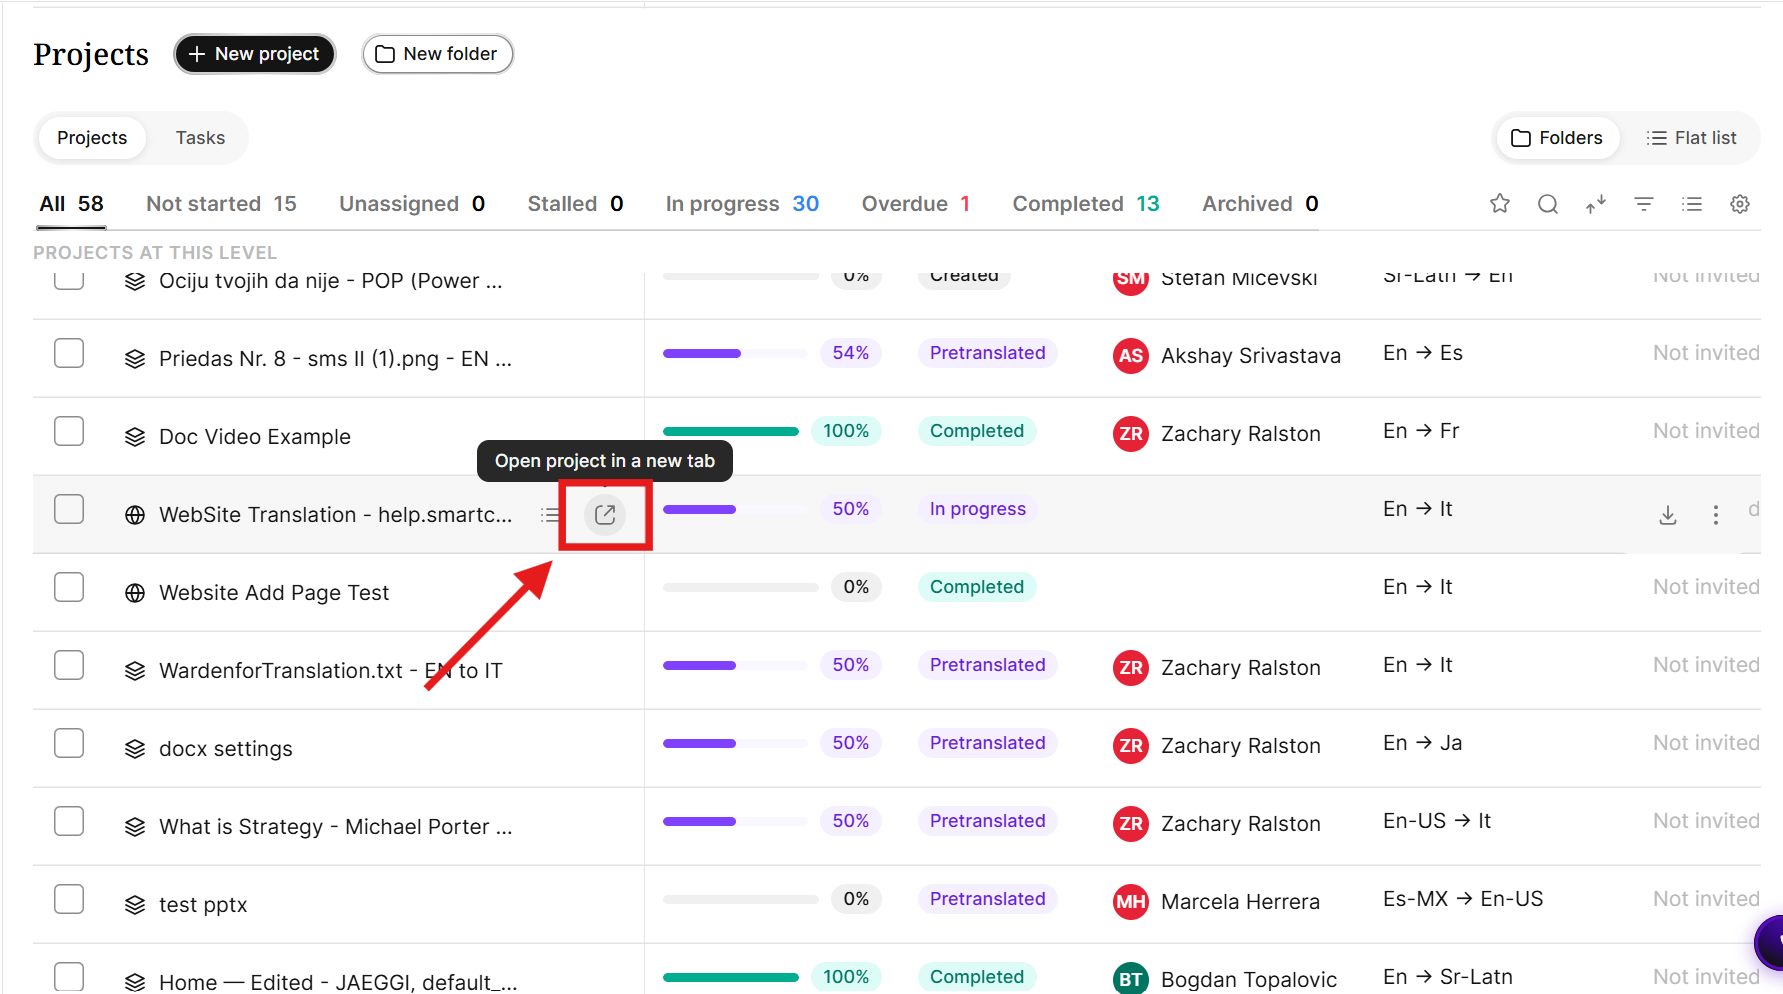
You see only the tasks that belong to the project you selected.
Filter the project and task lists
Use the project manager dashboard’s filter bar to sort your projects or tasks and display exactly what you need. The filter bar displays every filter you’re currently using and allows you to save and pin filters.
Click the Filter icon to display the filter bar.
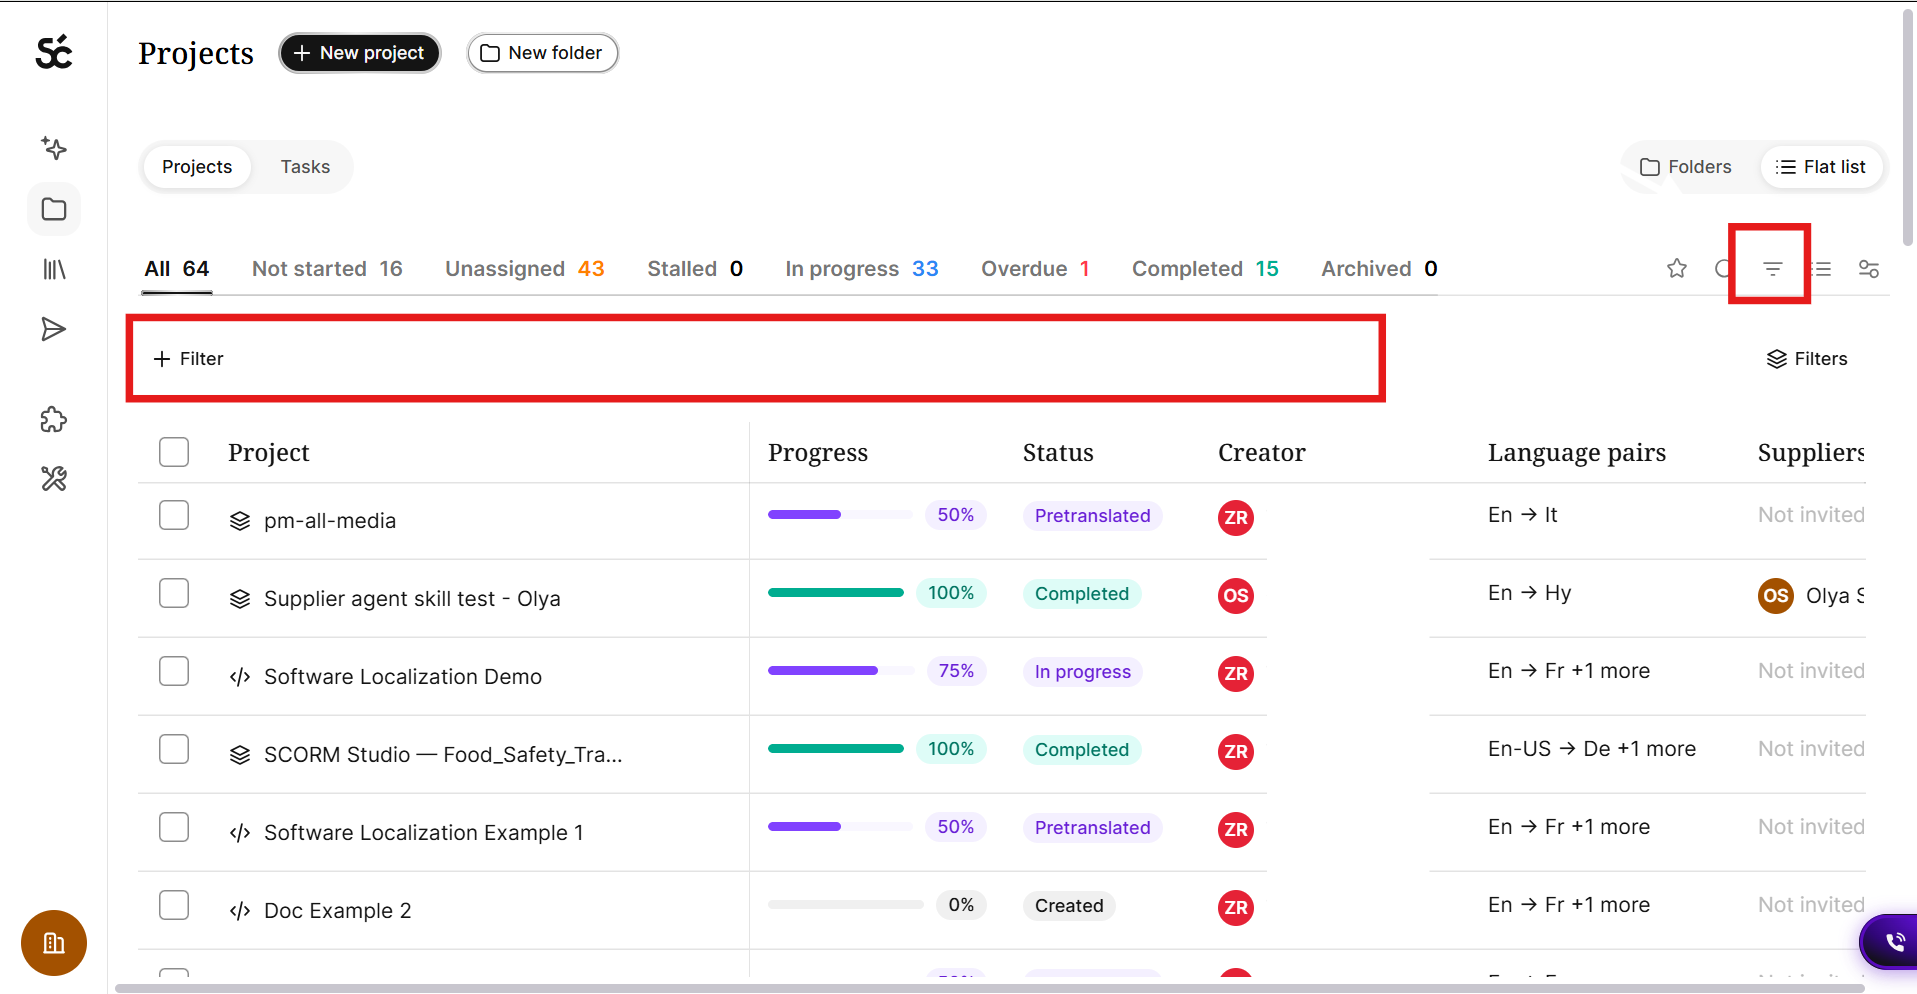
Filter types include:
-
Project type
-
Project number
-
Source language
-
Target language
-
Created
-
Deadline
-
Creator
-
Manager
-
Assigned to
Selecting any one of the filter types you can select the specific criteria by which to filter. For example, if you click Project type it displays the project types you can select.
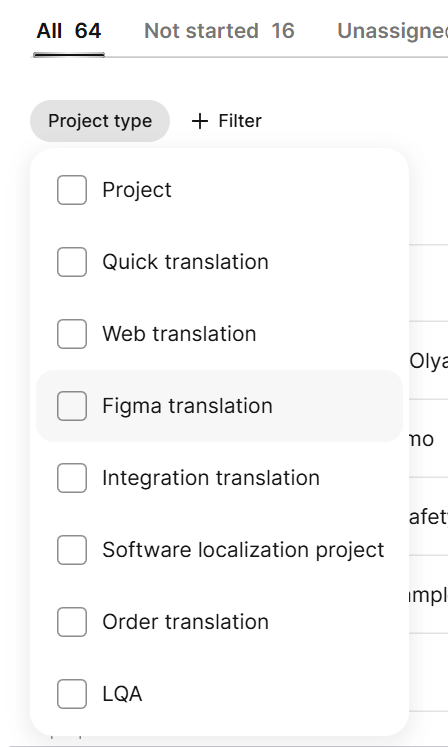
Once you have added filters to the list, click Save to store the filter under the Filters icon. You can select the saved filters to apply them.

Smartcat saves filters on a user-by-user basis and do not persist across different accounts. You can also re-order and show/hide columns; Smartcat also saves these settings on a user-by-user basis. If you want top share a filter, apply the filter and then copy the URL to share the filtered view with another user in your workspace.
Requirements and limitations
-
The stall window — how long a task can go without progress before it is marked Stalled — is set once for the whole workspace and applies to both the Tasks view and the Projects view; a workspace admin configures it from the dashboard settings (default 7 days, adjustable from 1–365 days)
-
A task counts as stalled based on its last recorded progress, not the last time someone opened or viewed it
-
A task that has never had any progress recorded shows as Not started, not Stalled
-
When a task matches more than one condition, it is shown under the higher-priority tab only, in this order: Overdue, then Stalled, then Unassigned
-
A task whose suppliers have been invited but have not yet accepted still appears under the Unassigned tab, because no one is actively working on it yet — see the FAQ below
FAQs
Why does a task show as "Invited" but still appear under the Unassigned tab?
Inviting a supplier is not the same as having one working on the task. The Tasks view shows the task's assignee as invited so you can see that outreach is in progress, but keeps the task under Unassigned until a supplier actually accepts the assignment. Once someone accepts, the task moves out of the Unassigned tab automatically.
How is "stalled" calculated, and can I change the threshold?
A task is marked Stalled when it has gone longer than your workspace's configured stall window without any recorded progress. A workspace admin can change this window in the dashboard settings; it applies workspace-wide.
Can a task be both Overdue and Stalled at the same time?
A task is only ever shown in one tab. If a task is both overdue and stalled, it appears under Overdue. If it is stalled and unassigned, it appears under Stalled.
Where do projects go when I move them out of a folder
To All projects — the top level, not inside any folder. In the move picker this is the first option (with a home icon).
Why does a folder’s status bar change when I switch tabs?
The bar shows the status make-up of the projects that match the active tab. On All it's the full composition (completed / in progress / other); on a single-status tab it collapses to that status; on Unassigned / Stalled / Overdue it reflects the real status split of the matching projects. A folder with nothing matching the current tab shows an empty bar.
A project contains multiple files, and I need to assign different files to different translators — how do I do that?
Open the project and go to the Files list. Select the checkboxes next to the specific file or files you want to hand to one translator. You can select across any language grouping the files are displayed under, either individually or using a group checkbox to select every file under one language at once. With those files selected, click Assign (or Assign tasks) in the toolbar, choose the translator and the workflow stage (e.g., Translation), and only the files you checked go into that assignment.
Repeat the same steps for the remaining files, selecting a different translator each time. This works whether you're setting up a brand-new project or adding files to an existing one later — there's no need to re-upload anything or split the work into separate projects.
Our project is organised into two folders (one per manual) with subfolders per section, but our translator says the folder structure is lost on her side and everything is one big list. Is something broken, and how should we structure assignments so linguists can tell the batches apart?
The folder and subfolder structure you build in a project's Files tab is a project-management organizational feature; it isn't carried over into the view a linguist or supplier sees once documents are assigned to them. Assigned work always appears to the linguist as a flat list of files with word counts, with no folder information, whether the invitation is still pending or already accepted.
A few things that can help with this limitation: send the linguist a short mapping of which folder covers which manual or section alongside the assignment; assign folder by folder rather than the whole project at once, so each invitation only contains the files for one section, each with its own deadline; build the structure into file names before upload so the flat list is self-describing on its own; and if the batches genuinely need to stay separate, consider setting them up as separate projects instead of folders within one project.
Want to learn more?
See how Smartcat can transform your localization workflow.
Still need help?
Our support team responds within one business day.