Translate AEM Guides content with the Smartcat plugin
Overview
This guide explains how to translate content in Adobe Experience Manager (AEM) Guides using the Smartcat plugin. Follow these steps to set up and run your translation workflow from within AEM Guides.
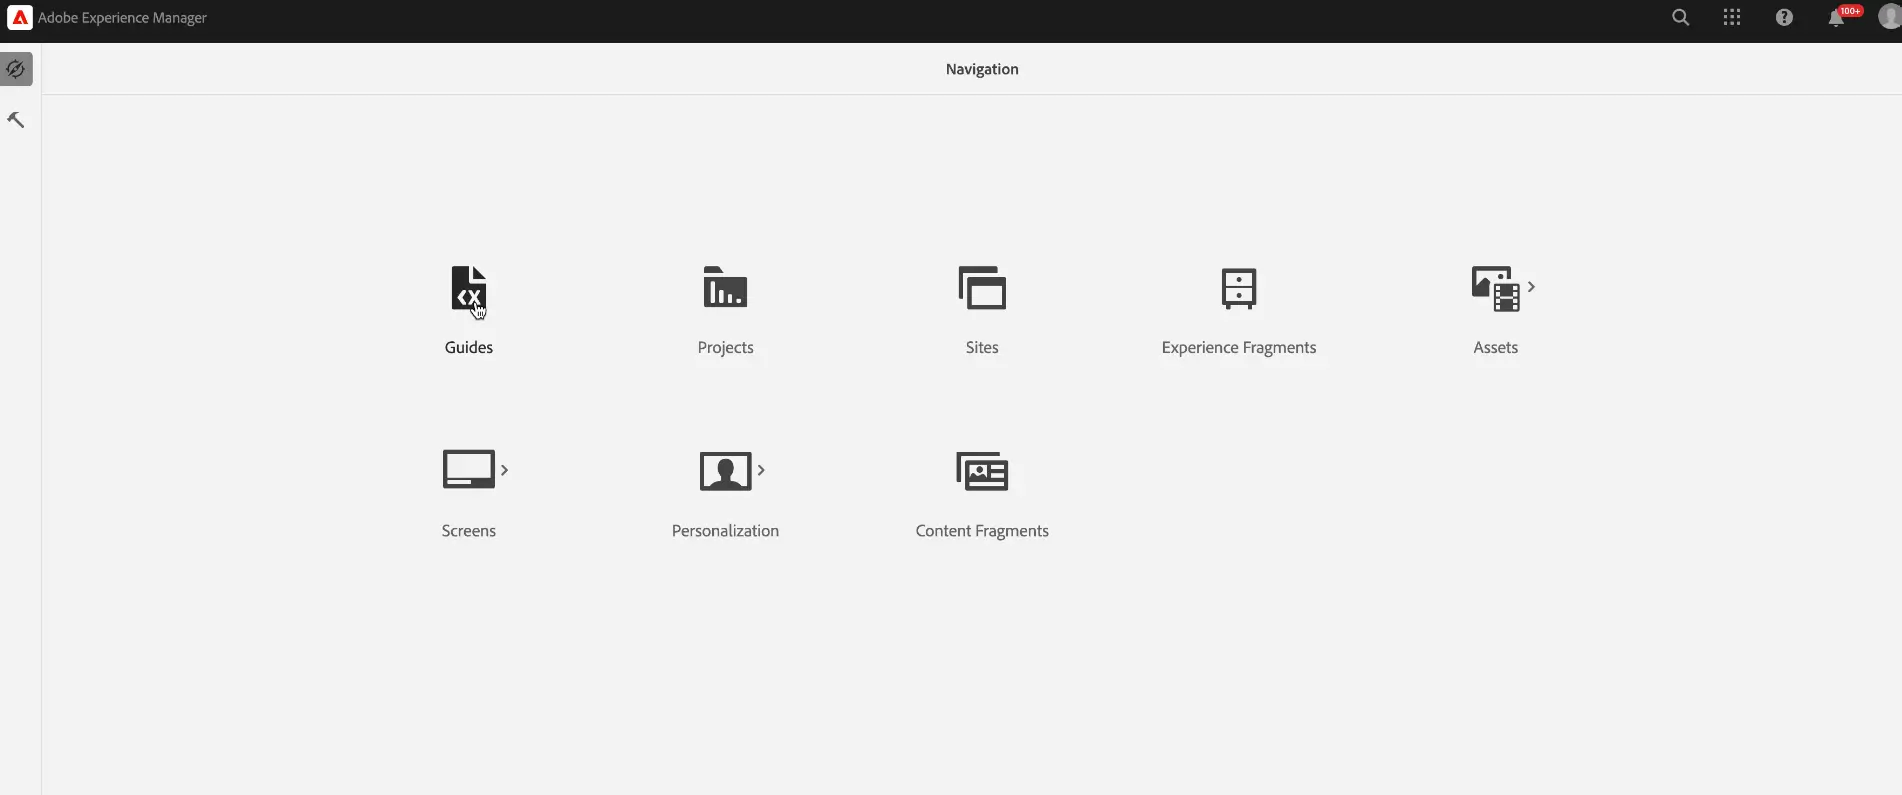
Open the AEM Guides admin panel
Go to the AEM Guides admin panel.
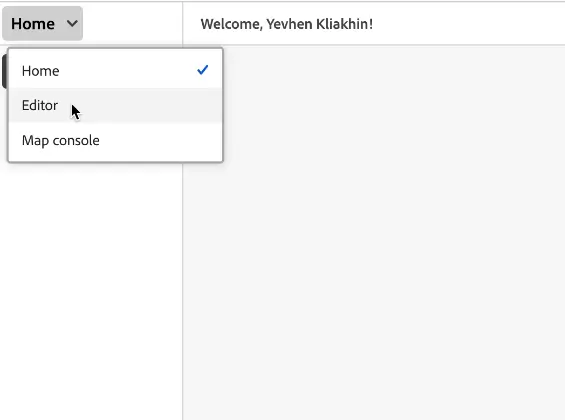
Select the map for translation
Select the Editor tab.
Go to the Repository tab
-
In the folder list, select the map you want to translate
-
Click the three-dot icon next to the selected map
-
Choose Open in Map Console from the dropdown menu
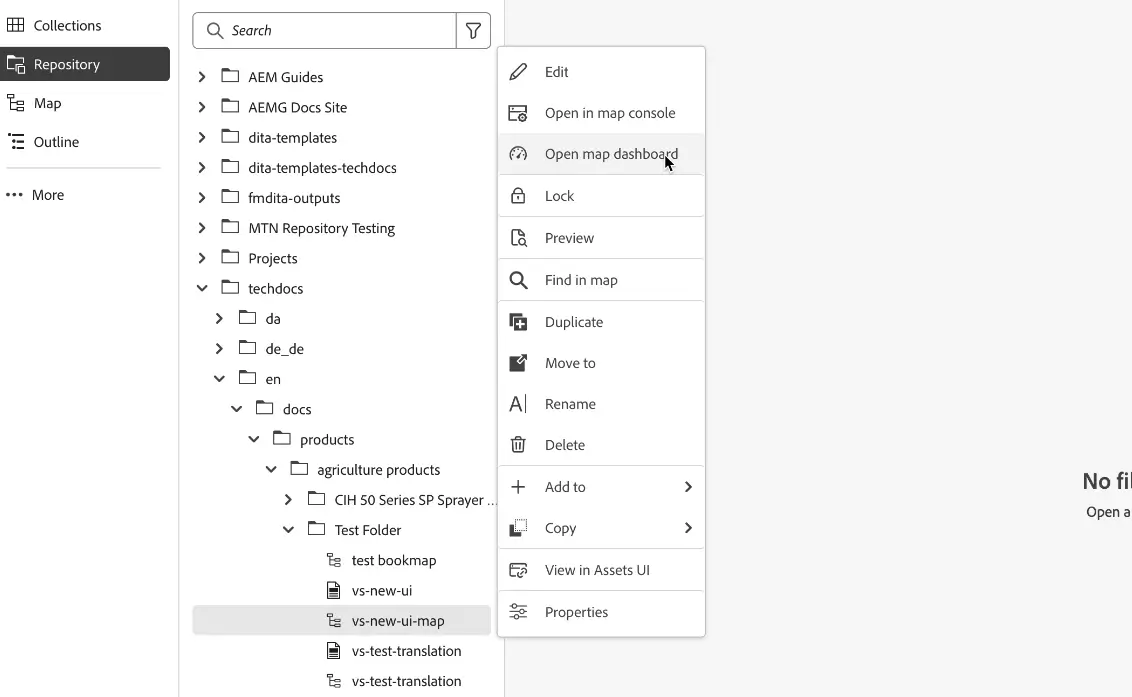
The selected map opens in the Map Console.
Select translation and set the language
-
In the left-hand sidebar, select Translation
-
Specify the Translation Language
-
Choose your target translation language in the right tab
-
Apply your choice
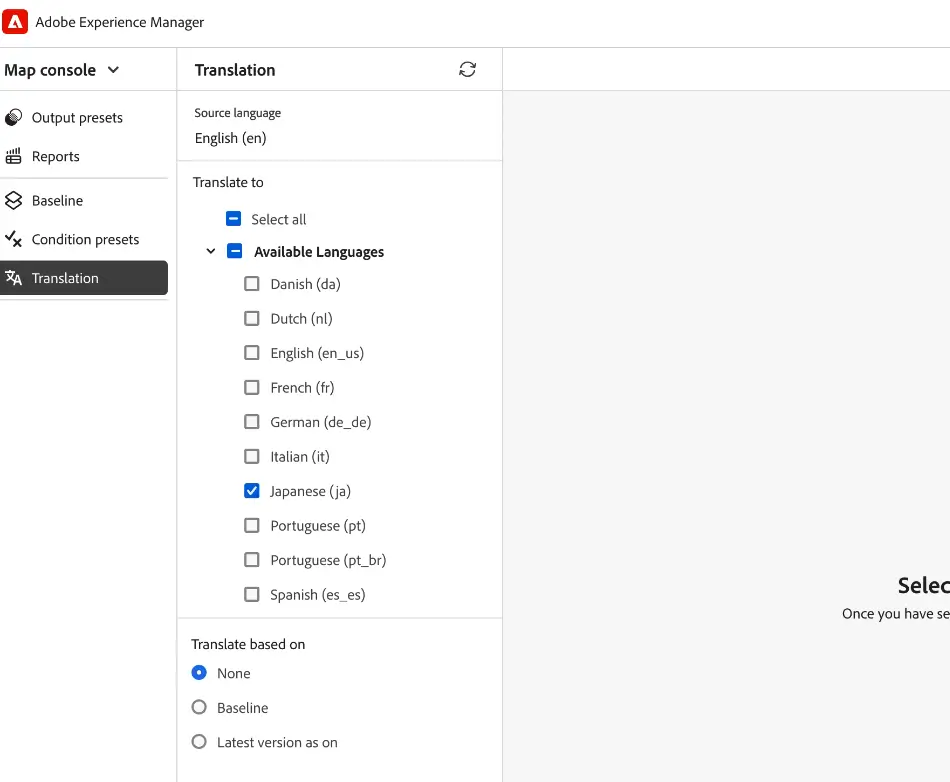
Your target language is now set for the translation.
Select files for translation
-
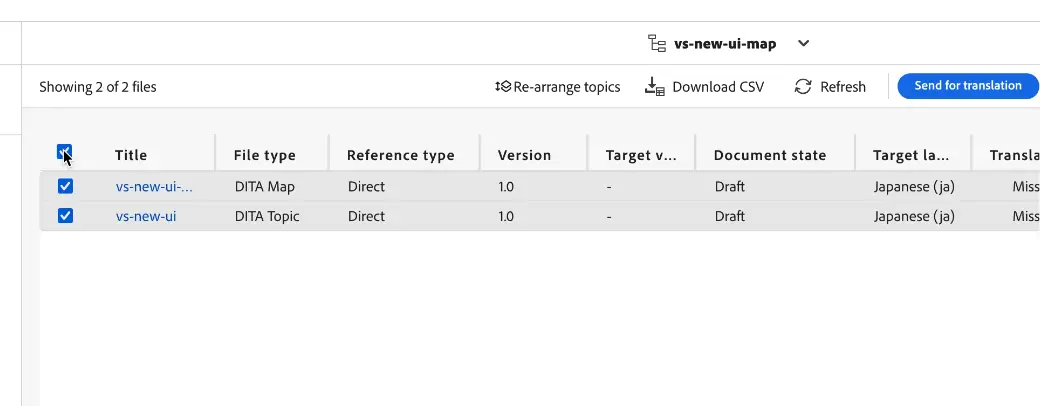
On the next screen, select the files that need to be translated
-
Click Send to Translation
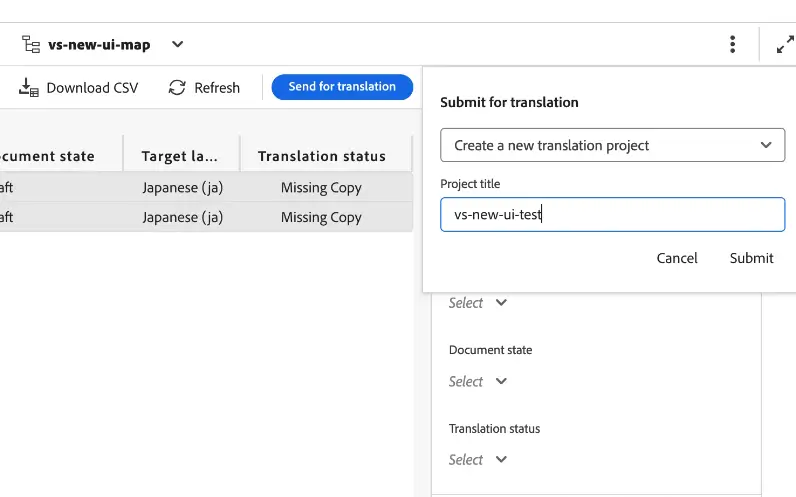
Create a translation project
In the pop-out panel on the right, enter a title for your translation project.
Monitor translation progress
-
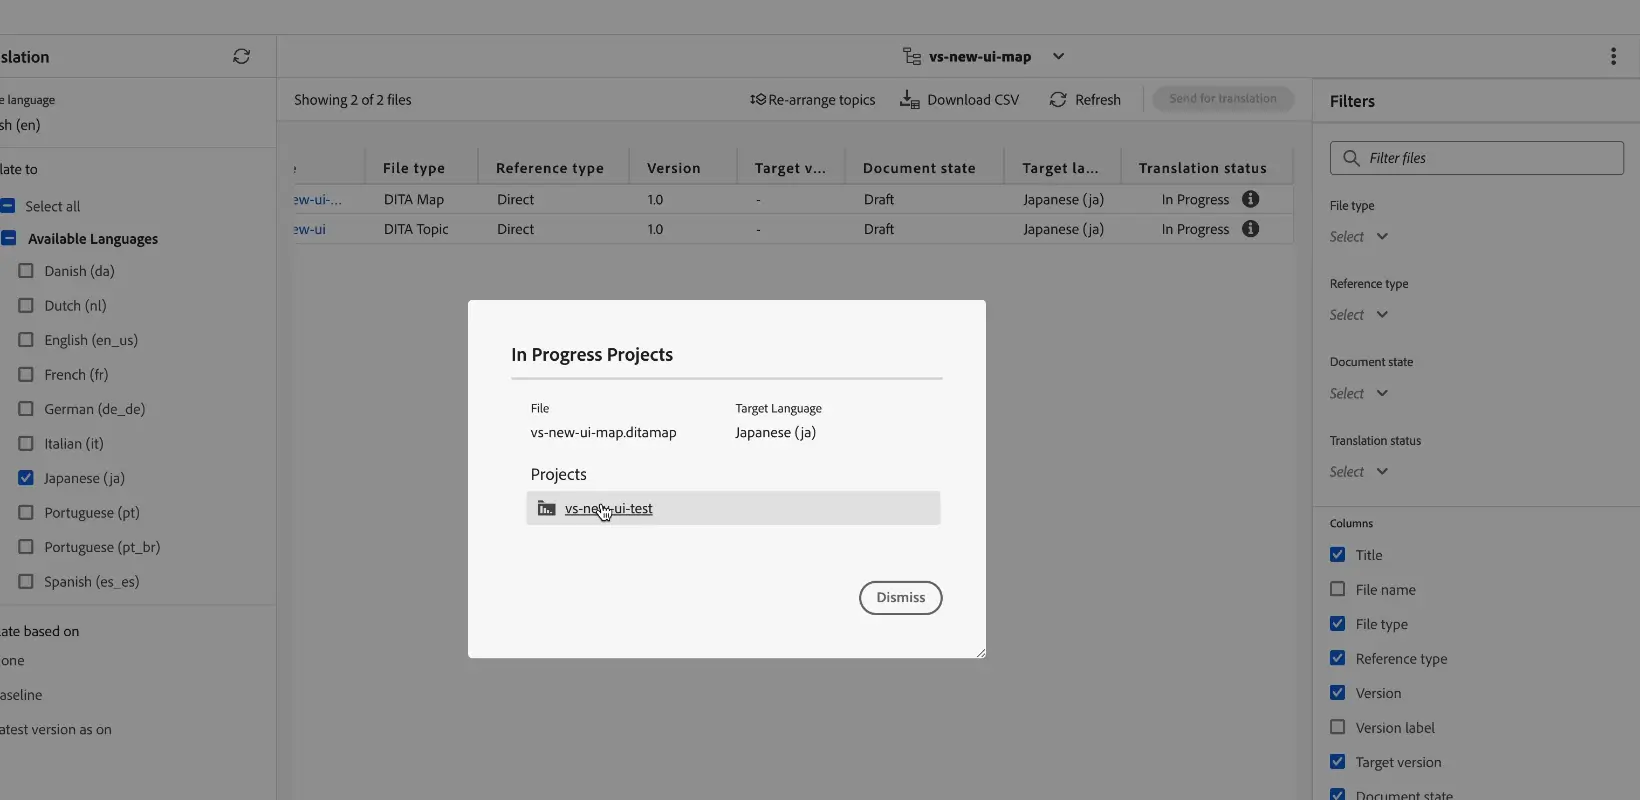
Click Refresh on the top bar
-
Once refreshed, click through the In Progress status
-
In the pop-out window, go to the translation project by clicking its title
The translation project opens so you can track its progress.
Review translated files
-
On the translation project screen, check the status of the translation
-
View the files sent for translation
-
Review the translated files to make sure all segments are correctly translated
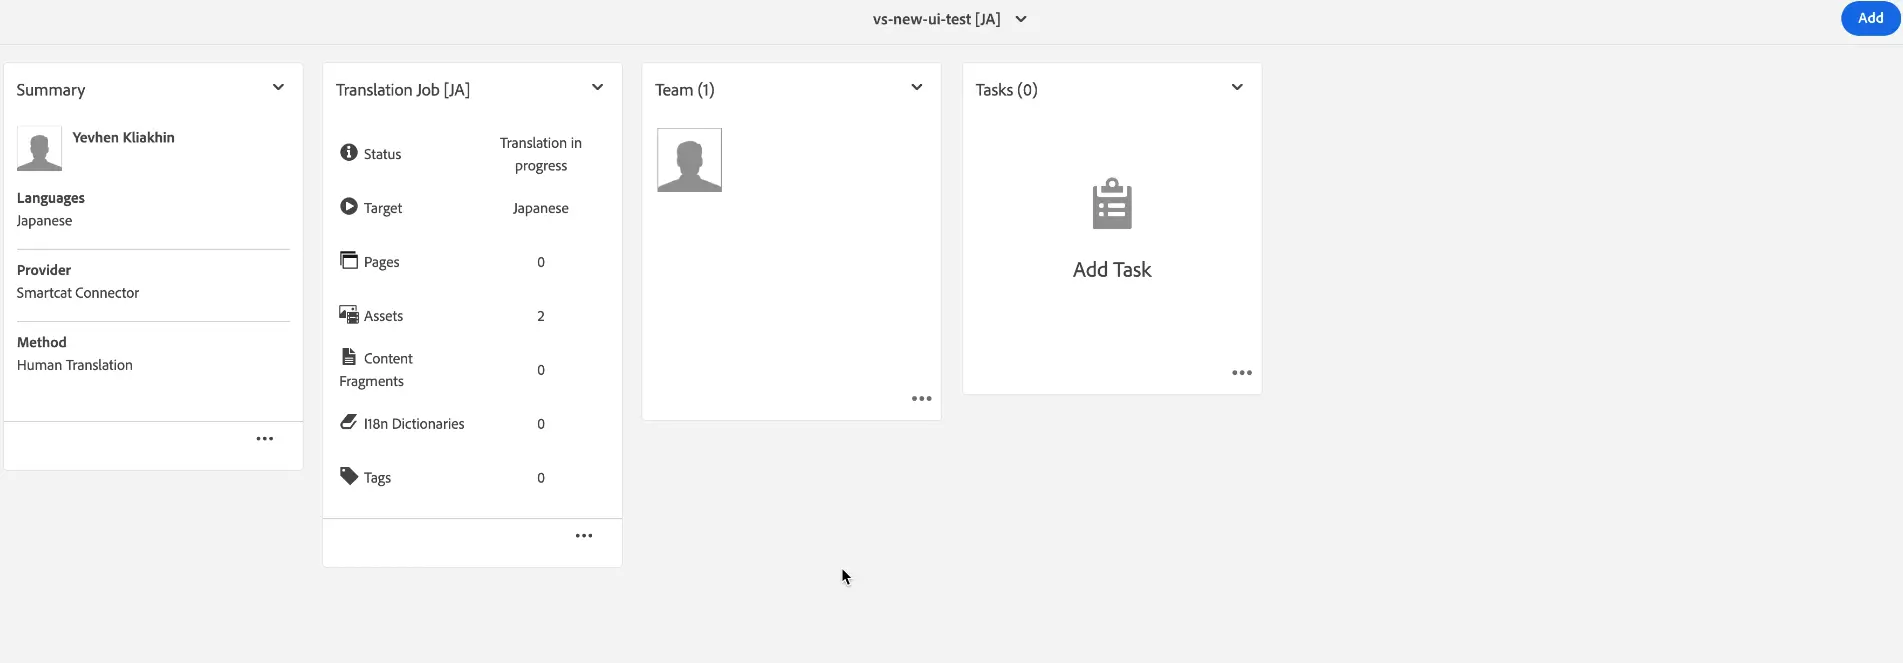
Your AEM Guides content is now translated and ready for review.
FAQs
Where do I start a translation job for AEM Guides content?
In the AEM Guides admin panel, under the Editor tab, select the map you want to translate, open it in the Map Console via the three-dot menu, then set the target language under Translation settings.
Can I select individual files within a map to translate, rather than the whole map?
Yes — after setting the translation language, you're shown a file selection screen where you choose specific files before clicking "Send to Translation."
How do I check on the progress of a translation job?
Click Refresh on the top bar of the Map Console; once the status shows "In Progress," click through to open the translation project and track it in more detail.
What happens once translation is done?
You review the translated files directly in the translation project screen to confirm all segments were translated correctly before the content is considered ready.
Want to learn more?
See how Smartcat can transform your localization workflow.
Still need help?
Our support team responds within one business day.