Set up and use the Smartcat Paligo integration
Overview
This guide walks you through setting up and using the Smartcat Paligo integration to manage and translate your content in Paligo.
Prerequisites
Before you set up the Smartcat Paligo integration, collect the following parameters:
-
Paligo Base URL
-
Paligo Username
-
API Key
Paligo Base URL
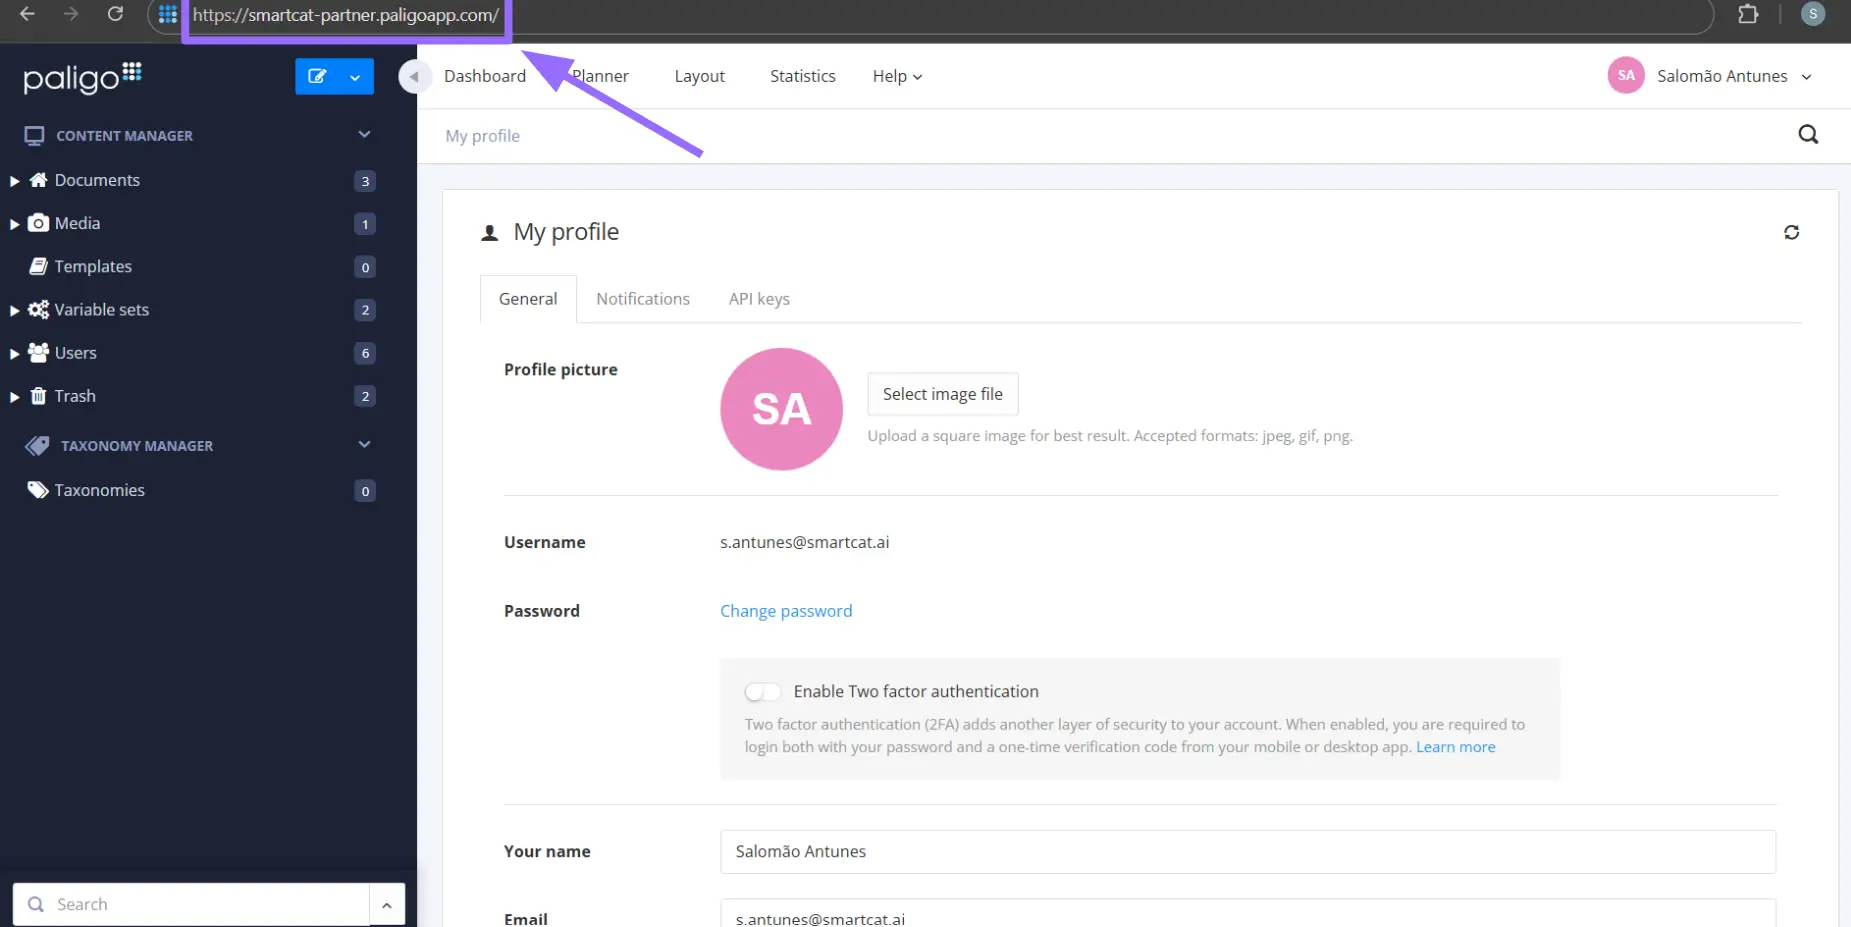
In your browser's address bar you find the Base URL for your Paligo account (for example, https://company-name.paligoapp.com/).
Paligo Username
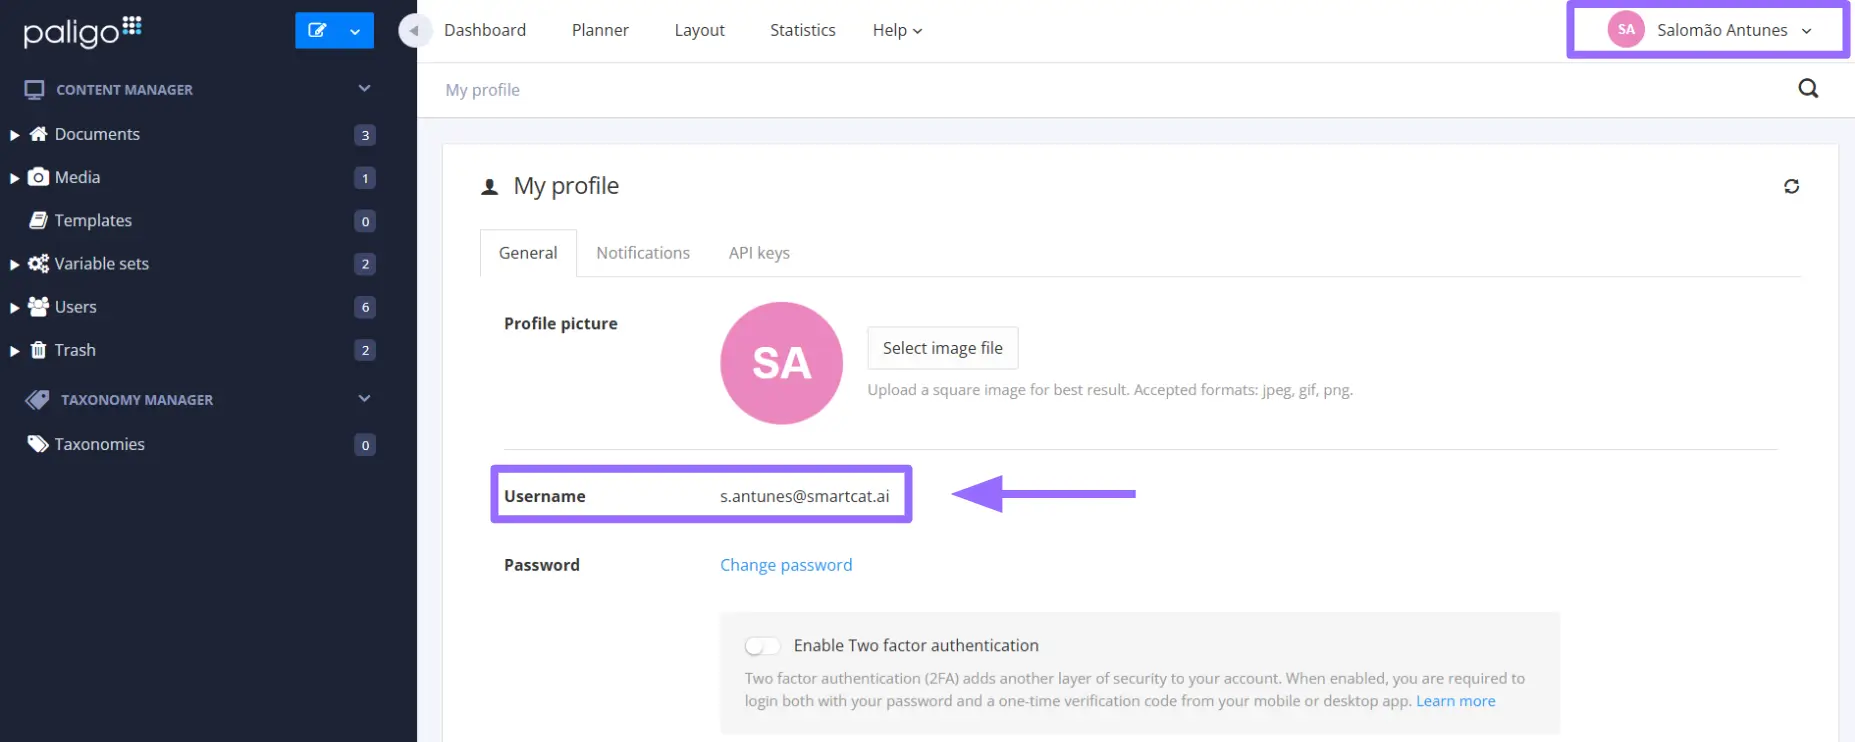
In your Paligo profile, you find your Username.
API Key
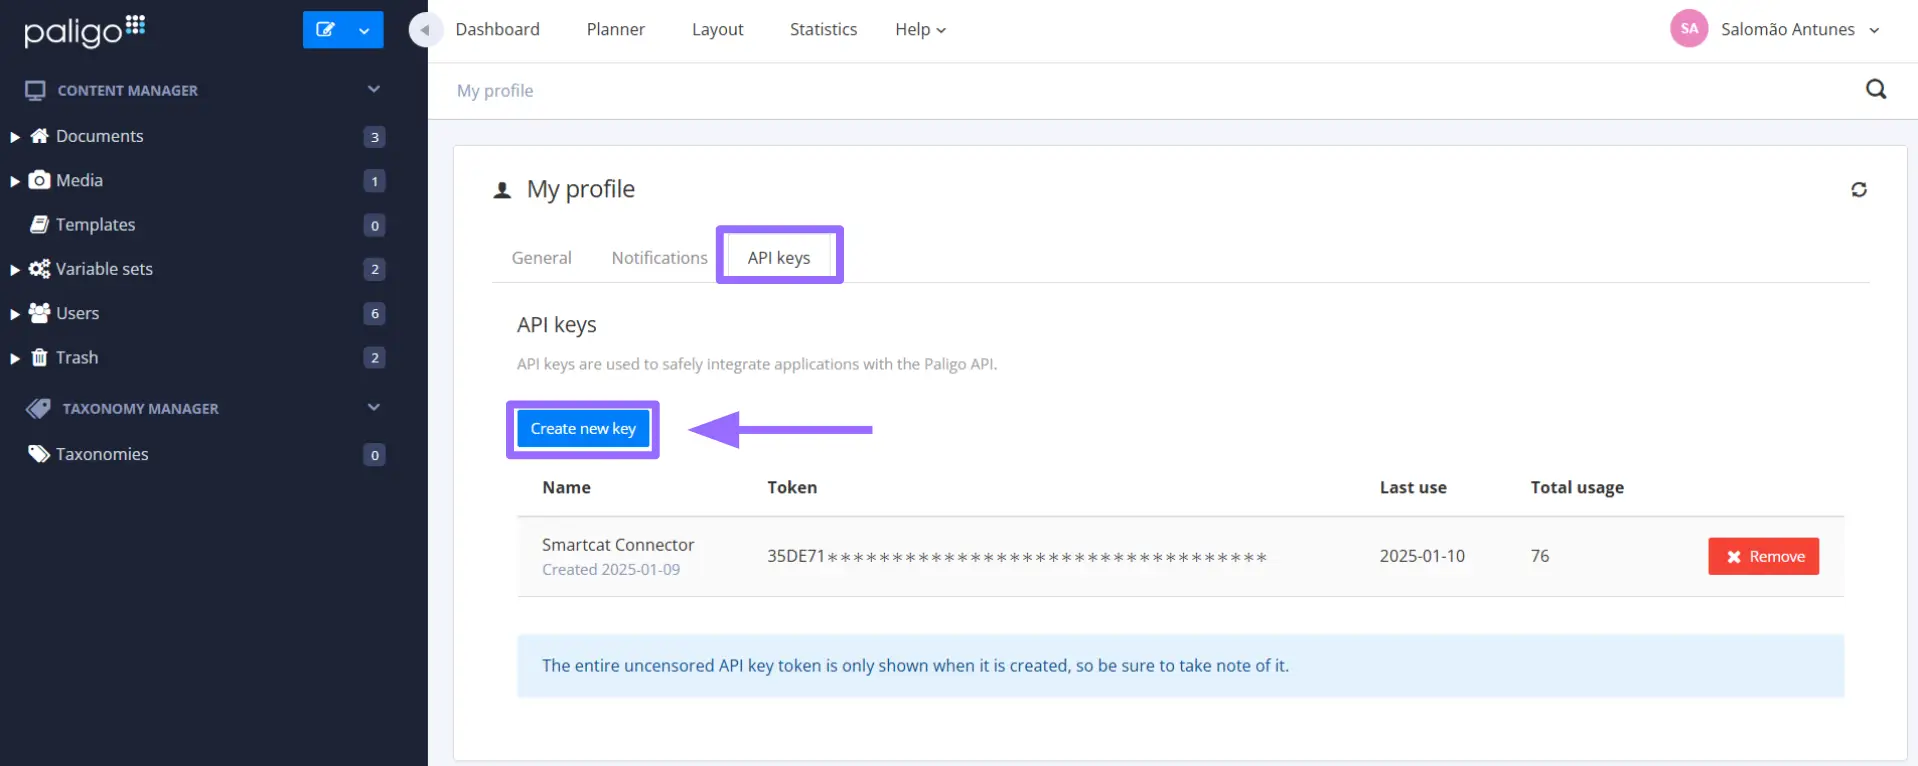
You can create an API Key by going to your profile and then to API Keys. There you find a Create new key button.
Configuring the integration
-
In your Smartcat account, go to Integrations → Add new integration
-
Look for Paligo and click Set up integration
-
Name the integration and provide your Paligo Base URL, Paligo Username, and API Key
-
Choose whether to list all content from your Paligo account or only what is marked as In Translation
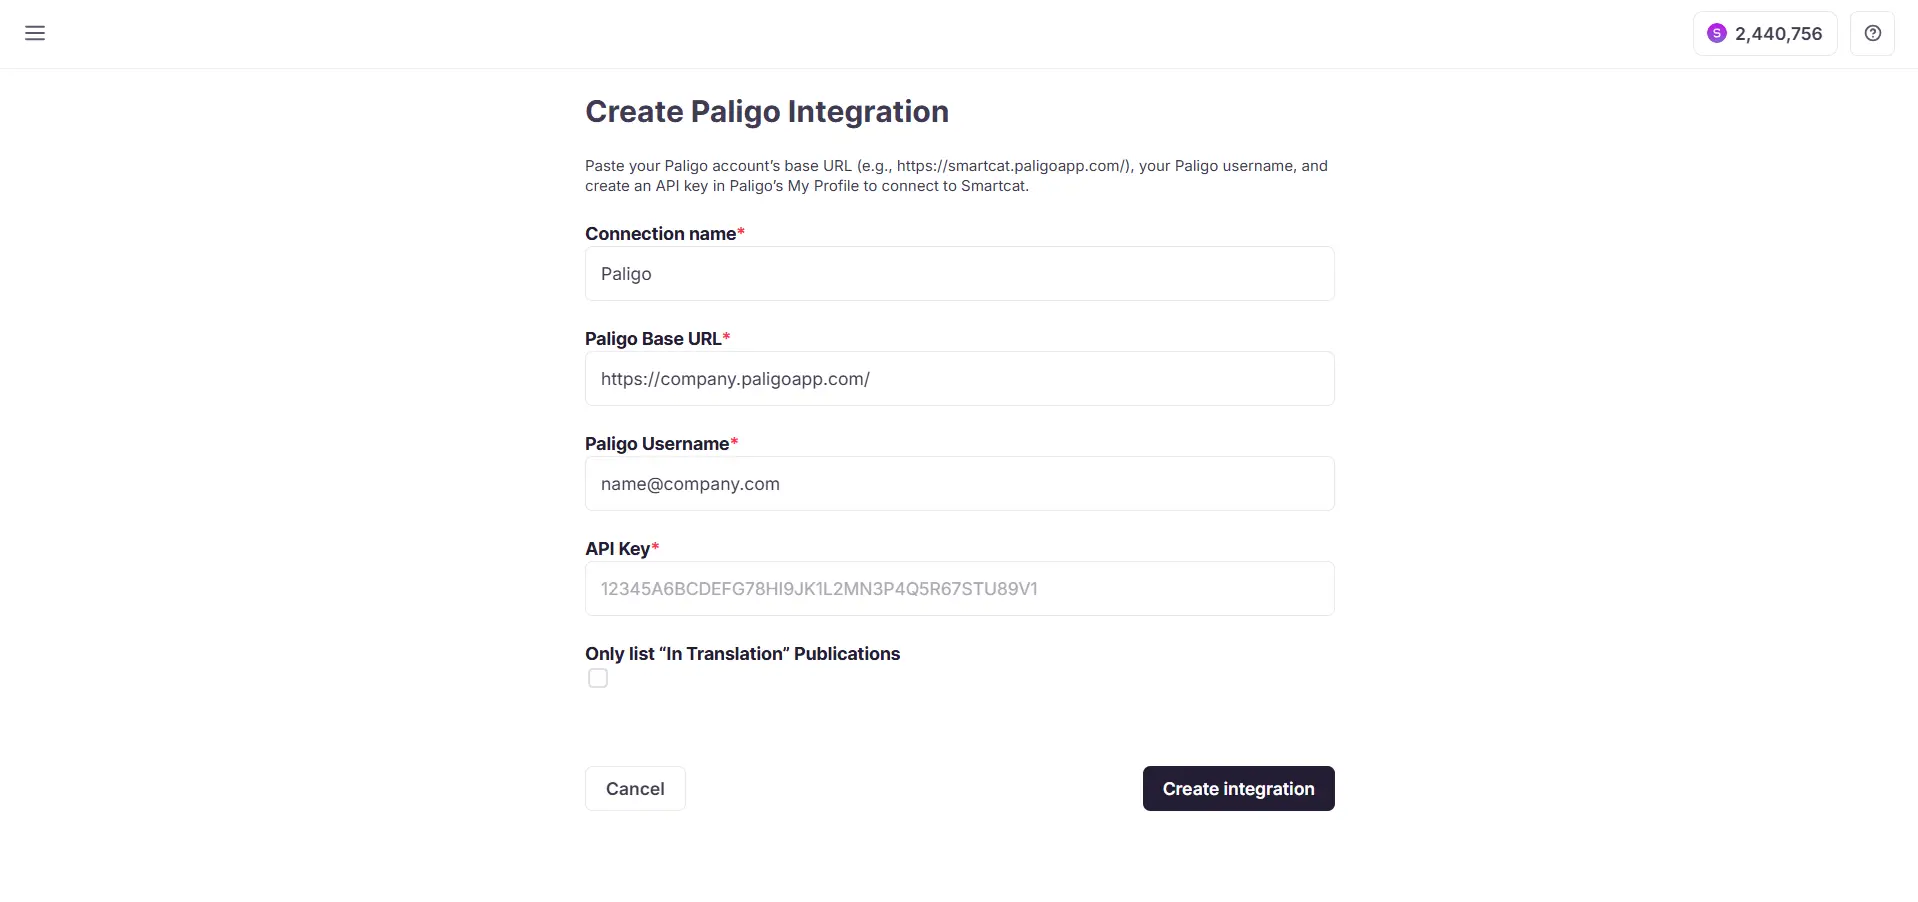
The Paligo integration is now configured and ready to use.
Using the integration
-
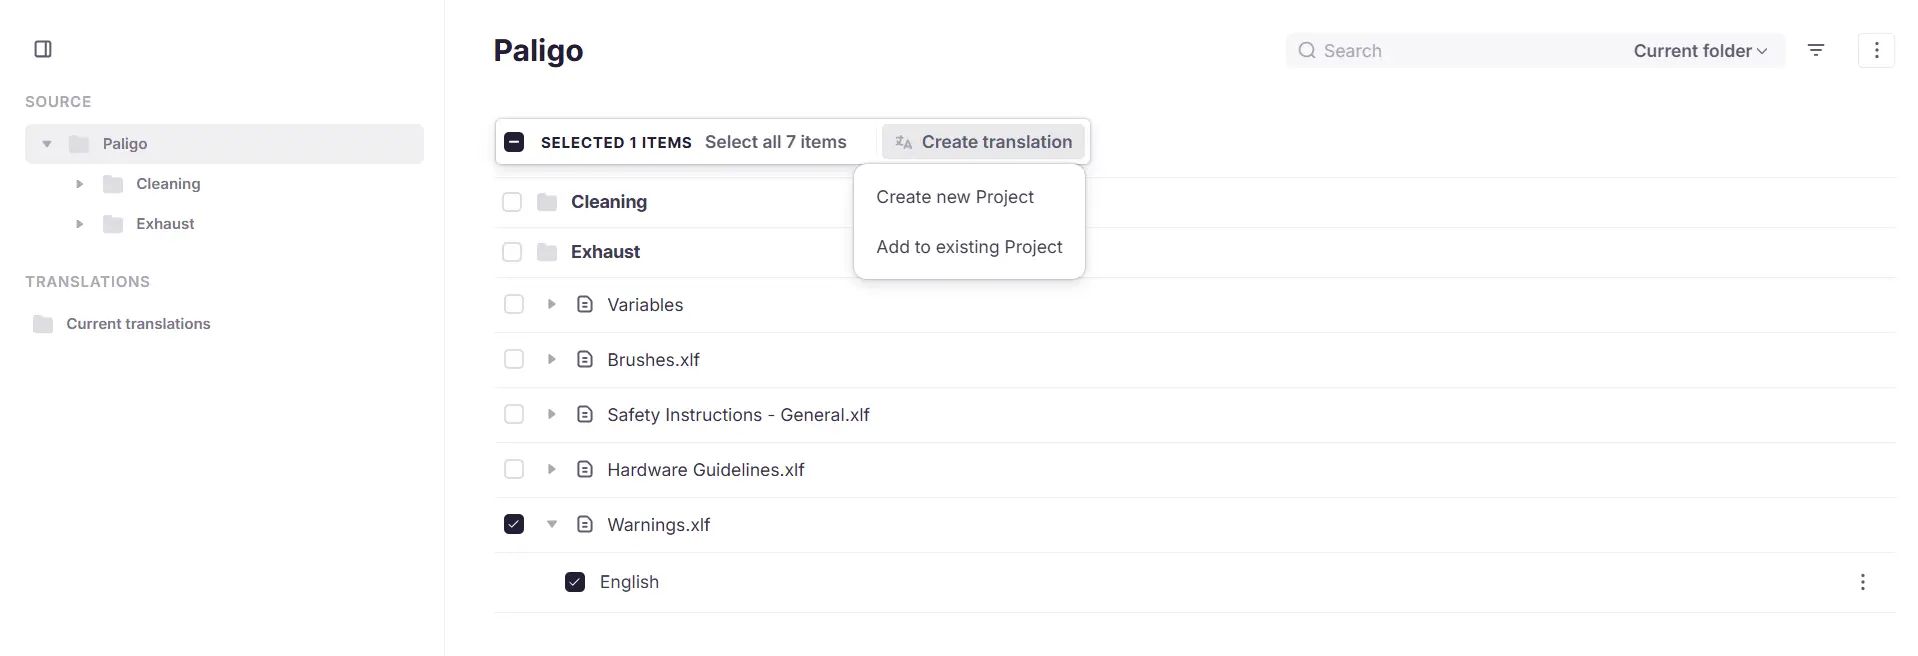
To start the translation process, select your content and click Create translation
-
Select whether you want to create a new project in Smartcat or upload a file to an existing project
-
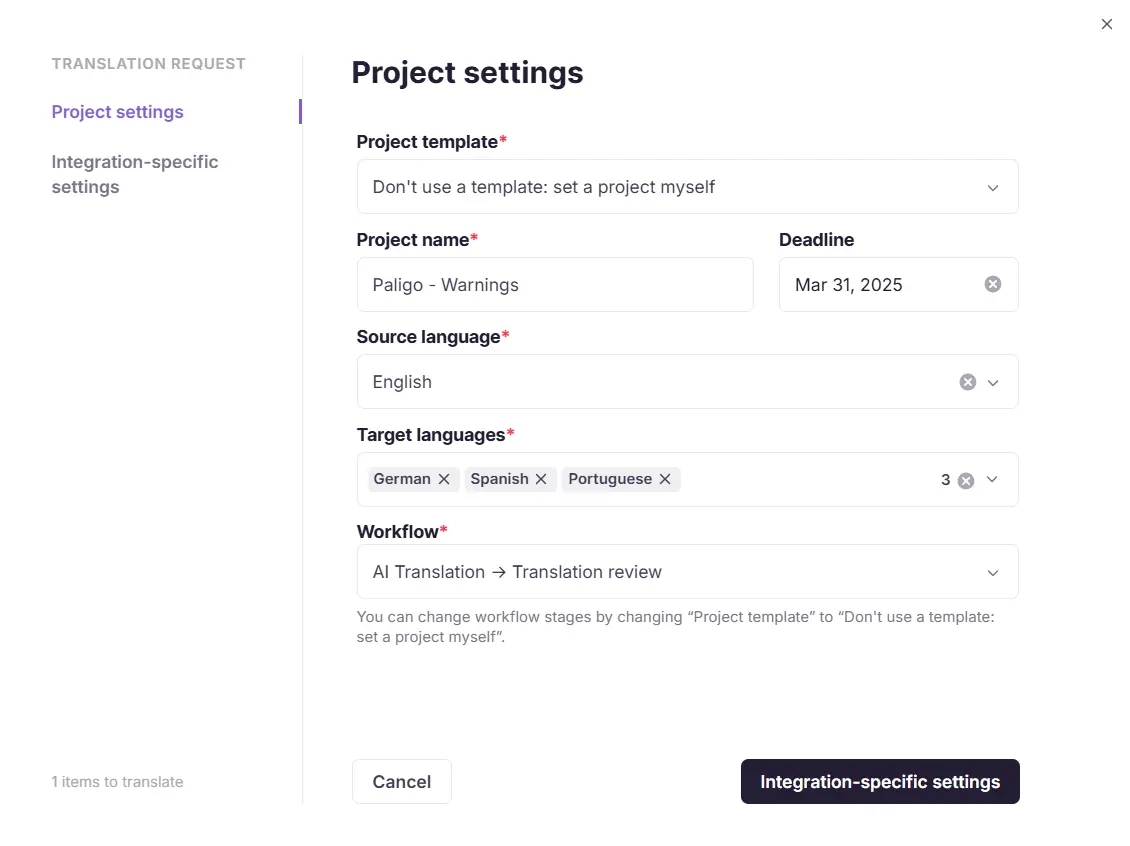
Enter the project data, such as name, deadline, and source and target language. You can select multiple target languages
-
Select the appropriate workflow for your translation. The Automatic Translation → Post-Editing workflow allows Smartcat to select the most suitable AI engine for the initial translation. After that, you can review the translation yourself or invite a collaborator to your project in Smartcat
-
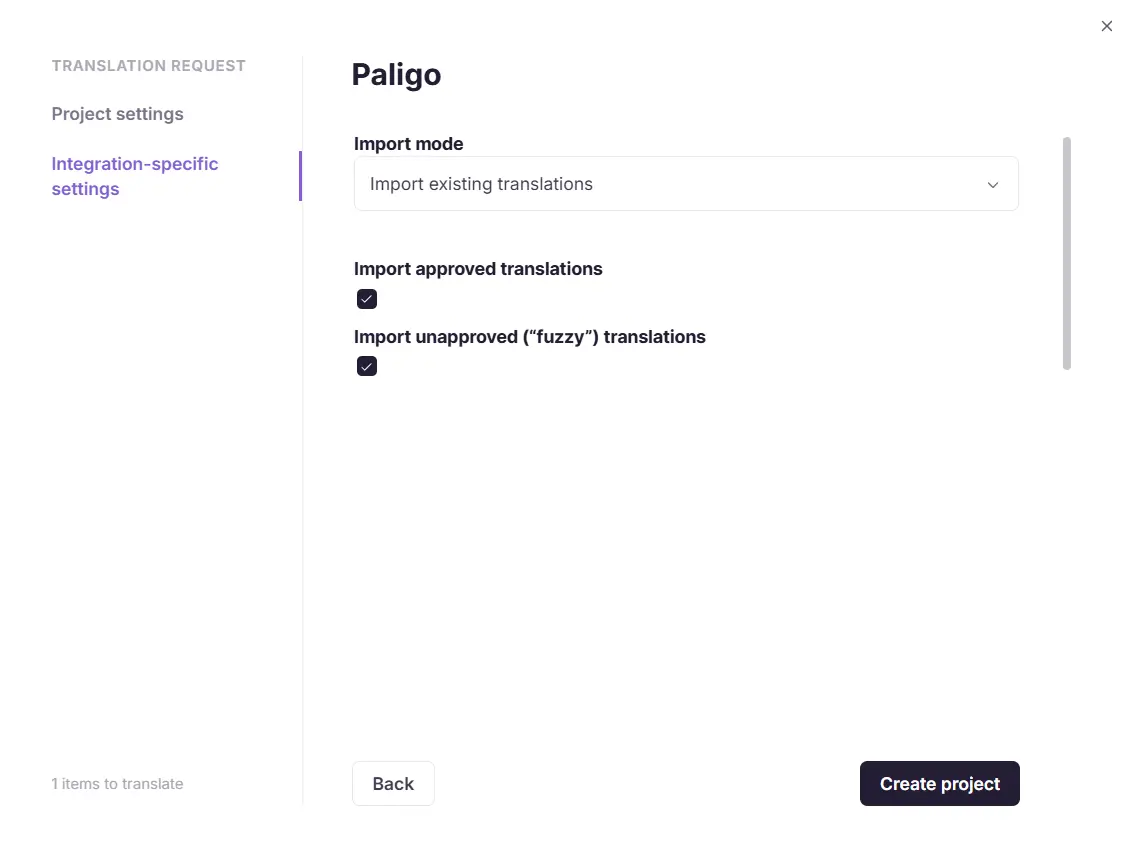
Go to the Integration-specific settings by clicking the respective button below. Select the import mode for your translation: import existing translations or skip this step
-
When importing existing translations, you can pick which status they should be in
-
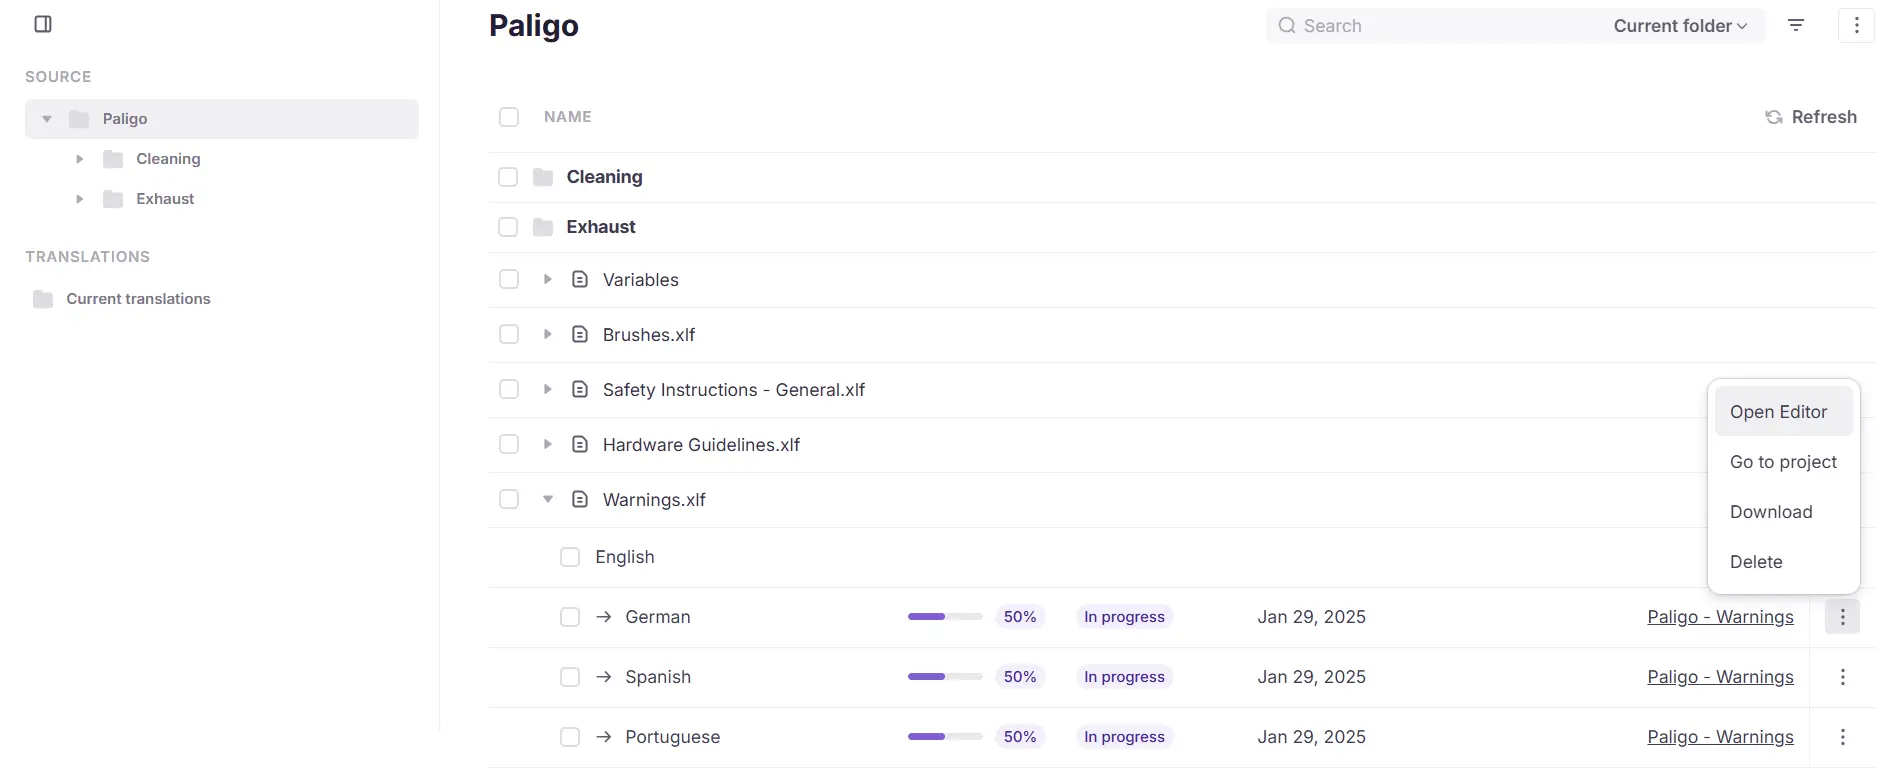
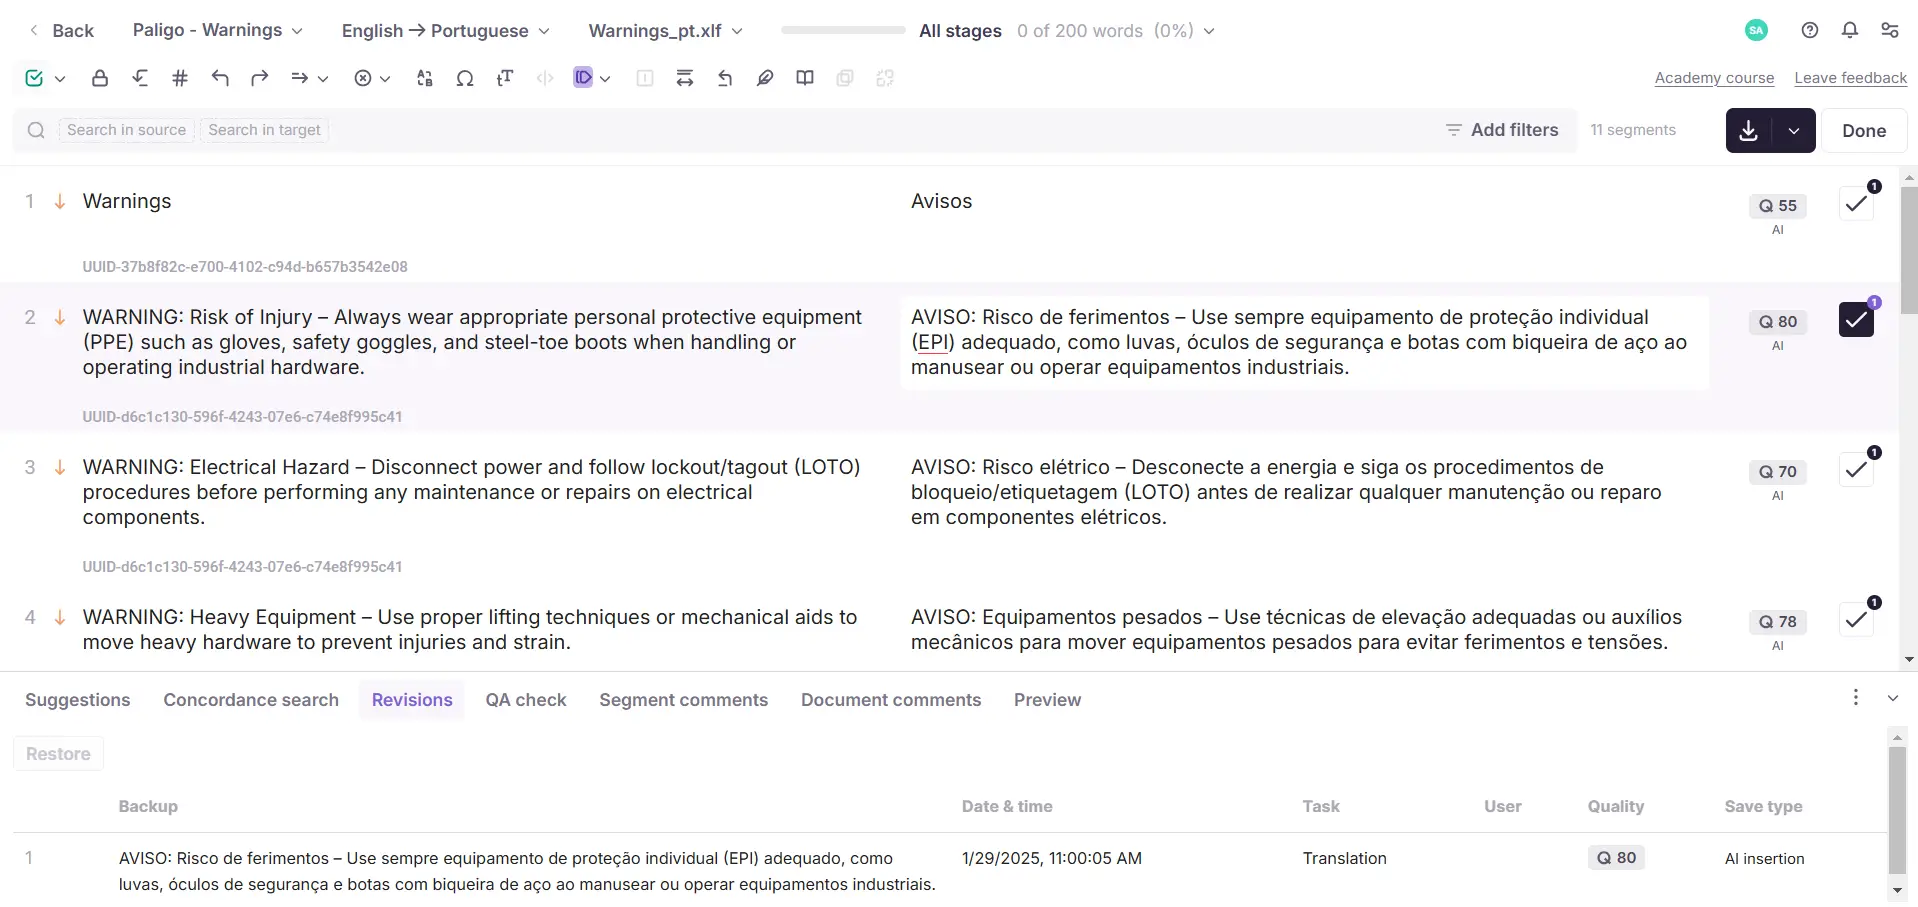
After the synchronization process is complete, you see a list of target languages under the title of the original file. Click the underlined title on the left to open your project in Smartcat, or click Open Editor to see the content and its translation
-
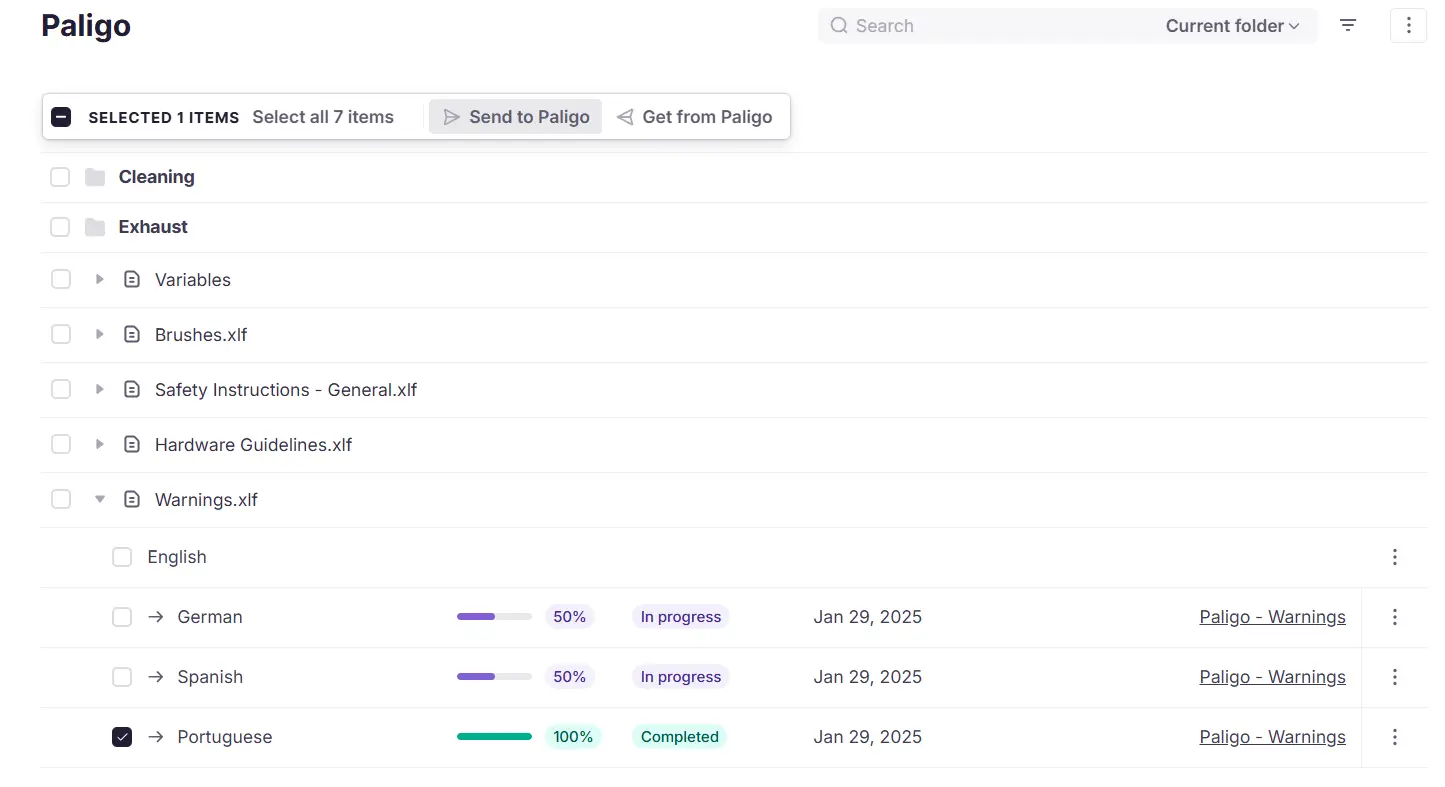
Once the translation is complete, send it back to Paligo by clicking Send to Paligo
-
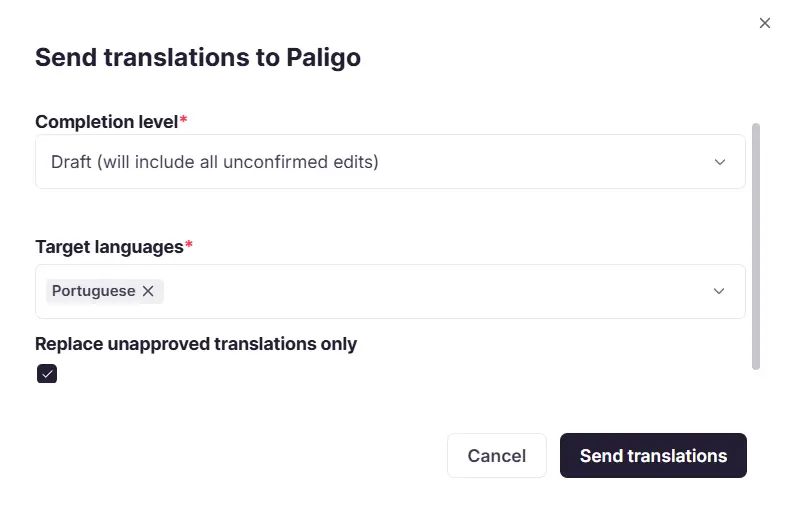
When sending content back to Paligo, determine its Completion level (whether all steps of the translation workflow were completed or not), confirm the Target languages, and pick whether it should rewrite confirmed translations
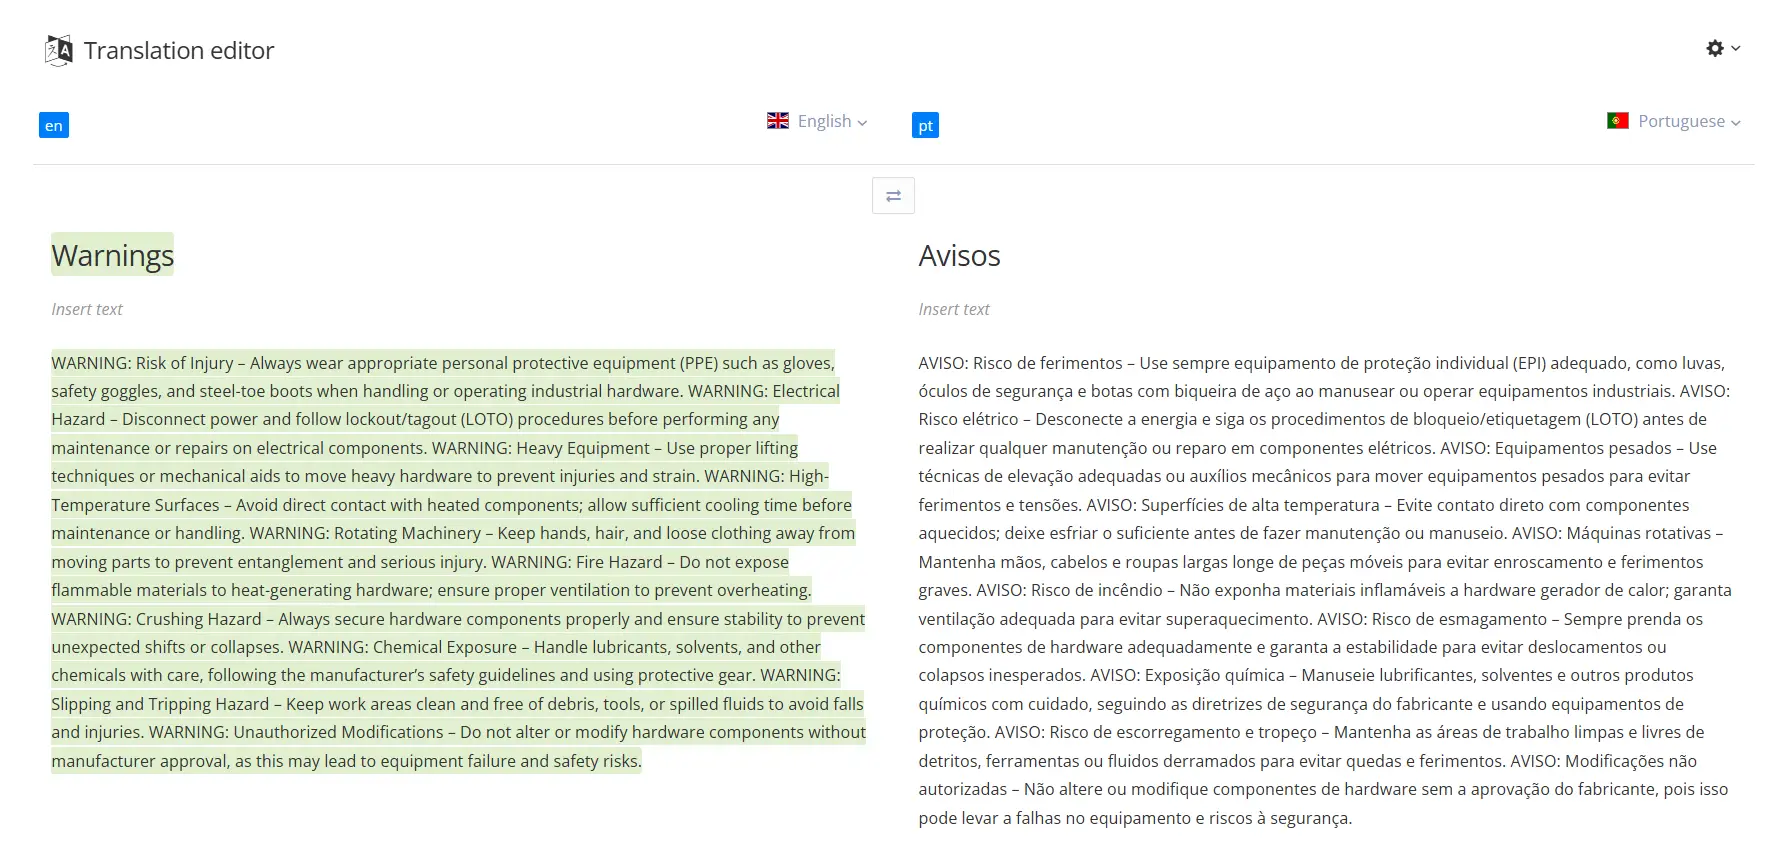
Once synchronization is complete, you see the translation in Paligo.
FAQs
What three pieces of information do I need from Paligo to connect it?
Your Paligo Base URL, your Paligo Username, and an API Key generated from your Paligo profile's API Keys section.
Can I choose to see only content marked "In Translation" in Paligo, or everything?
Yes — during setup you choose whether to list all content from your Paligo account or only content marked as "In Translation."
Can I reuse translations that already exist in Paligo?
Yes — in the Integration-specific settings you can choose an import mode to import existing translations (and pick which status they should be in), or skip that step.
What does "Completion level" control when sending translations back to Paligo?
It determines whether all steps of the translation workflow were completed before syncing back, and you also confirm the target languages and whether to overwrite confirmed translations.
Which translation workflow does the guide recommend?
Automatic Translation → Post-Editing, which lets Smartcat pick the most suitable AI engine for the initial pass, followed by your own review or a collaborator's.
Want to learn more?
See how Smartcat can transform your localization workflow.
Still need help?
Our support team responds within one business day.