Set up the order management solution
Overview
The Smartcat order management solution lets you receive translation requests from other workspaces in your organization.
Enable order management solution
To get started, request activation of this feature for your workspace. This is available to a Workspace Admin.
-
Go to your Smartcat account and log in to the workspace where you want to receive the translation requests
-
On the Home page, click your name in the top right corner, then Manage Organization
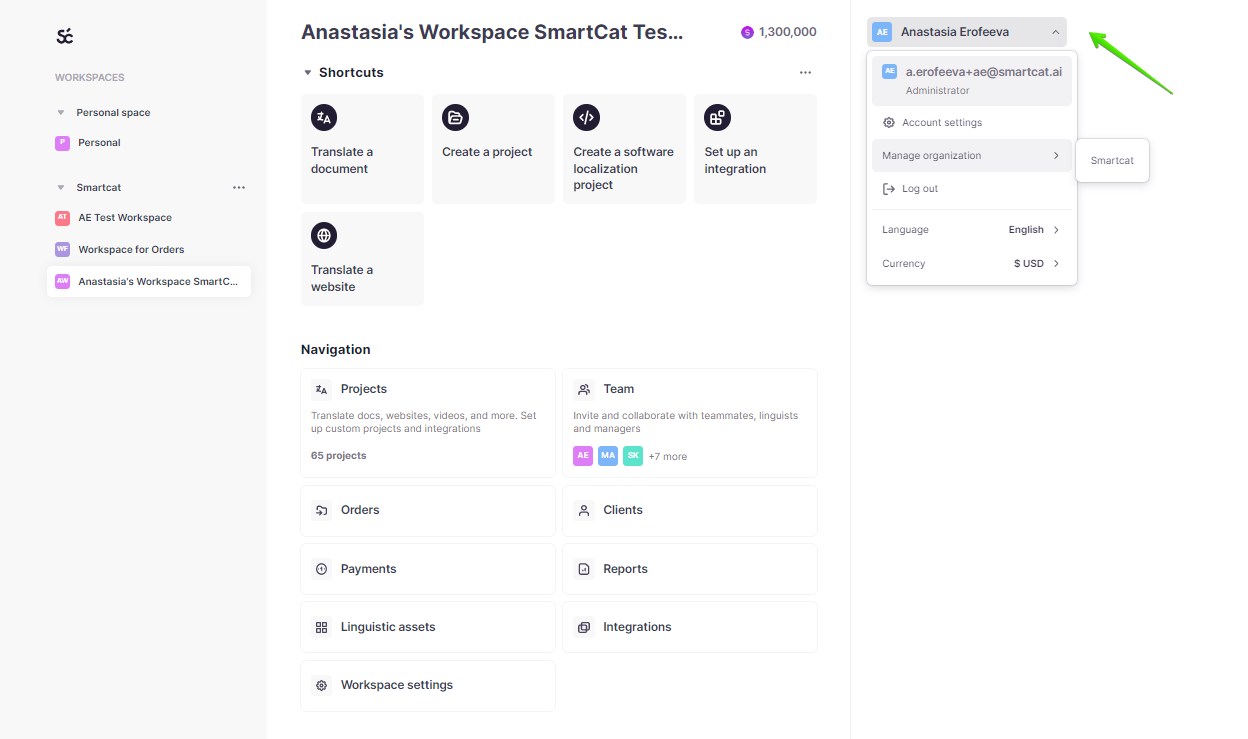
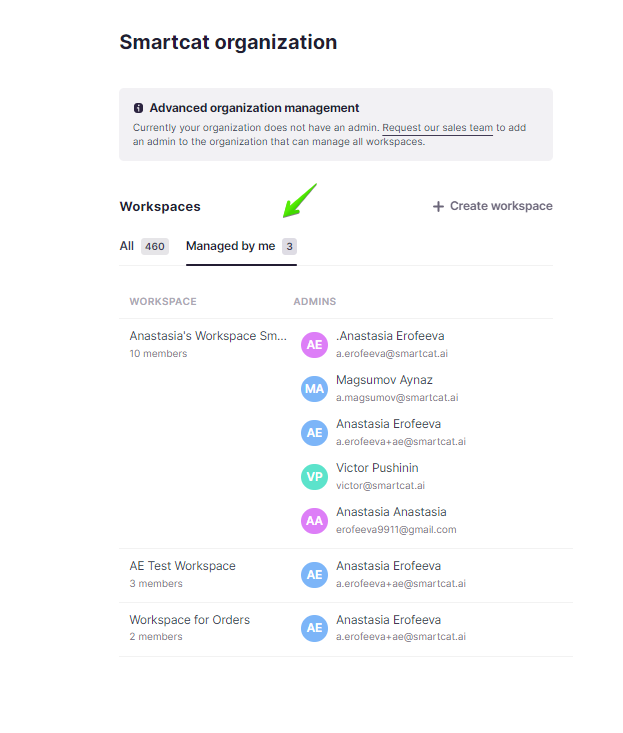
- Open the Managed by me tab and select your workspace
- On the General page, click Send request
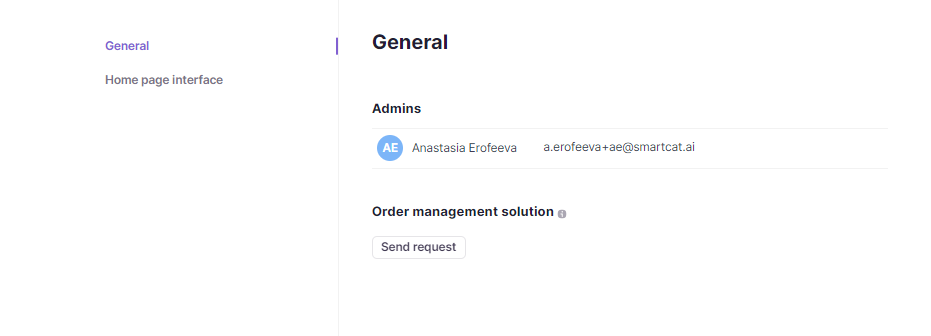
Smartcat receives your request and enables the feature in your workspace. Once it is activated, you see the Orders tab on your Home page.
Create workspaces for translation requests
You can create a new workspace or choose an existing one that your colleagues use to create translation requests. To view all workspaces or create a new one, follow these steps:
-
On the Home page, click your name in the top right corner, then Manage Organization
-
See workspaces under the All and Managed by me tabs
-
To create a new workspace, click + Create workspace
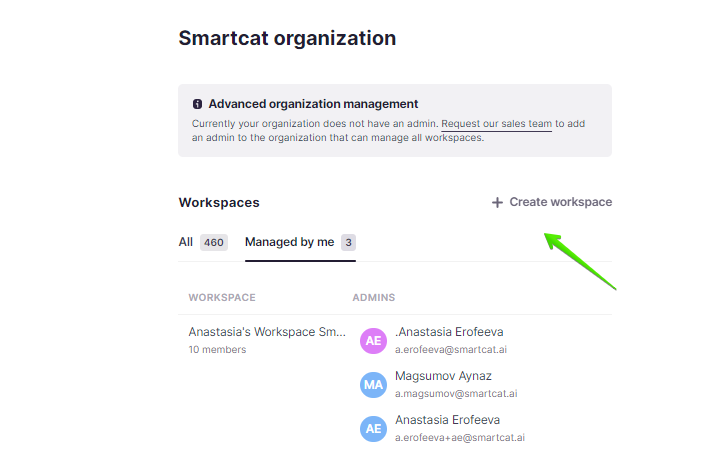
You can create as many workspaces as you want.
Create service templates
After defining the workspace where your colleagues create translation requests, set up the service templates for it. The template predefines the main properties of future translation requests.
To add a service template, you first need to create a project template. Here is how.
-
Go to your Smartcat account and log in to the workspace where you want to receive the translation requests
-
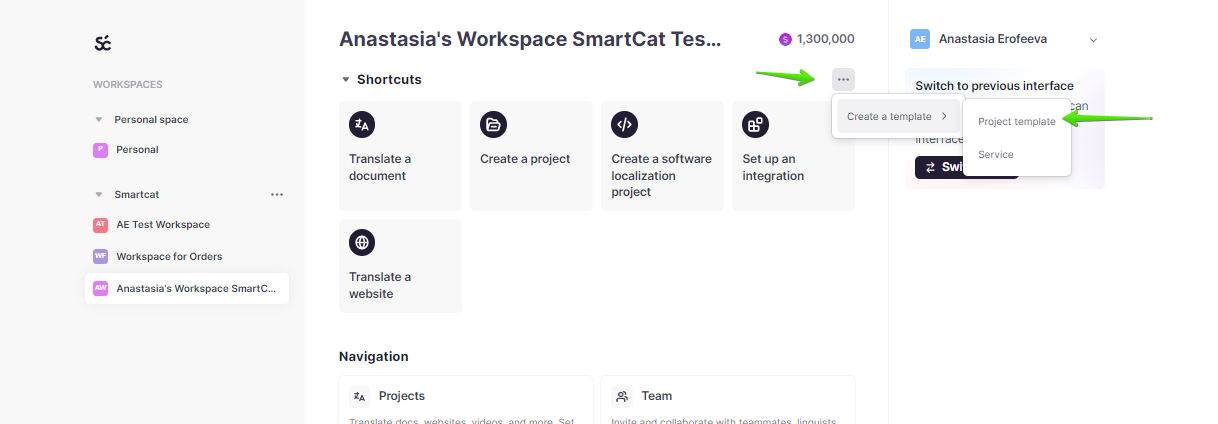
On the Home page, click the three dots in the Shortcuts section, then Create a template → Project template
- Fill in the required fields to create a template
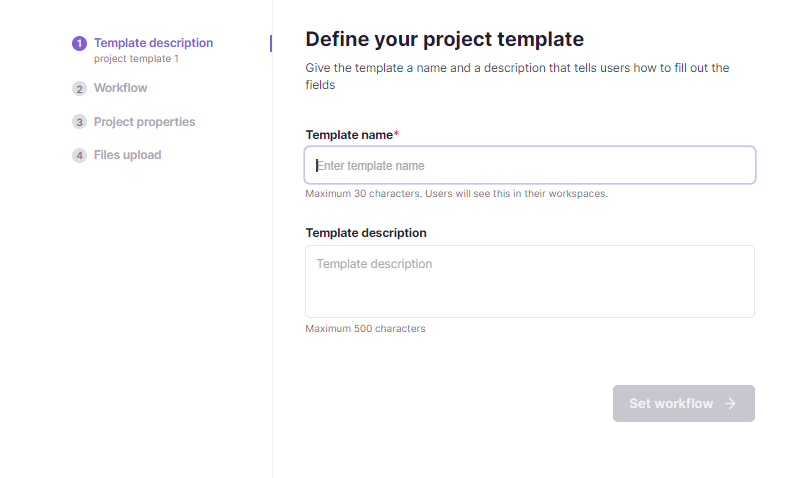
📌 This project template is linked to a service template for creating translation requests. The workflows you specify in the project template are reflected in the translation request.
You now have a project template ready to link to a service template.
Next, create a service template.
-
Go back to the Home page and click the three dots in the Shortcuts section, then Create a template → Service template
-
Fill in the required fields:
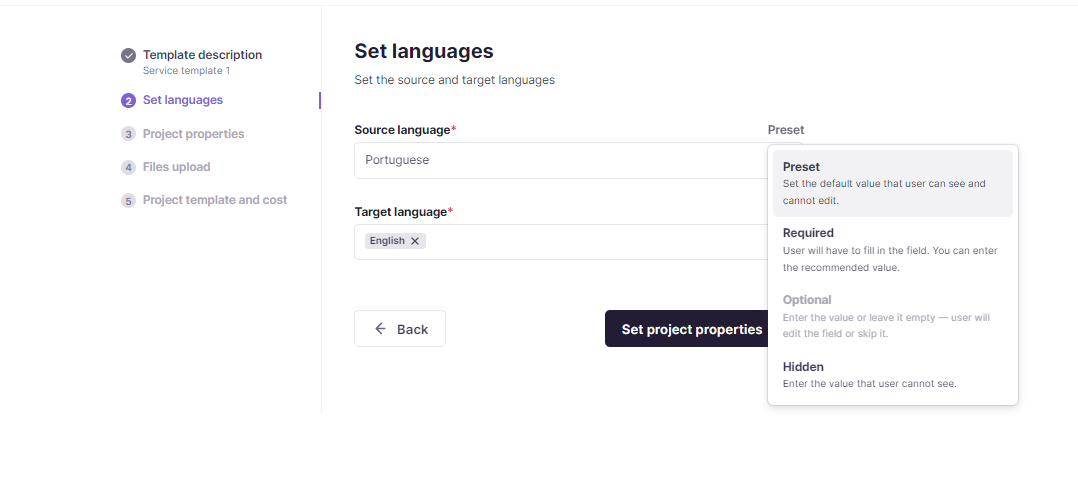
- Set languages: you can preset the source and target languages for the translation requests. If you choose the "Required" type, users can select the languages themselves when creating the translation request
- Project properties: if you have any custom project fields, select them by clicking + Add custom property. The "Required" field type lets users fill in the custom fields when creating a translation request
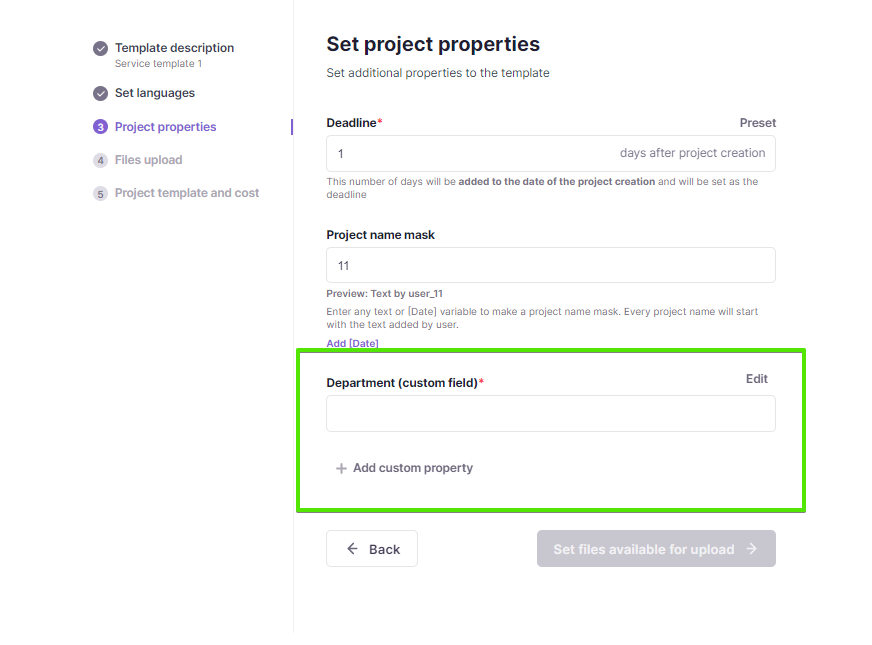
💡 Custom fields are managed in Smartcat account → Workspace settings → Custom fields
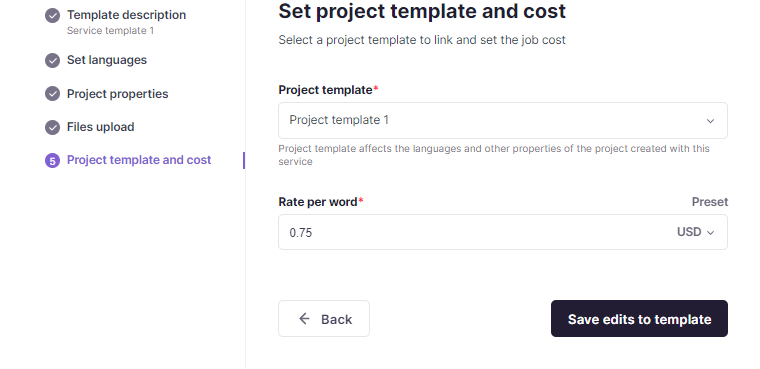
- Set project template and cost: select a project template you created earlier and specify a rate per word
- Once the service template is created, share it with the corresponding workspace. Click the three dots next to the template on the Home page and select a workspace that should have access to the template
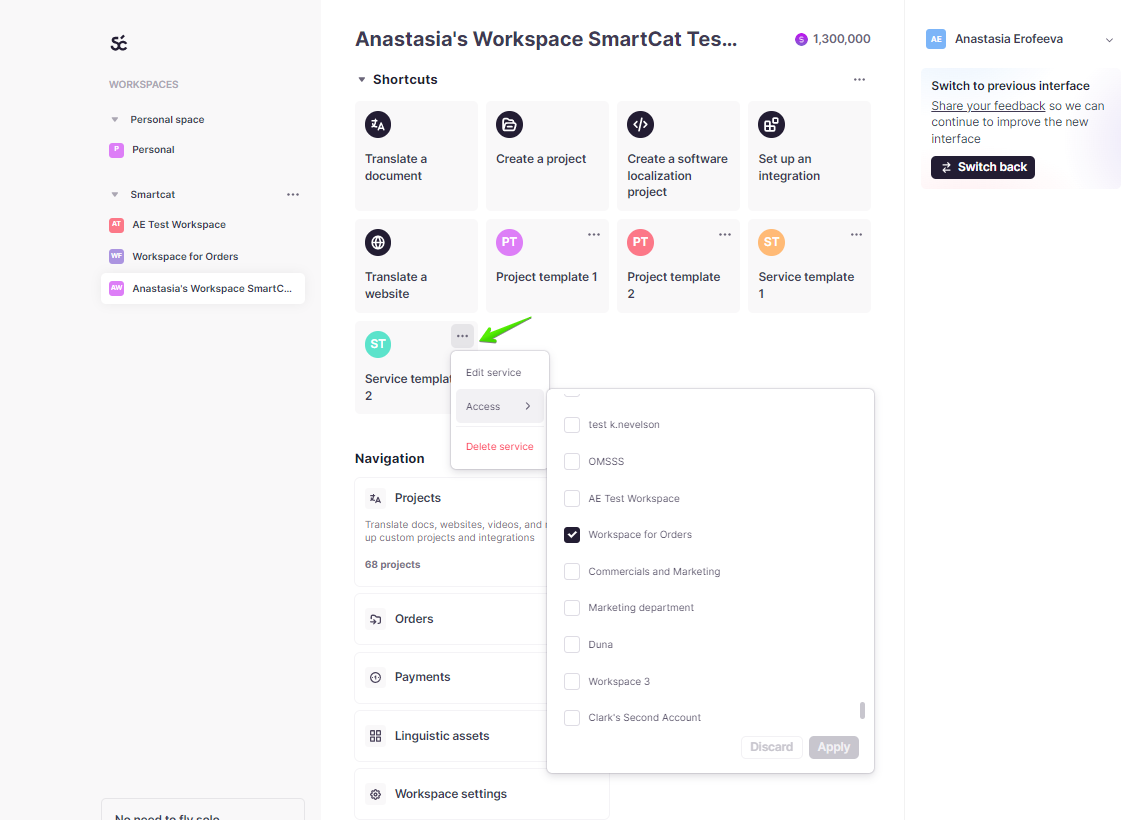
The service template appears in the selected workspace and can be used to create translation requests.
Customize workspace appearance and invite users
You're almost ready to go. Consider keeping necessary navigation menu shortcuts in the workspace to enhance the user experience, then invite your colleagues.
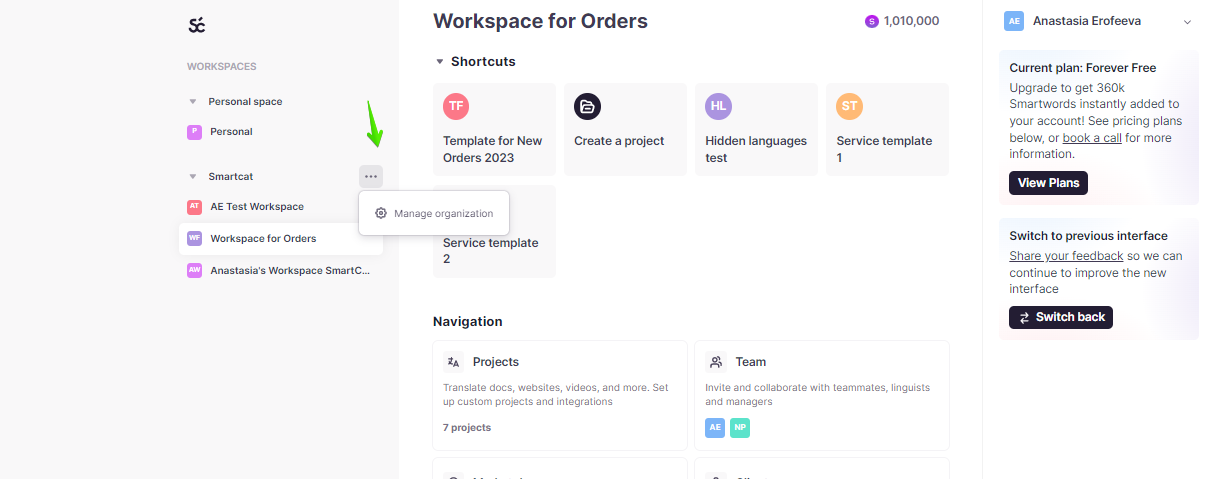
- Go to the Home page and click the three dots in the sidebar to open the organization settings
-
Select the workspace in the list and open the Home page interface tab
-
Adjust the workspace appearance, upload a logo and background image, and select shortcuts that are displayed for users
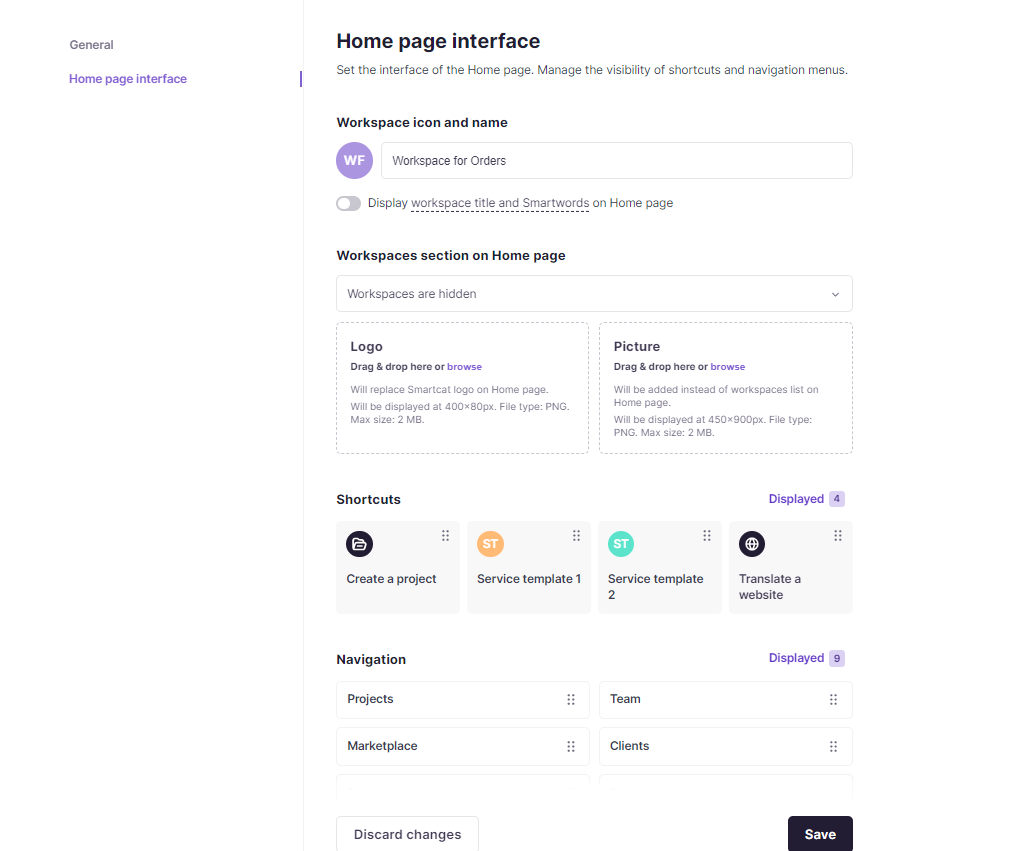
Your workspace now reflects the appearance and shortcuts you configured.
Next, invite your colleagues to join the workspace. If you'd like them to have full access to the workspace settings, provide them with the admin role. Alternatively, assign them any other role with the access level to create orders so that they can use your service template for translation requests. For example, you can invite users with the product manager role.
To learn more about how to invite your colleagues to the workspace, refer to the guide on how to add teammates.
FAQs
Who needs to activate the Order Management Solution before I can use it?
A Workspace Admin must request activation via Home > user name > Manage Organization > Managed by me tab > General > Send request. Once approved, the Orders tab appears on the Home page.
Do I need a separate workspace just for handling translation requests?
It's recommended — you can create one or more dedicated workspaces for translation requests via Manage Organization, though the exact structure depends on your organization's needs.
What's the difference between a Project template and a Service template in this setup?
A Project template defines the main project properties and workflow that requests will use. A Service template builds on top of that — configuring languages, custom project-property fields, the linked project template, and the rate per word charged for the service.
What access should I give someone who should only submit requests, not manage the whole setup?
Invite them with a role like Product Manager (or another limited role) rather than Admin — Admin gives full access, while other roles can be scoped to order creation only.
Want to learn more?
See how Smartcat can transform your localization workflow.
Still need help?
Our support team responds within one business day.