Connect Figma with Smartcat
Overview
Figma is a web-based user interface design app widely used for designing mobile app interfaces, prototyping designs, creating social media posts, and everything in between.
The Smartcat plugin for Figma instantly translates your Figma designs and individual frames into any language, allowing you to modify and test layouts in one place, without the messiness of multiple copies for every language.
Your translations are embedded into Figma text objects and kept intact when manipulating visuals. The Smartcat plugin is the easiest way to translate your designs, automatically or professionally. Here's how it works.
Integration type: Plugin — content is managed within Figma's native interface.
Prerequisites
Before setting up this integration, ensure you have:
-
A Smartcat workspace with an active subscription
-
A Figma account with access to the documents/frames you want to translate
-
The Smartcat Translator plugin installed in Figma (see below)
Installing and setting up the plugin
To install the Smartcat plugin for Figma, log in to your Smartcat account and then complete the following steps:
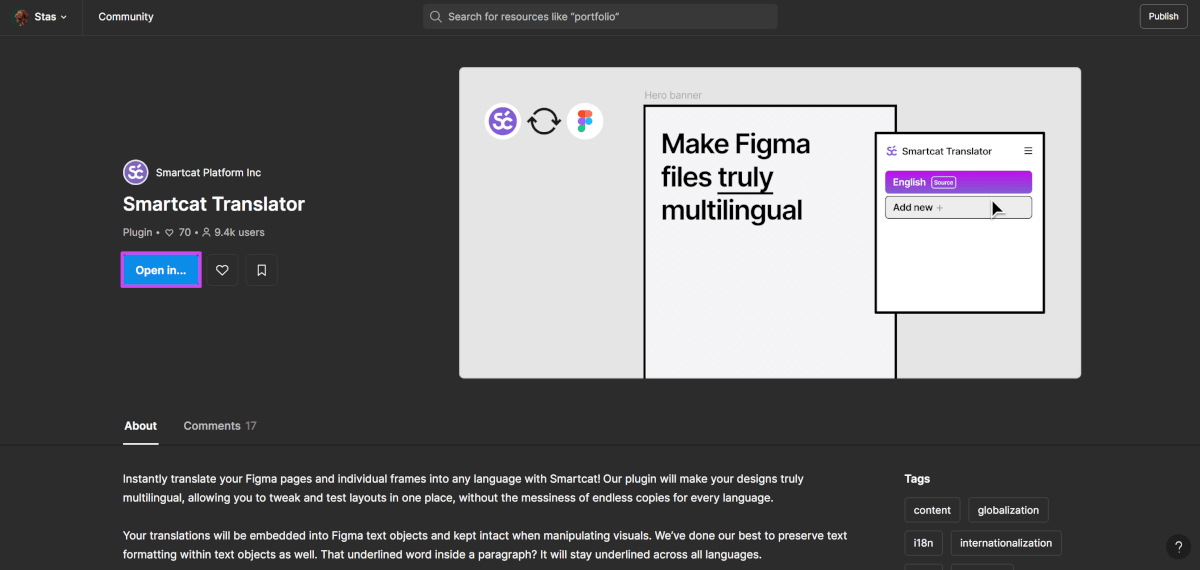
- Navigate to the Smartcat Translator plugin in the Figma Marketplace (https://www.figma.com/community/plugin/1055486946344563829/Smartcat-Translator) and click Open in.
-
Figma adds the plugin to your account and it shows as installed.
-
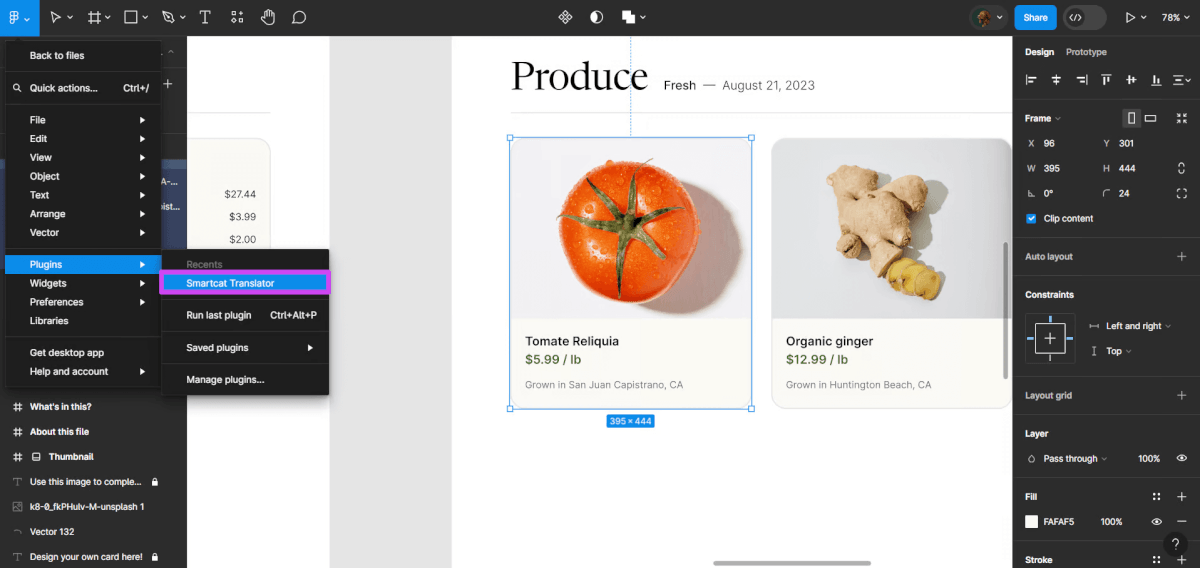
In Figma, open any document with frames and find the Resources tab in the toolbar, go to Plugins, and select Smartcat Translator.
-
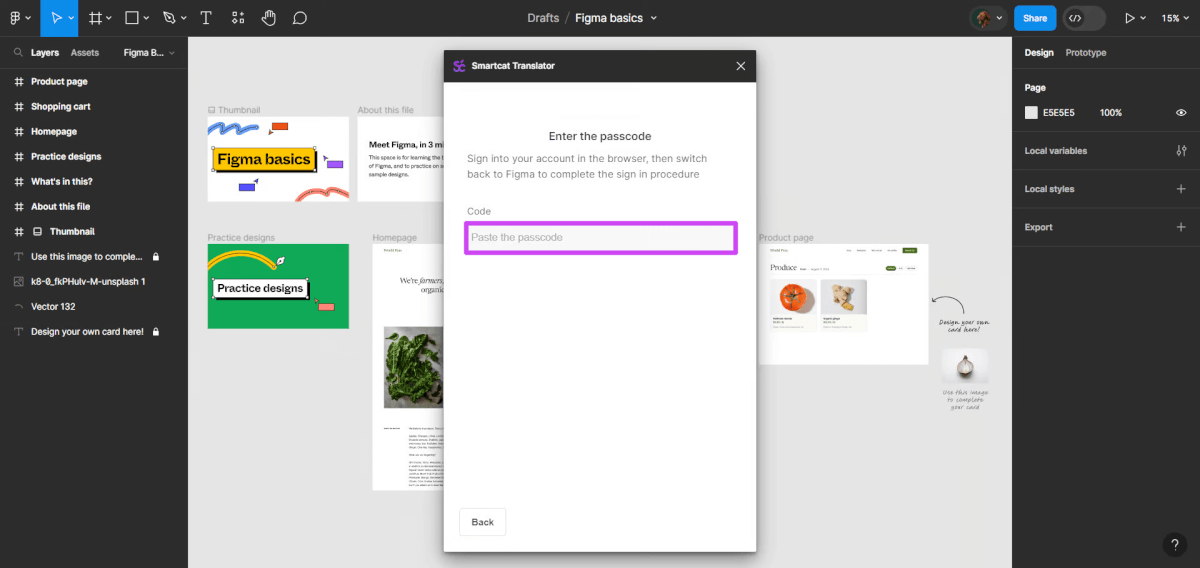
Click through the introductory screens. Clicking Let's get started on the last screen redirects you to Smartcat, prompting you to copy the passcode.
-
Click Copy to clipboard, go back to Figma, and paste the passcode to complete the sign-in.
Using the plugin
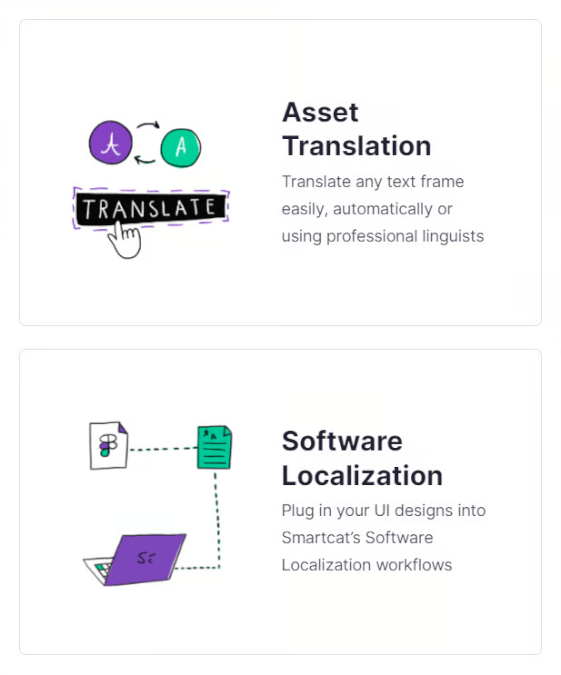
The Smartcat plugin allows two modes for you to choose from:
-
Asset Translation
-
Software Localization
Understanding asset translation mode
In this mode, you can easily translate any text frame either automatically, or using professional linguists. You can choose whether to connect to the Smartcat project or just use automatic translation inside Figma.
This option would be the best for non-software localization content types: marketing materials, emails, landing pages, etc.
Understanding automated translation
Follow these steps to start using the Smartcat plugin for automated translation.
-
Select a frame or a group of frames you want to translate.
-
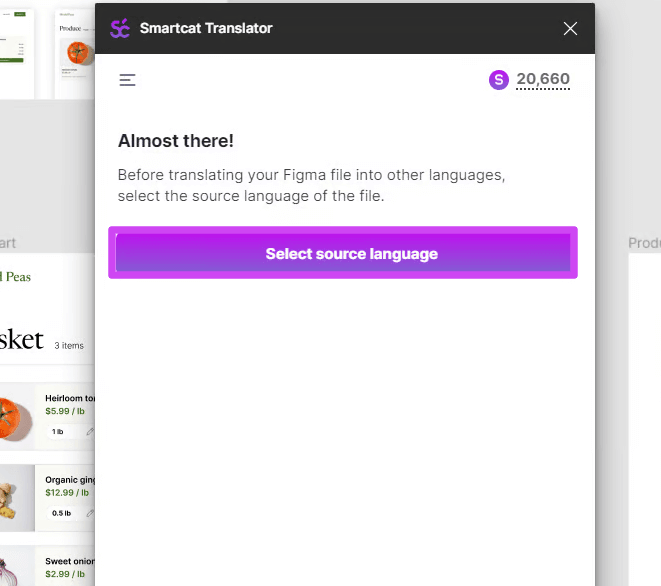
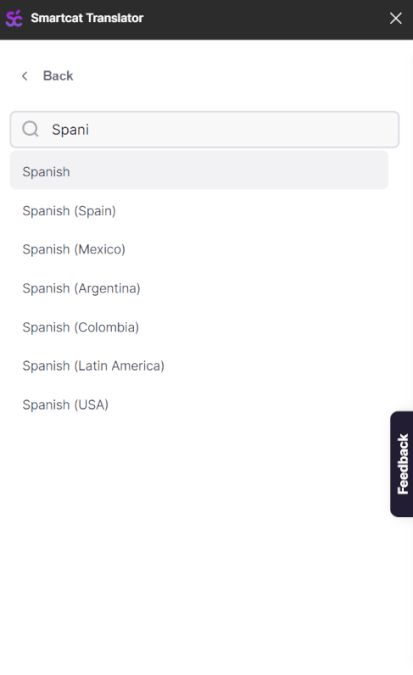
Click Select the source language to open a list of languages, choose the language currently used in your Figma frames, and click Add.
-
The selected language is labeled Source. You can choose only one source language and it is applied to all frames in the Figma document. You cannot choose different source languages for frames in one and the same Figma document.
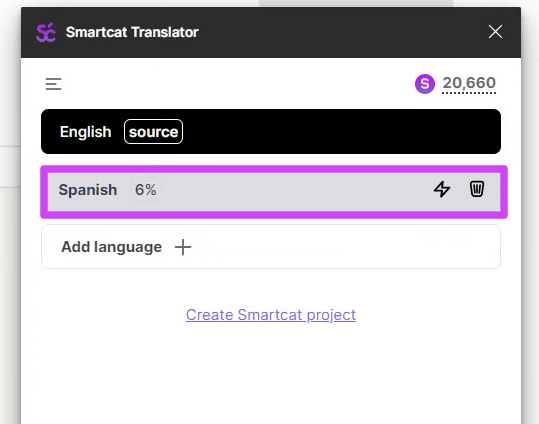
- Click Add language to choose the target languages that your Figma frames should be translated into. You can choose as many target languages as you need.
-
The addition of a target language depends on frame selection and is applied only to the frames you've selected. You can apply various target languages to various frames in one Figma document. For example, you can translate one frame from English to Spanish and French, and another from English to Chinese and Korean.
-
As soon as you add a target language, the original texts in frames are automatically translated and replaced with their equivalents in the selected language.
-
When multiple languages are selected, you can switch between them, verify that the translated text is correctly located inside the frame, and make necessary adjustments on the fly. Text formatting within text objects is preserved and stay identical across all languages wherever possible.
-
The number displayed next to each destination language represents the percentage of the source text in the selected frame currently translated to this particular language. If several frames are selected, the percentage is shown for all of them. If the number is smaller than 100%, click on the three-dot icon for the corresponding language and select Update translations.
How to exclude elements from translation when localizing Figma designs
You can easily control which parts of your design get translated and what remains untranslated directly from your Figma frames without having to leave the design platform. This allows you to preserve specific elements in the source language, such as brand names, CTAs, or special terms.
Before you can start excluding elements from translation, ensure that you have the Smartcat integration enabled within your Figma workspace. If you haven't already done so, navigate to the Figma Community and install the Smartcat plugin.
Once the Smartcat plugin is installed and enabled, open your Figma file containing the design elements you wish to exclude from translation. Select layers that you want to exclude from translation, such as brand names, CTAs, or specialized terms, that you want to preserve in the source language.
Steps to follow to perform human review
To enable human editing, do the following.
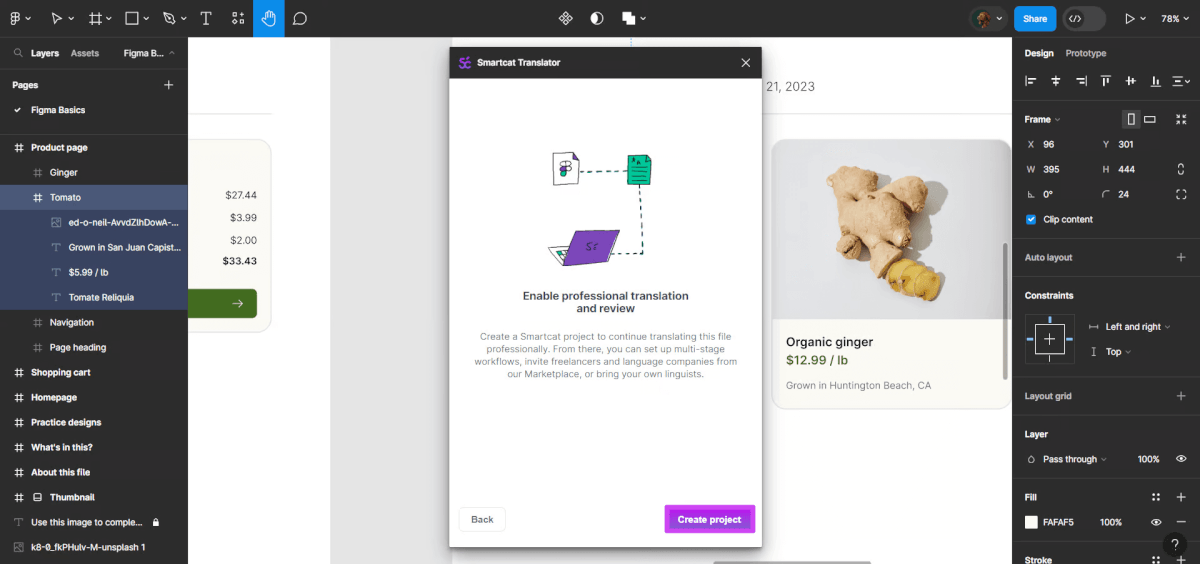
- Under the list of selected languages, click Create Smartcat project.
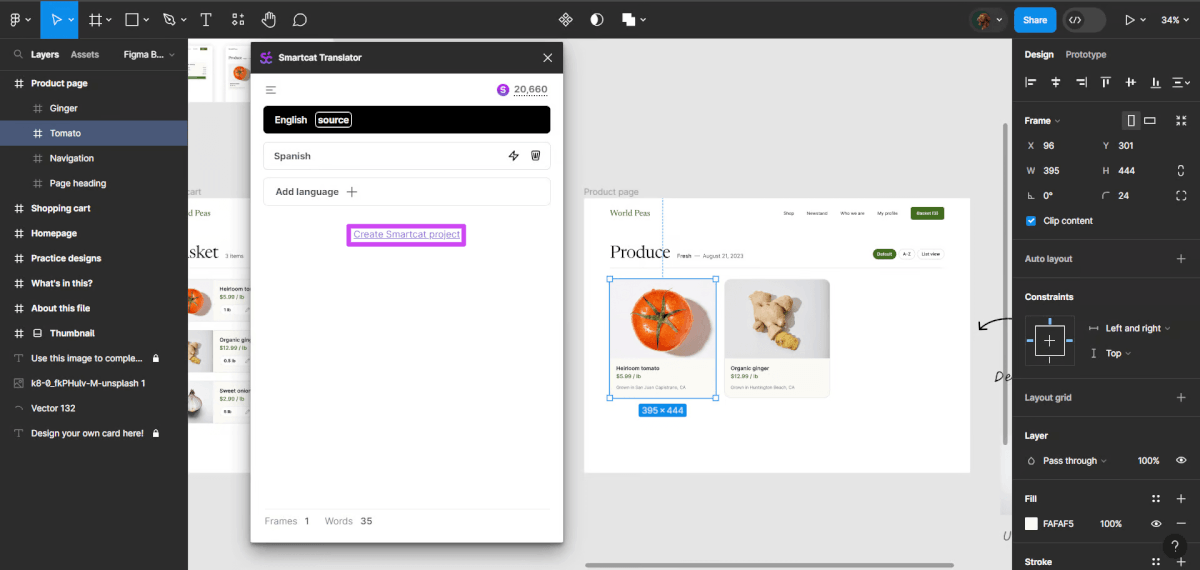
- Step 2 — On the next screen, click the Create project button.
-
Smartcat creates a project automatically and sends selected frames there. When you create a project in the plugin, segments with the same key are merged in the Smartcat project, so no duplicate segments form for one key.
-
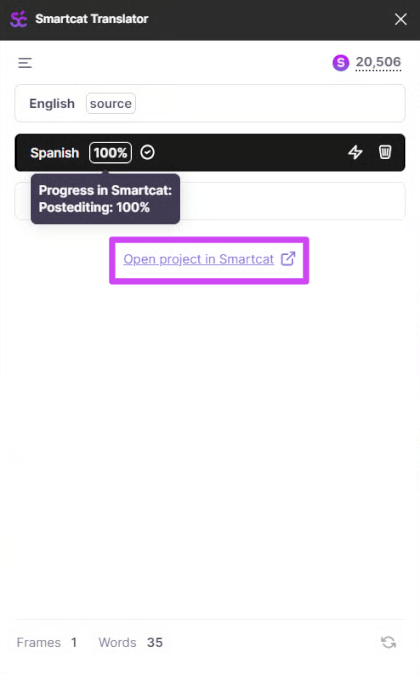
You can open the project right from Figma by clicking Open project in Smartcat.
-
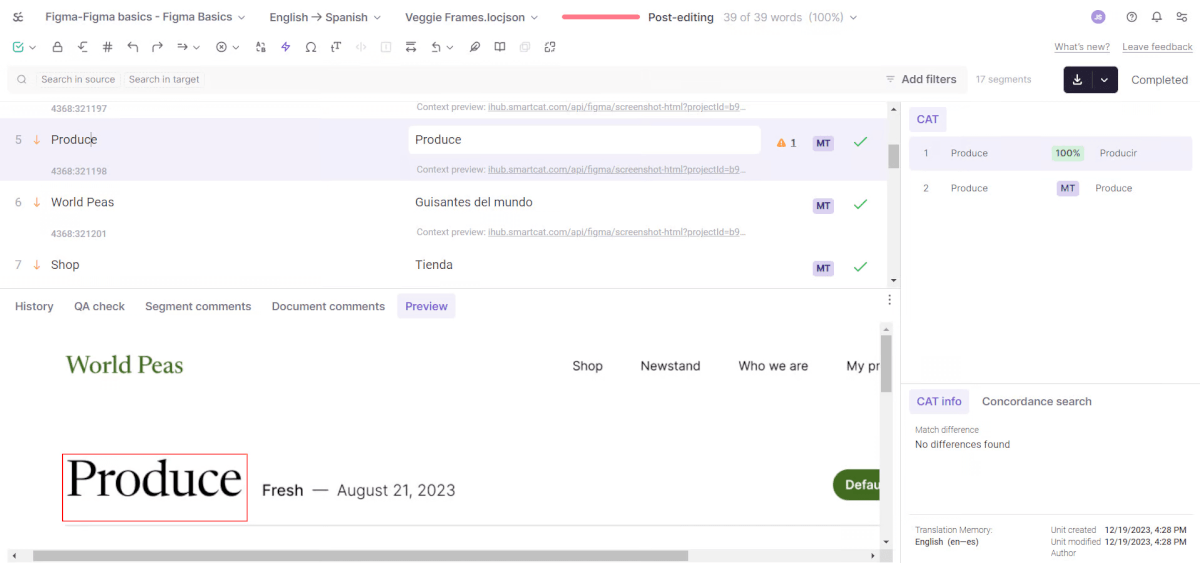
In the project, you see files for translation. Each frame is uploaded as a separate file.
-
Each file can be opened in the Editor. Here in the Preview section, you can see the preview of your frame. It is important to provide context to the translators and editors who will work on translations. When you focus on a variant’s segment, that variant is shown in the Figma preview, so you can review each variant within the corresponding segment.
-
If you want to invite suppliers to translate these files, go to the Tasks tab and click assign. Assign suppliers from your team or choose a professional from Smartcat Marketplace.
-
To synchronize the project with Smartcat, click the Synchronization button at the bottom-right corner.
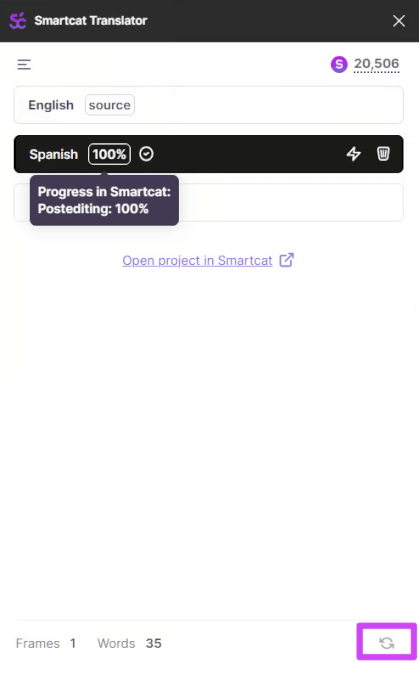
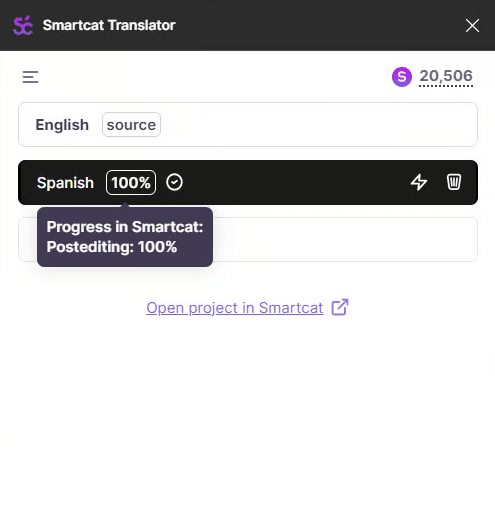
- You can track the translation progress in Figma. Each time you synchronize with the project, Smartcat updates the translation progress so you can check what stage each translation is at. To do so, you need to hover over the percentage icon right to the selected language. You see the breakdown into the workflow stages set up in the project.
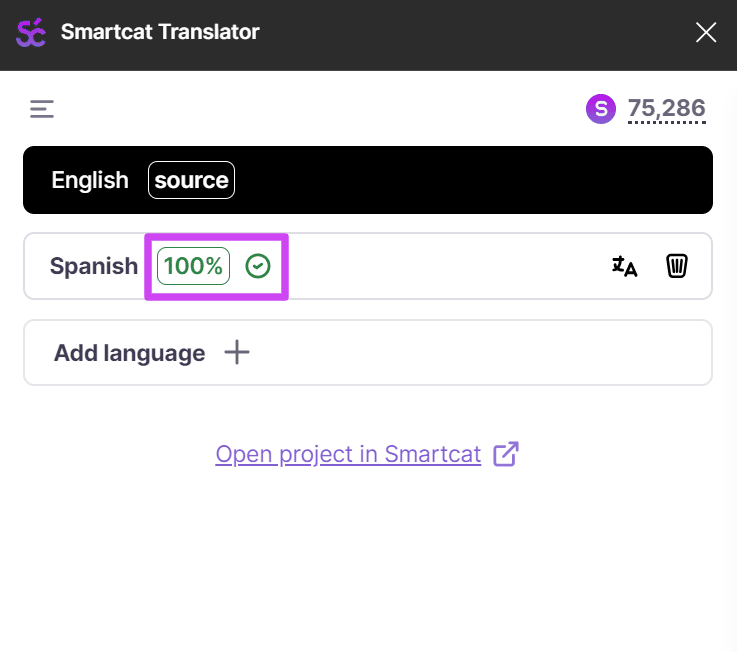
- When the translation is complete on all stages for some languages, Smartcat shows a green tick to the right, to mark it as complete.
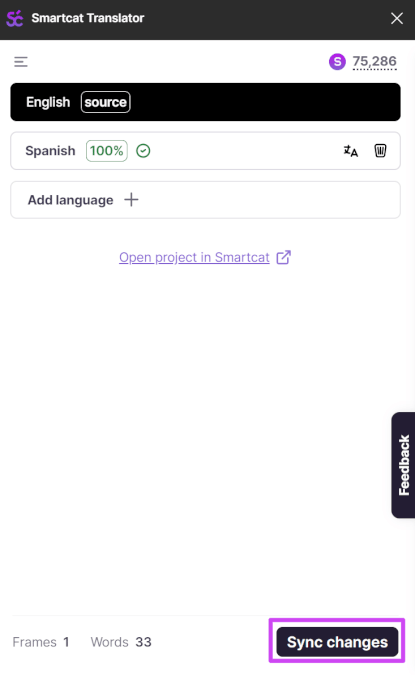
- To get the translations to Figma, select frames and click the Sync changes button in the bottom right corner.
-
To send more frames for human editing to the project, select them in Figma and click the Sync button in the bottom right corner.
-
Please note that the frame selection influences your actions. If you have only two frames selected while you set up some target language or synchronize with the project, this action applies to these two selected frames.
Can I manually edit the translations right in Figma?
Yes, but these edits won't be passed to Smartcat. You have them in Figma only. If you want to edit translations manually in Figma, we advise enabling the Show text object properties option in the menu.
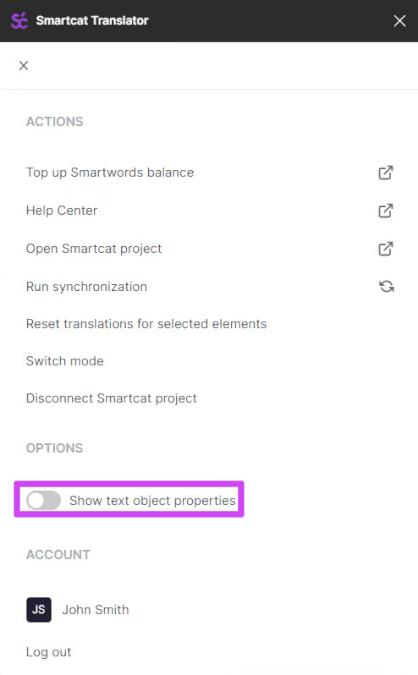
After that, choose a frame and switch to the target language that you want to edit and adjust the translations. At the bottom, you see that the option Lock this translation has been enabled automatically.
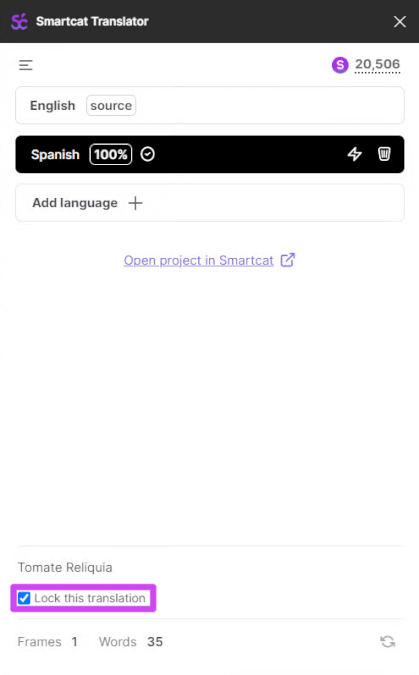
When it is enabled, Smartcat won't touch this text block and won't overwrite it with automatic translations or human-edited translations from the project when you synchronize.
But if you want to apply automatic translation back or push translations from Smartcat there, you'll need to untick this option and launch synchronization.
Live Preview: Custom Fonts support
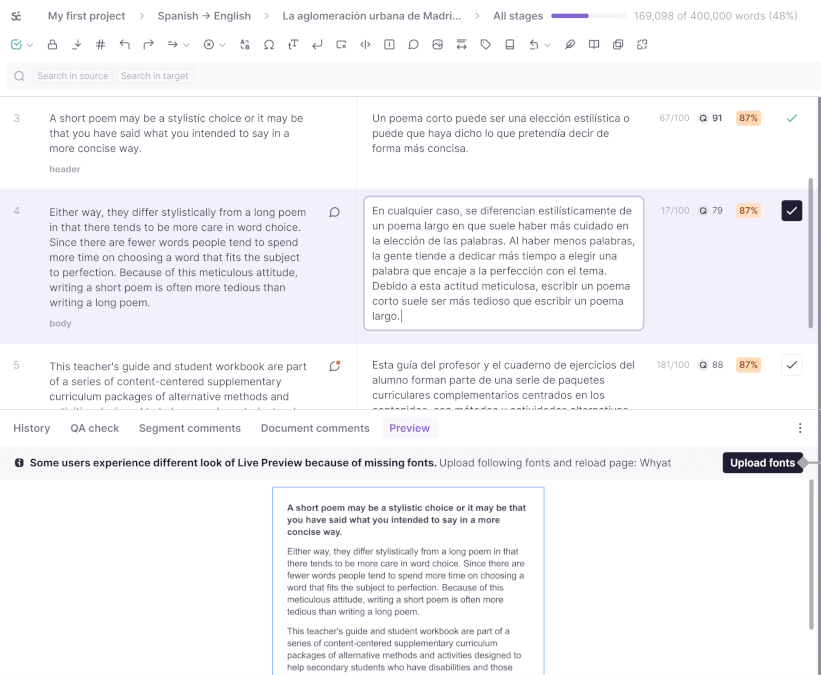
In the case when custom fonts are used for a Figma board, to be able to use them in live preview, the user is required to upload the "custom font" to Smartcat. If the font is not uploaded, Smartcat can’t show Live Preview precisely, and a default font is used.
There are two entry points for the upload of fonts:
- In the Smartcat Editor
- In the Workspace settings
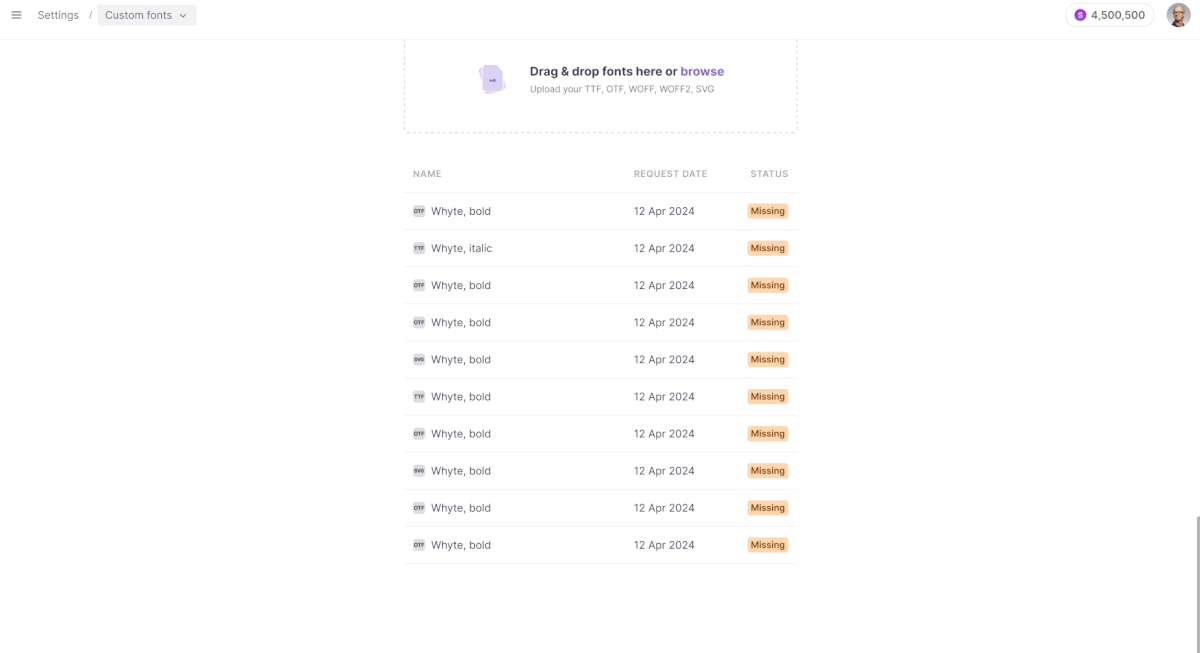
📌 Only users who have access to Workspace settings can upload the fonts. Reviewers (whether from Smartcat Marketplace or your team) only see the notification that indicates the requirement to upload the fonts.
Currently, Smartcat supports only TTF and OTF font formats. WOFF2 format will be added soon.
Once a font is uploaded, it is used in any project that exists in the workspace, and any user can to see the Live Preview with correct fonts (even if the user doesn't have the font installed on their system).
Software Localization mode
This mode allows you to plug your UI designs into Smartcat's software localization workflows. You connect to one of your Smartcat Software localization projects, can specify keys right in Figma, and then send them to Smartcat for translation.
Setting up the project
- Select a software localization project you want to connect the Figma file to. Or create a new one, if you do not have any. Learn more about Software localization projects and how to set them up (https://developers.smartcat.com/software-localization/#software-localization-projects-in-smartcat).
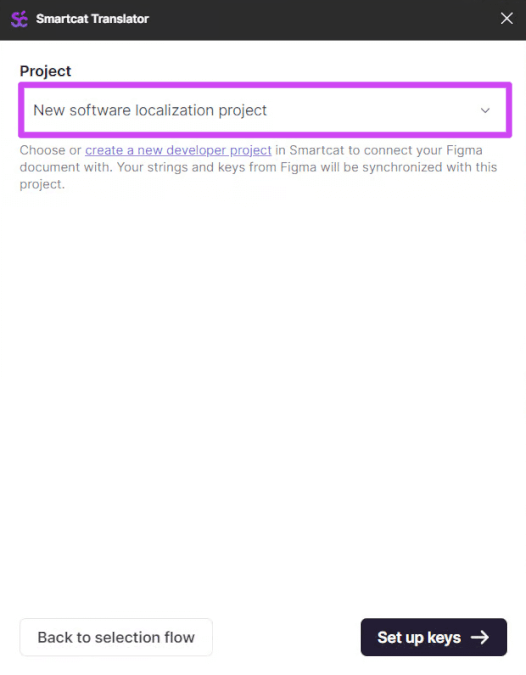
- When selected, click Set up keys.
Setting up the keys
Now you can start setting up the keys for the text objects in Figma.
-
Select a frame or a group of frames you want to work with.
-
In the plugin, you see the list of text objects Smartcat identified in these frames with a field where you can assign a key for each of them.
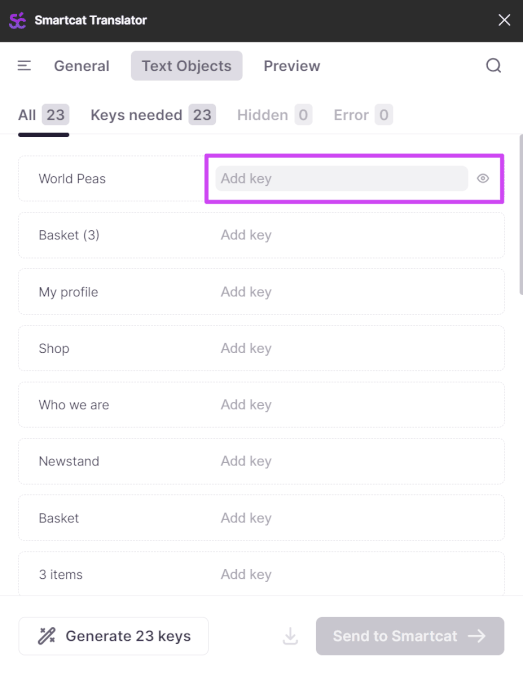
- To add a key, click Add key to the right of the text for translation and type the value into the field.
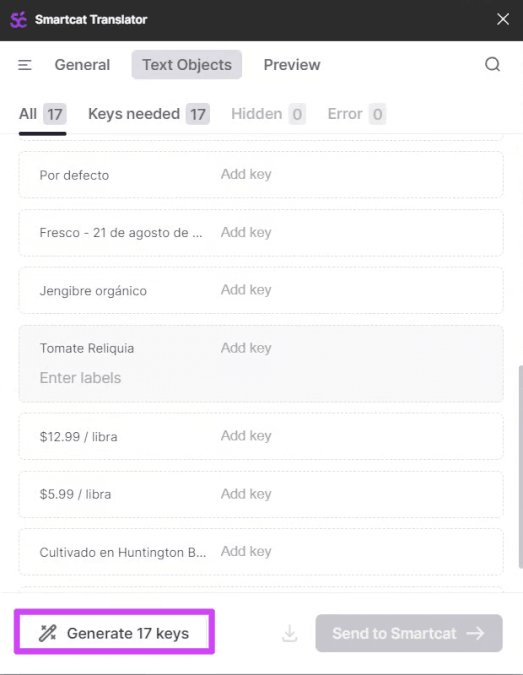
- You can also generate the keys automatically by clicking the Generate keys button on the bottom left. The system generates the keys based on the text value.
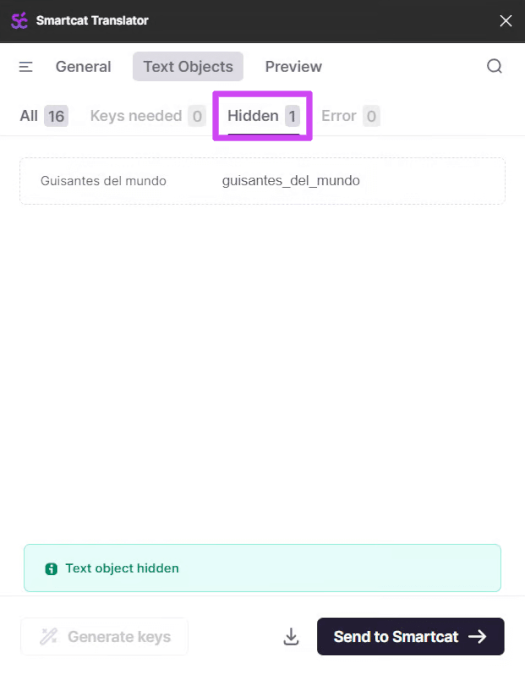
- If you don't want some text to be sent to Smartcat for translation, you can either leave the key field empty or hide it from the list by clicking the eye icon to the right.
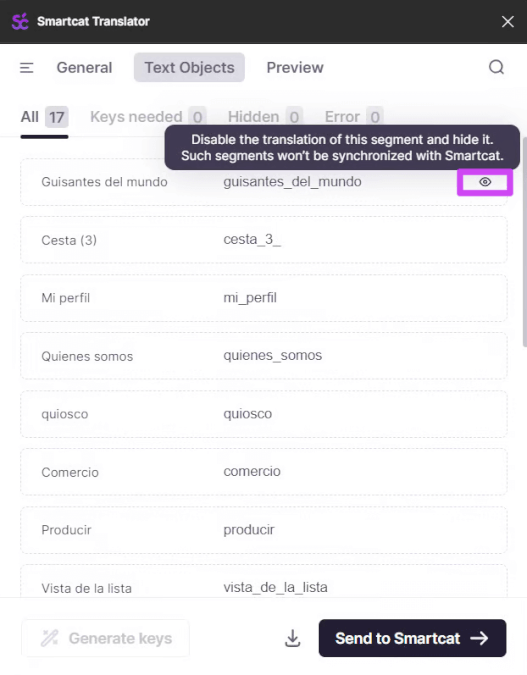
- You can always bring it back by going to the Untranslatable tab and unhiding the text object you need.
Setting up labels
In addition to keys, you can also add labels to your text objects.
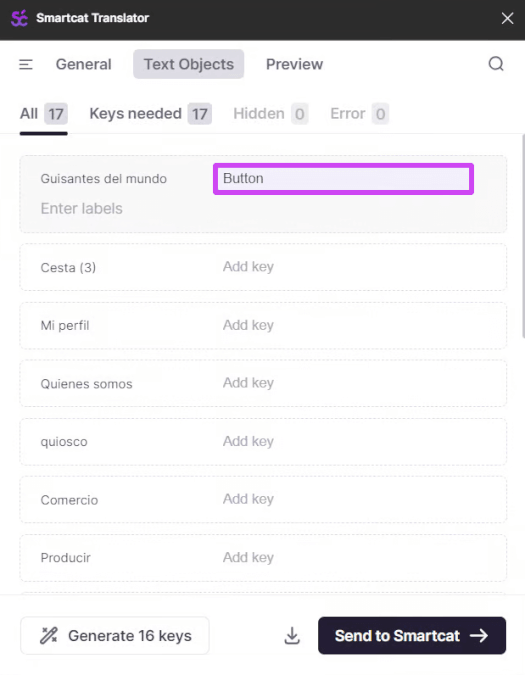
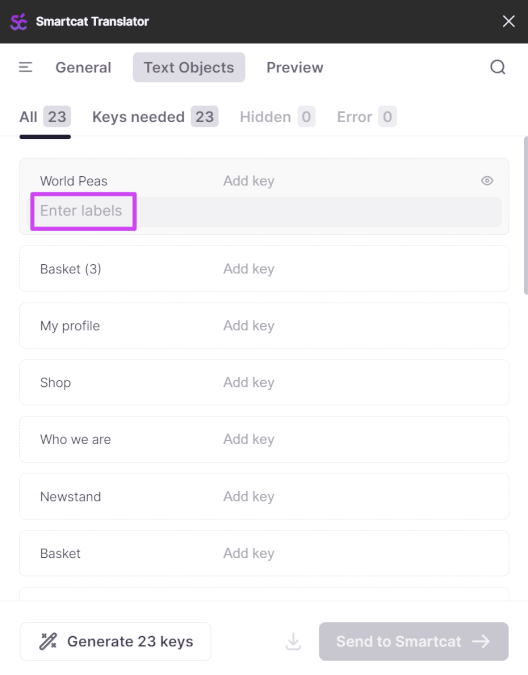
To add, choose a text field in the plugin, click on it, and type the value into the Enter label field. You can specify as many labels as you need.
You can use labels for filtering the keys in the Smartcat project and during the export. For example, you can mark keys in screens for iOS apps with an "iOS" label, and then developers can use this label as a filter when exporting strings from a Smartcat project to an iOS repository.
Group actions
You can apply key prefixes and labels to all text fields in the selected frames at once.
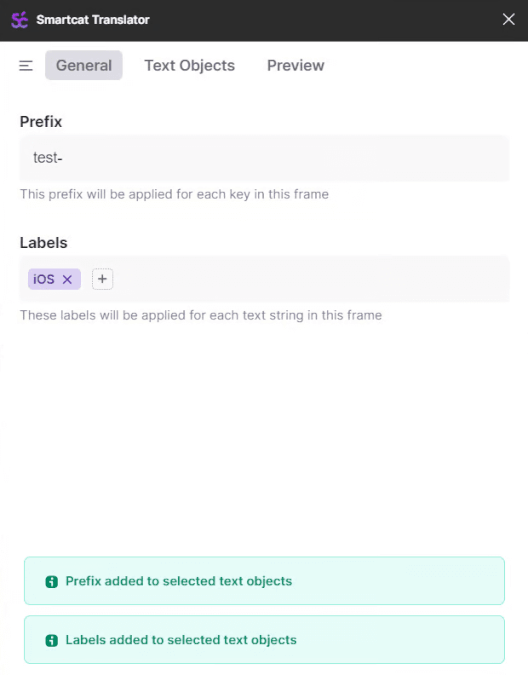
To do that, select the frame(s) you want to apply these changes to, open the General tab in the plugin, and type the prefix in the Prefix field. Add labels to the Labels field.
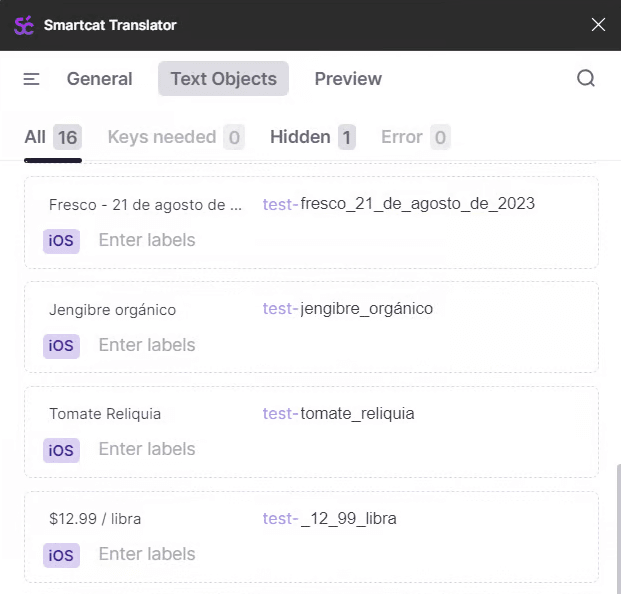
This prefix and labels will be applied to all keys in the selection. They'll be colored purple so that you can easily see them.
Sending content to Smartcat
Follow these steps to send content for translation to Smartcat.
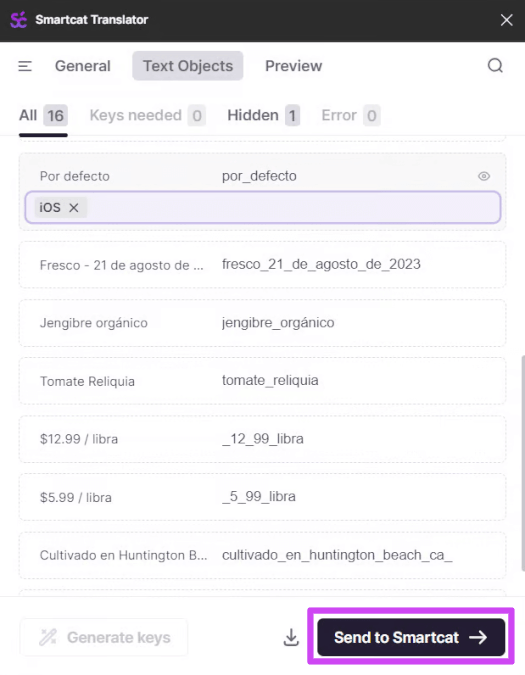
- When ready to send keys for translation to Smartcat, click Send to Smartcat in the bottom-right corner.
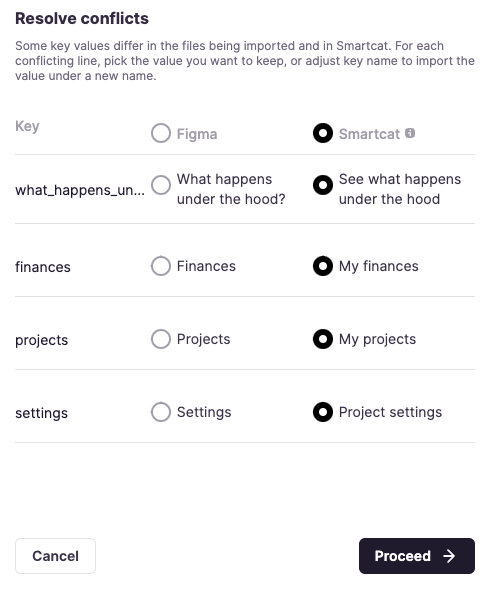
- The integration might identify some conflicts with information already stored in Smartcat, for instance, if there are keys with different values in Smartcat and Figma. In this case, you see the conflict resolution field where you are able to choose which value to preserve. If you choose Smartcat, then the value stored in Smartcat is saved. Otherwise, Smartcat replaces it with the new value from Figma.
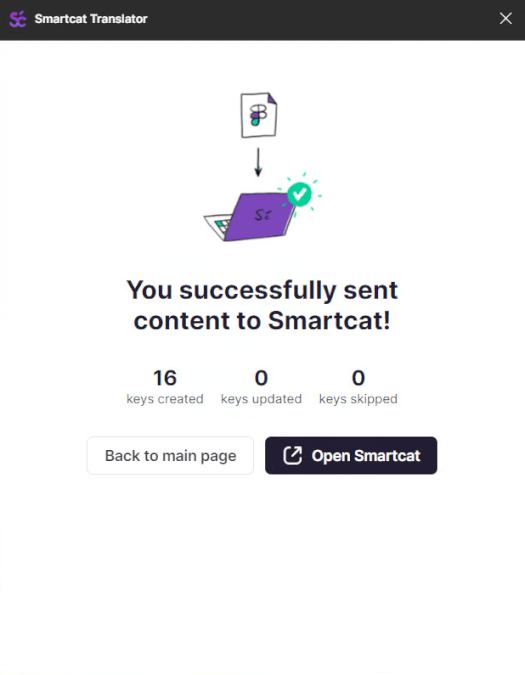
- If sending is completed successfully, you see a confirmation screen with information on the keys that have been sent.
Getting translations from Smartcat
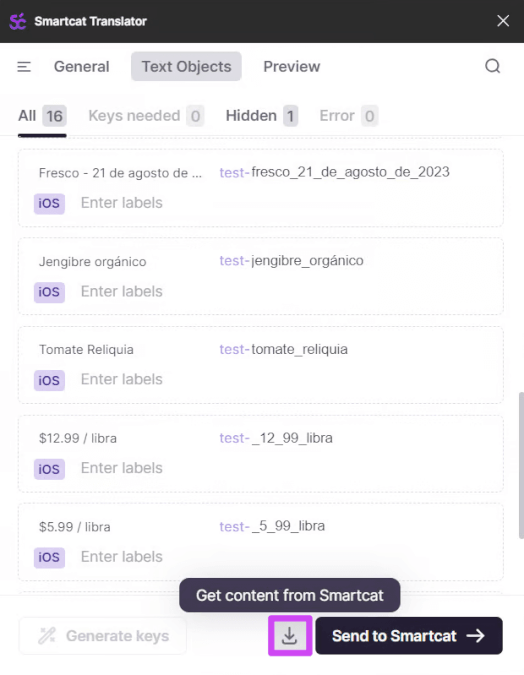
To transfer translations from Smartcat to Figma, click the Download button in the bottom-right corner.
Handling key conflicts
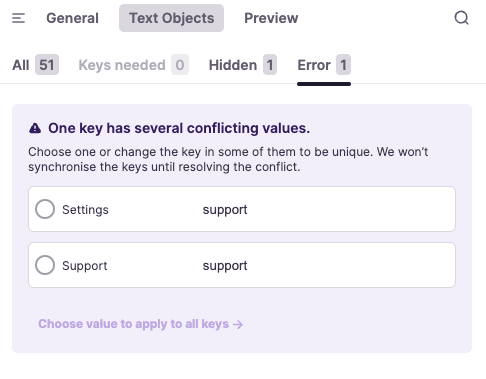
When setting up keys, you may face a situation where two or more keys are conflicting. It might happen when one and the same key is specified for two different texts. If it happens, you will see these strings highlighted in purple in the list of keys, and the active Errors tab.
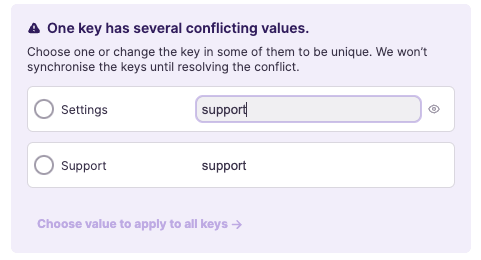
To resolve the conflict, you need to either change the key for one of the text objects,
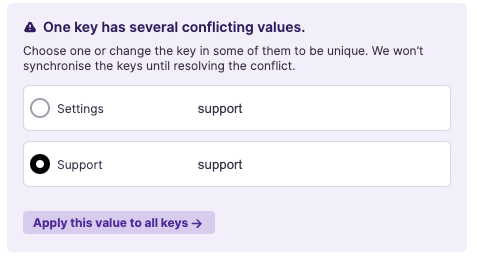
or choose one text value to be applied to the keys.
Asset Translation Mode - the Keys and Variants Tab
The Keys and Variants tab lets you manage text objects, their keys, and their variants. Each row on the tab pairs the on-canvas text with a key.
A key is automatically generated for every text object, and you set them manually whenever you need a specific key.
Variants
A single text object can hold several variants, alternative pieces of content for the same element.
- To add a variant, click + Add variant
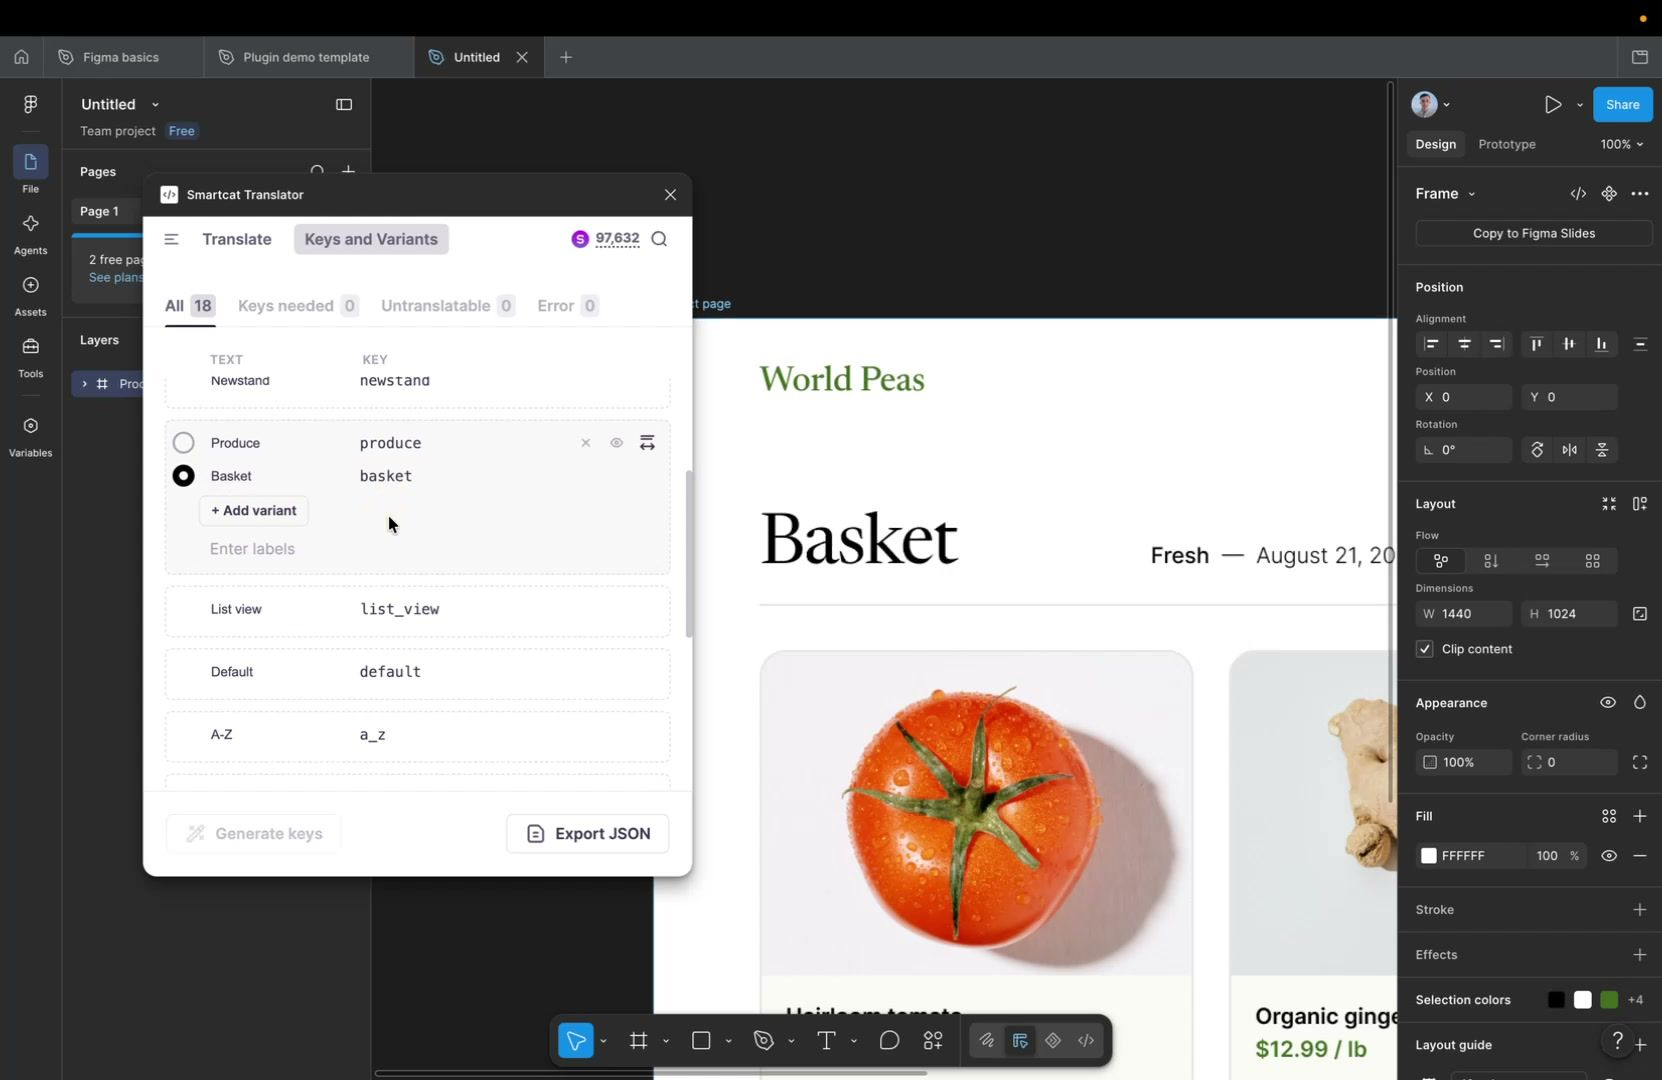
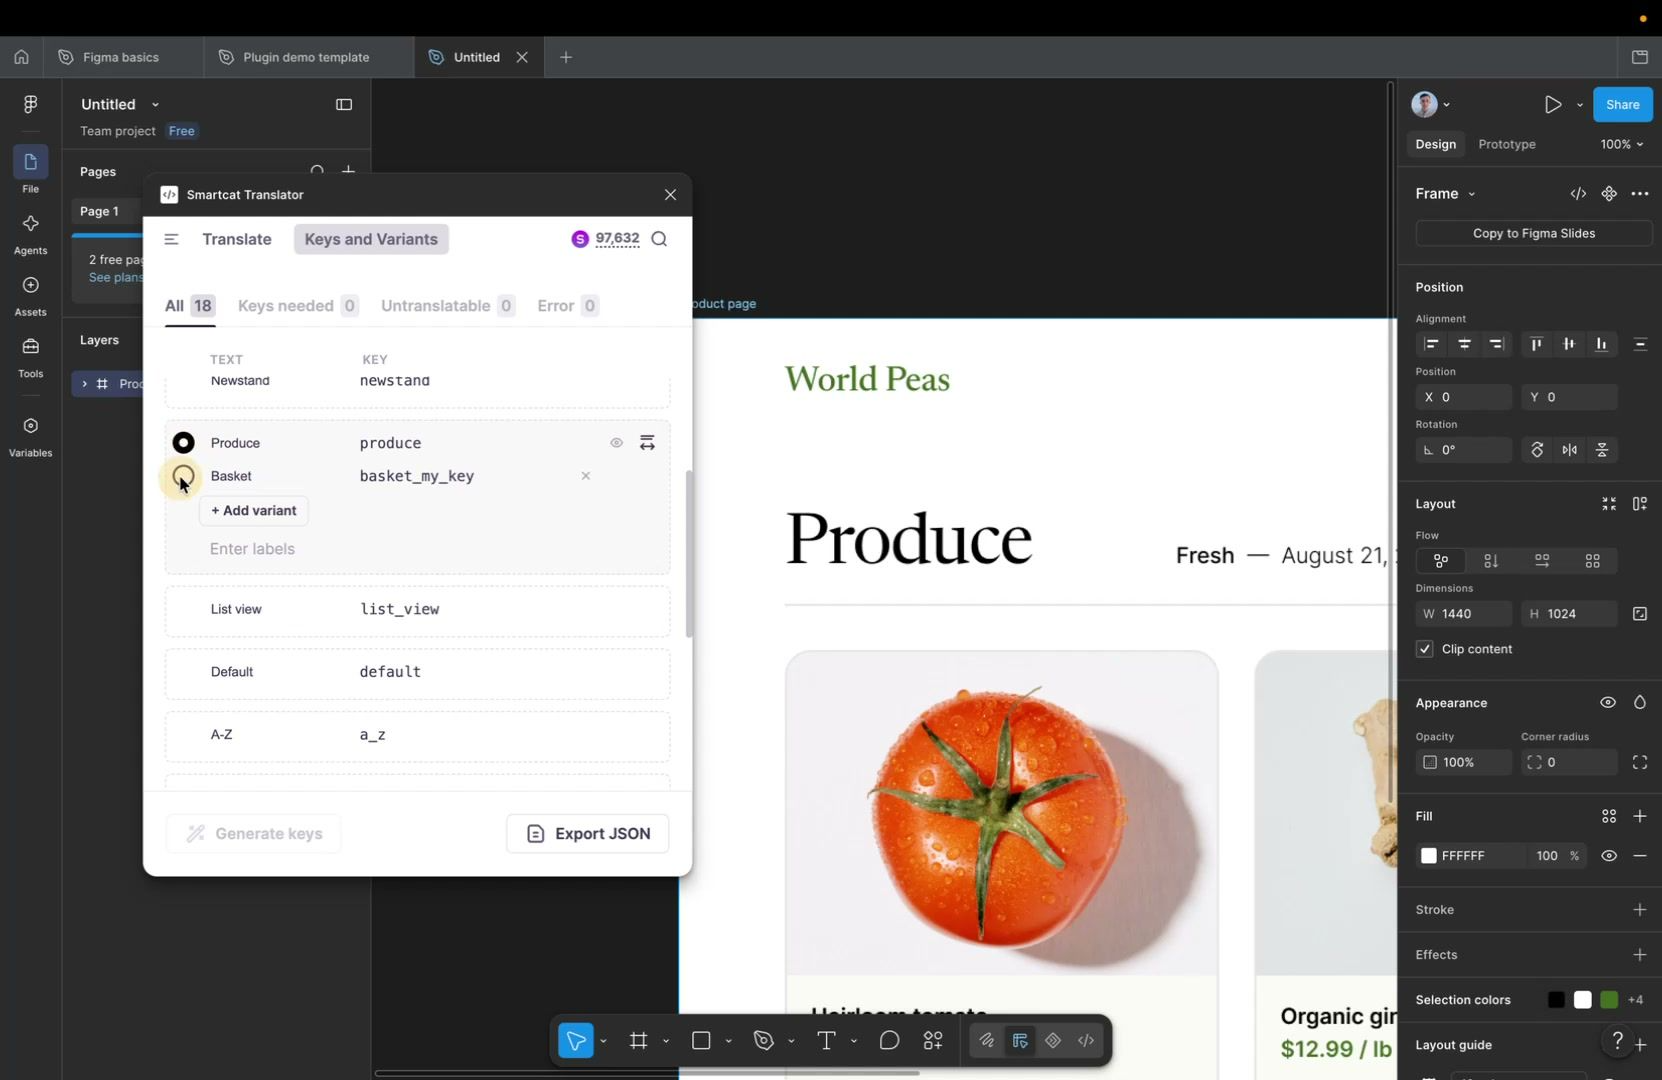
- Each variant receives its own automatically generated key. Like the base key, you can set the variant key manually.
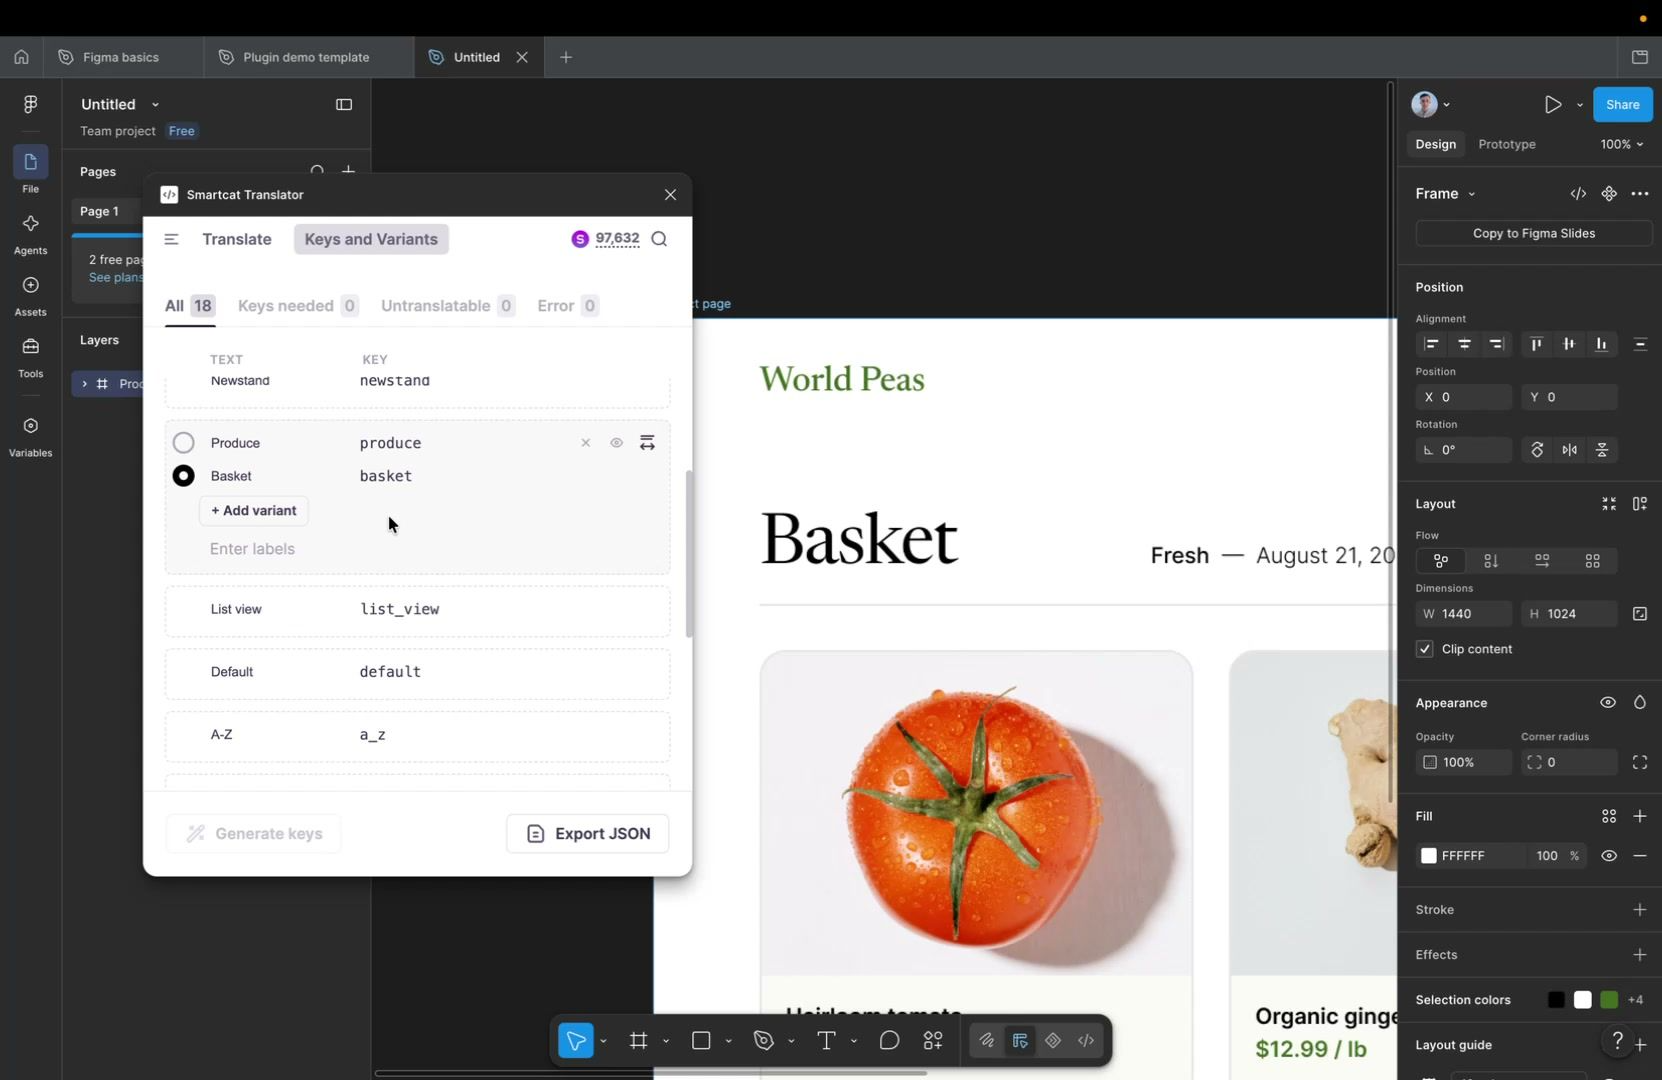
- You can switch between variants to see the corresponding element directly on the Figma canvas.
Handling key conflicts
When the same key is used for different text content, the plugin flags it as a conflict on the Error tab. To resolve the conflict:
-
Make the text content equal, or
-
Change one of the keys, and you can apply a chosen value to all keys at once.
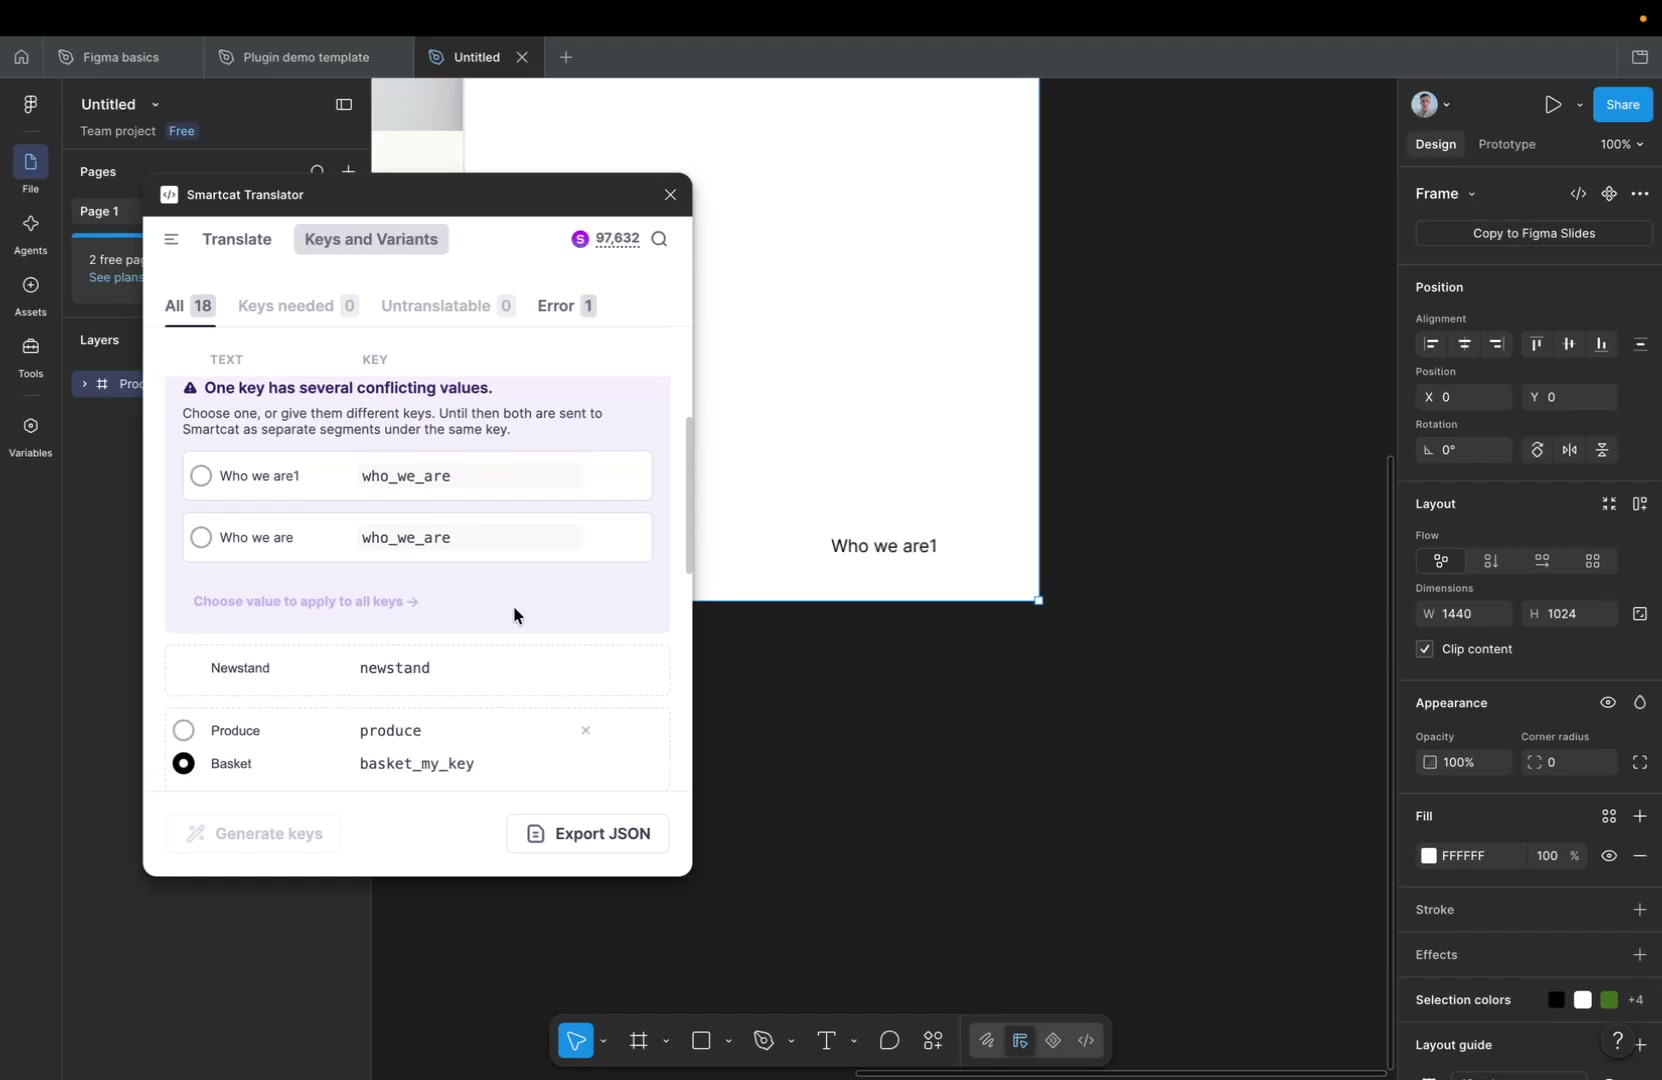
⚠️ Until you resolve the conflict, both items are sent to Smartcat as separate segments under the same key.
Working with translated variants
You can switch between translated variants and see the corresponding translation on the canvas.
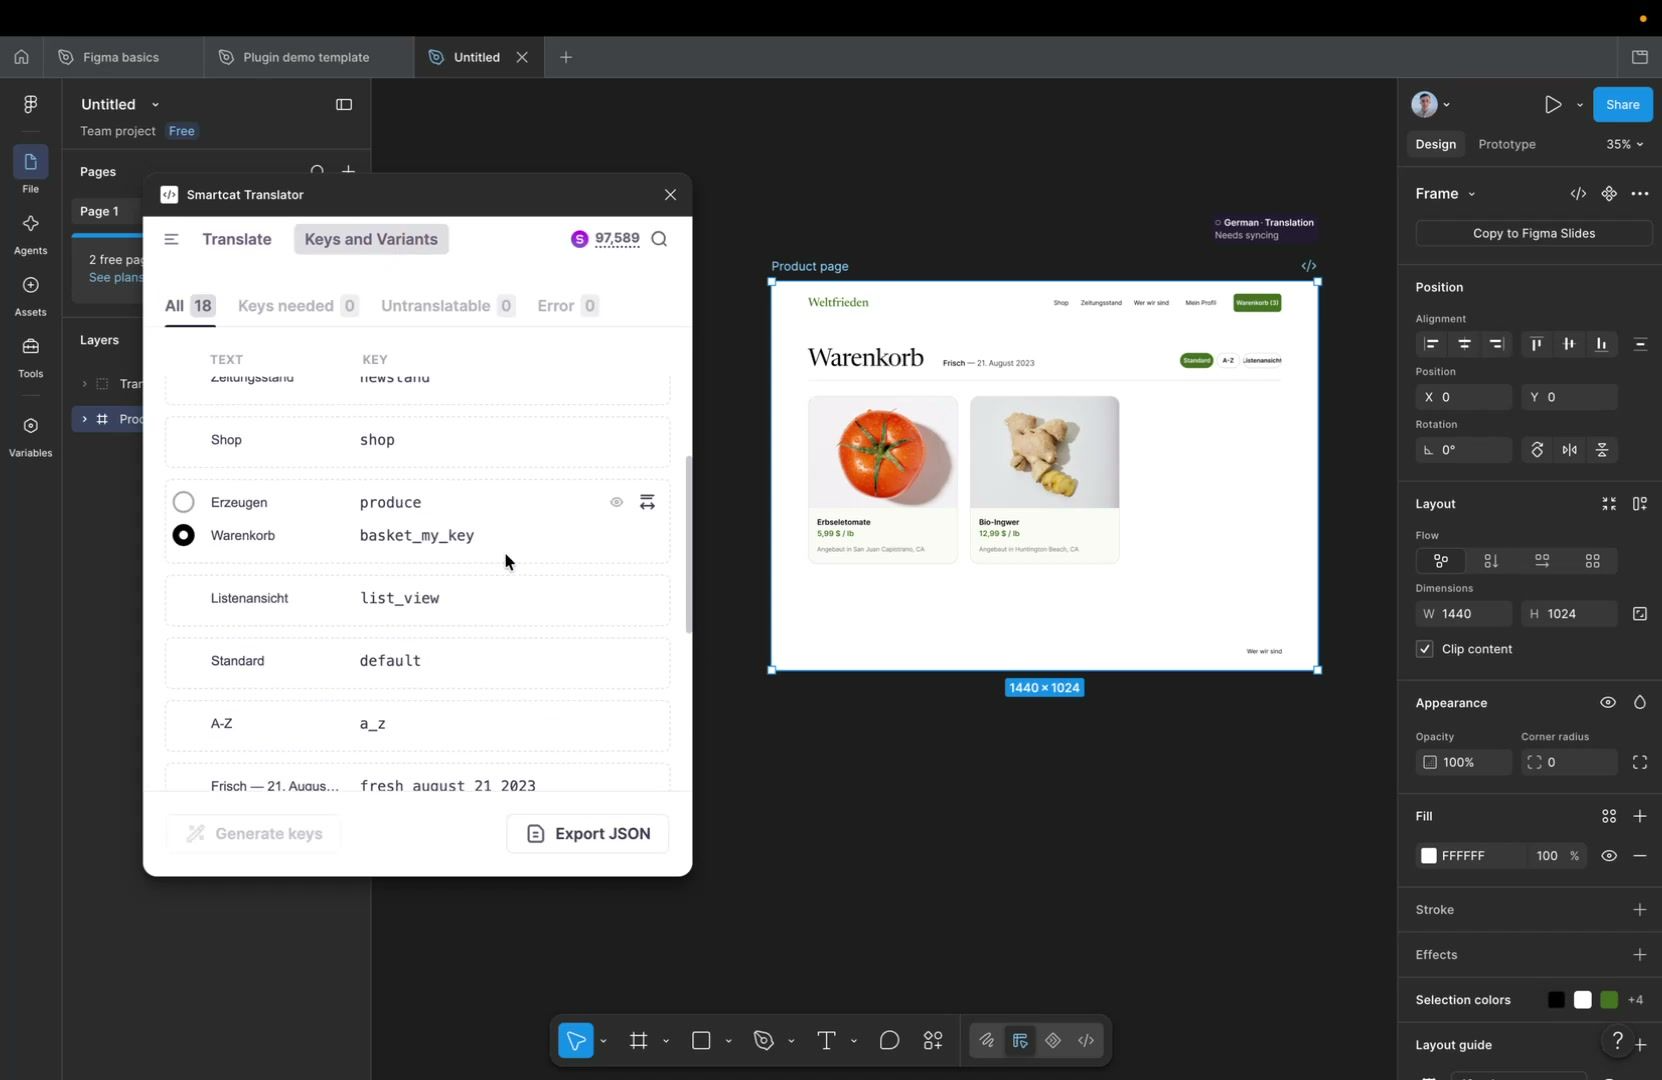
You can edit the translations directly on the canvas or in the translations list. If you edit a translation manually, it is not overwritten by Translate Instantly, but it can still be overwritten when you synchronize content with Smartcat.
Translatable vs untranslatable objects
You can mark text objects as translatable or untranslatable.
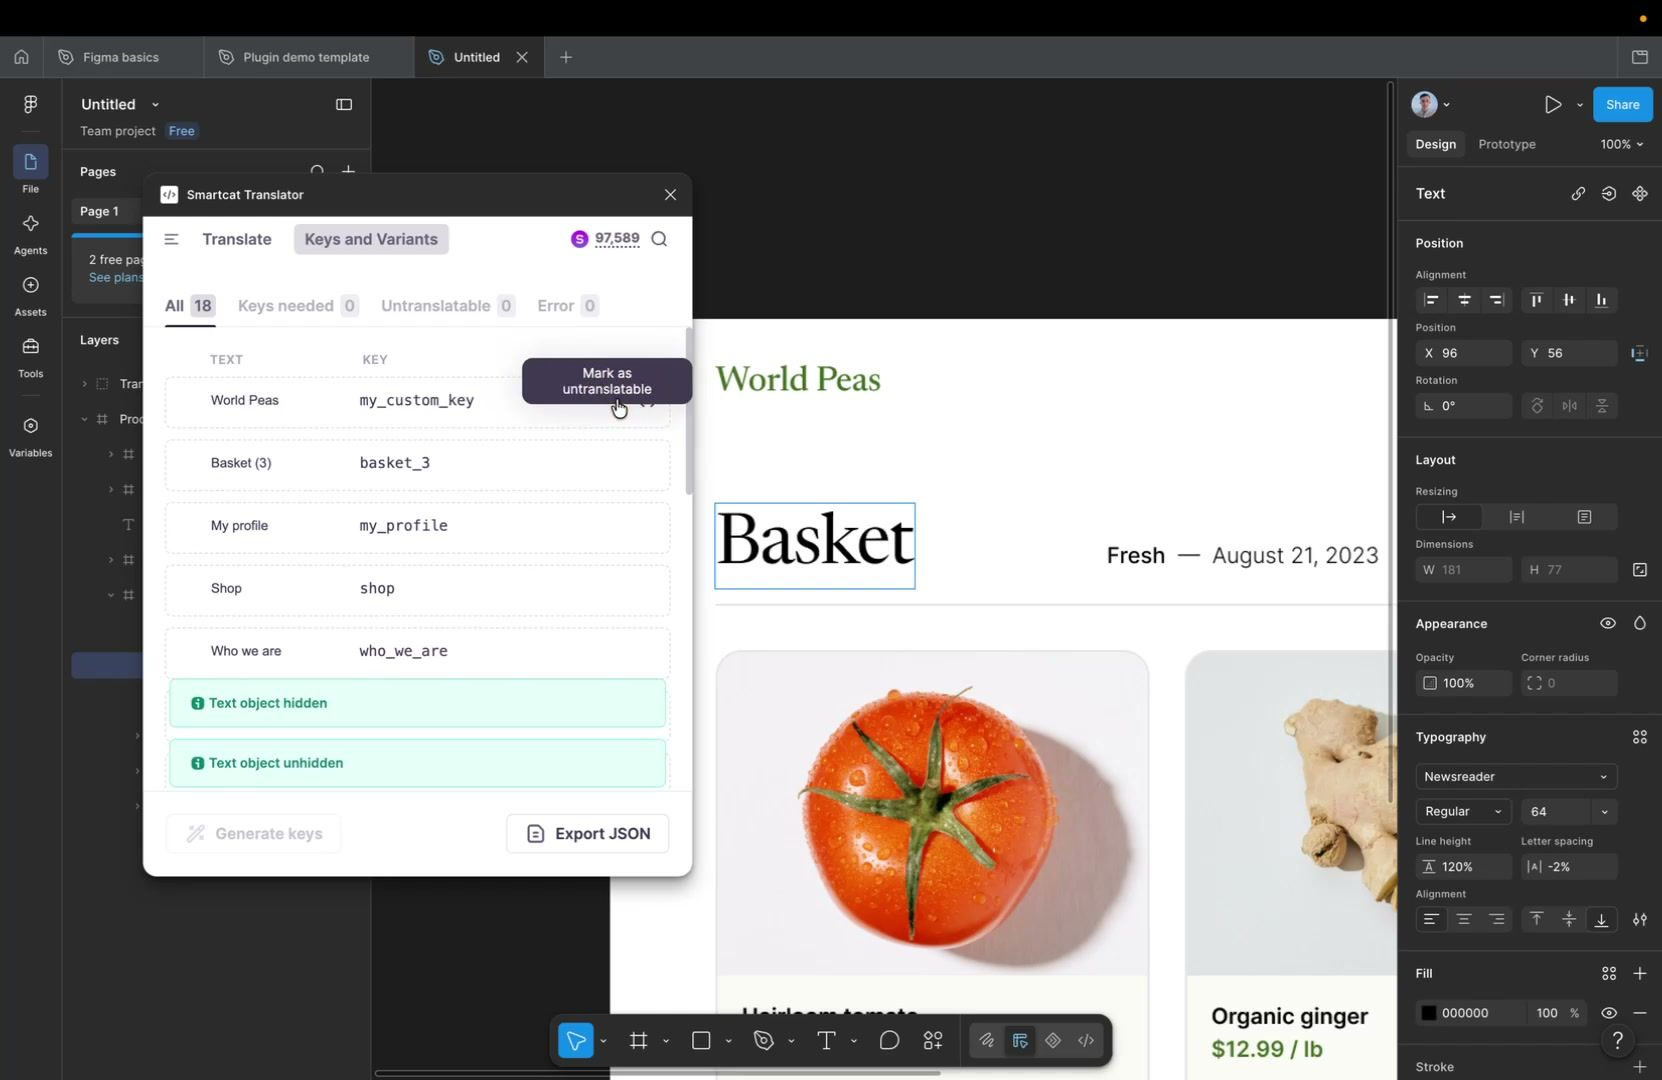
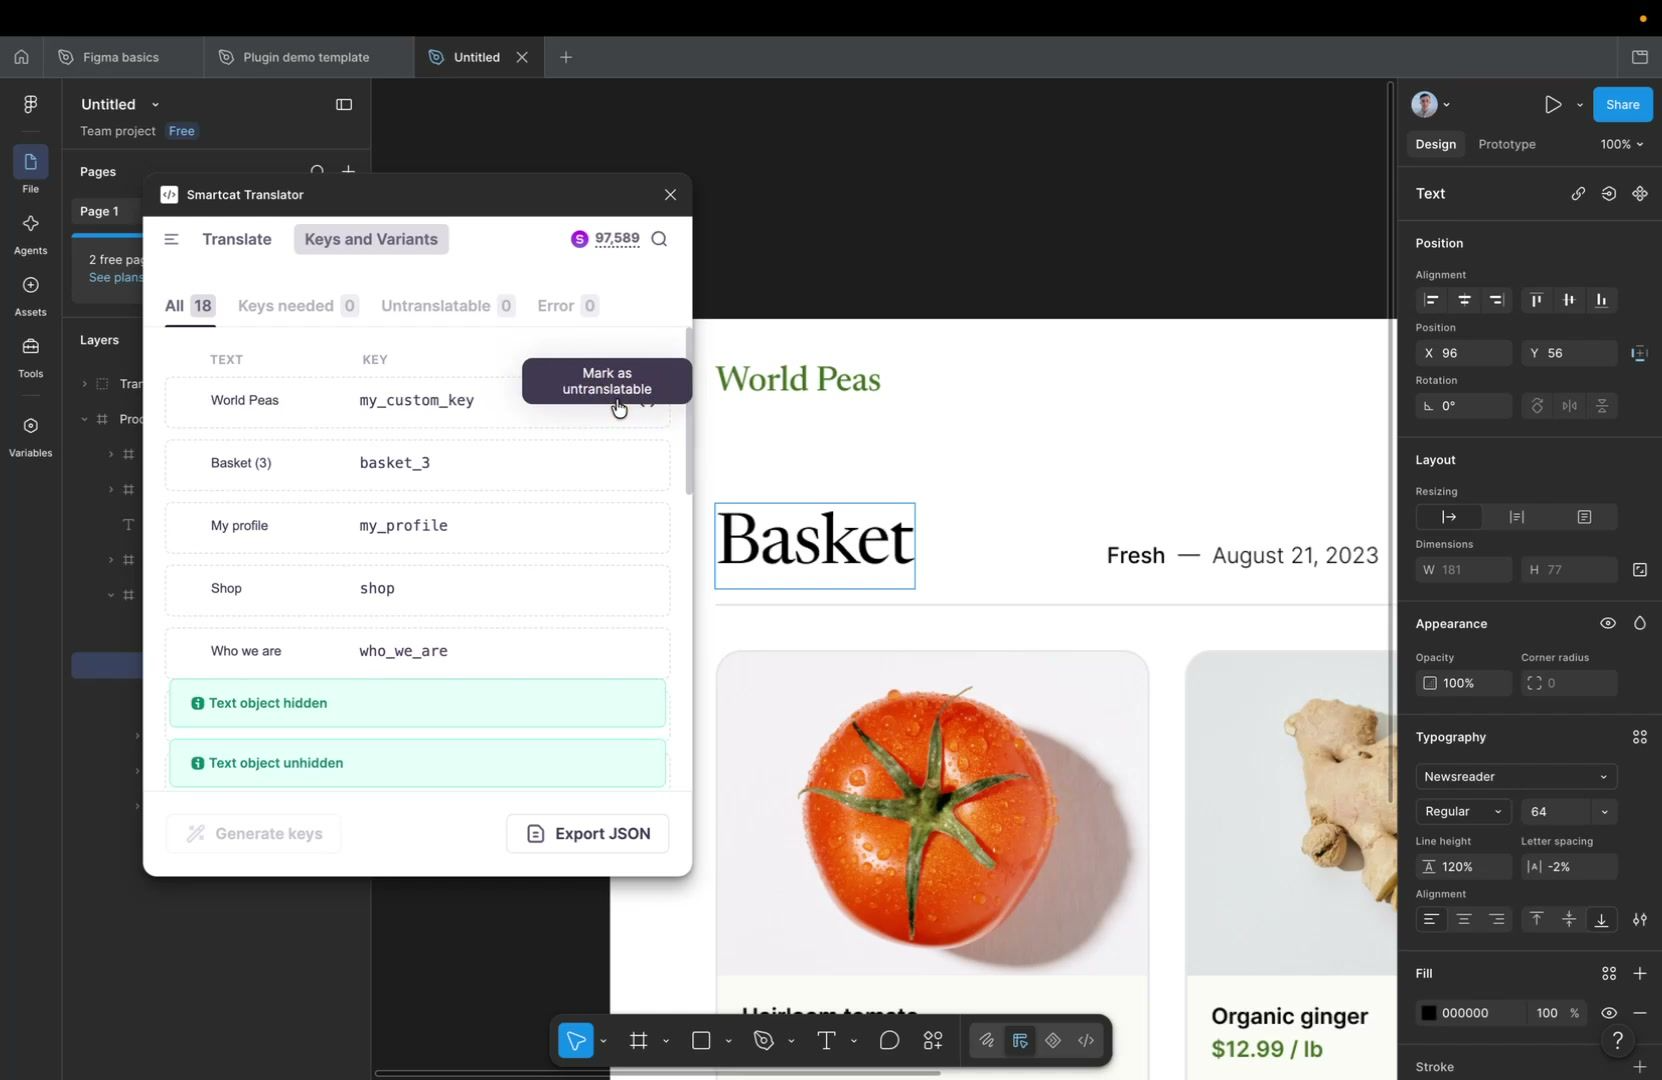
Items marked untranslatable remain visible in the Keys and Variants tab and are collected under a dedicated Untranslatable tab.
Exporting as JSON
You can export your localization result as a JSON file using Export JSON, located at the bottom of the Smartcat Translator window.
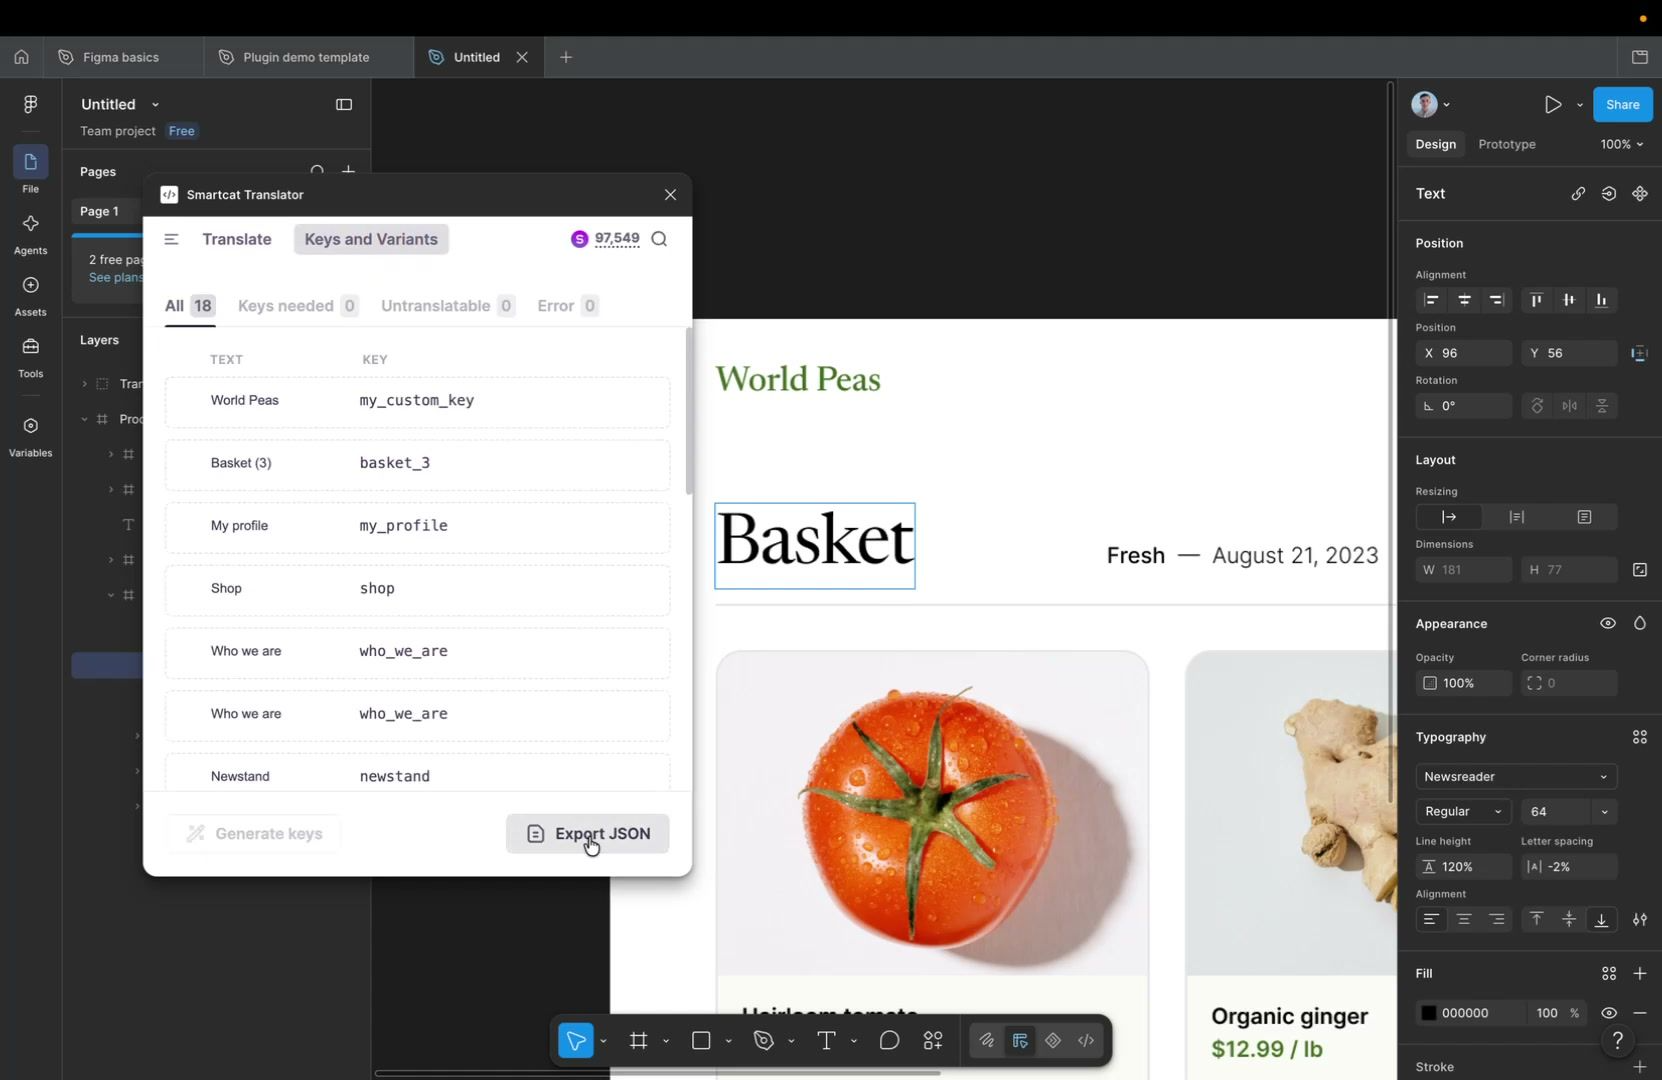
Each text object is exported with its Figma node id, its key, the source text, the translations for every language, and any variants (each with its own key, source, and translations).
Here's a trimmed excerpt of the German export for the page above:
{
"exportedAt": "2026-08-28T06:49:42.135Z",
"languages": ["de"],
"objects": [
{
"figmaNodeId": "1:11",
"key": "produce",
"source": "Produce",
"translations": { "de": "Erzeugen" },
"variants": [
{
"key": "basket_my_key",
"source": "Basket",
"translations": { "de": "Warenkorb" }
}
]
},
{
"figmaNodeId": "1:14",
"key": "my_custom_key",
"source": "World Peas",
"translations": { "de": "Weltfrieden" },
"variants": []
}
]
}
FAQs
What are the two modes of the Smartcat Figma plugin, and how do they differ?
Asset Translation mode is for general content like marketing materials, emails, and landing pages, and lets you translate text frames automatically or with professional linguists. Software Localization mode connects to a Smartcat software localization project so you can assign translation keys to UI text directly in Figma.
Can I manually edit a translation directly inside Figma?
Yes, but manual edits made in Figma are not passed back to Smartcat. If you edit in Figma, the plugin automatically enables Lock this translation for that text so it won't be overwritten by future automatic or human-edited translations from Smartcat until you untick it.
Can I exclude certain elements, like brand names, from translation?
Yes — you can select specific layers/text objects in your Figma frames and exclude them so they stay in the source language while the rest of the frame is translated.
What happens if I use a custom font in my Figma designs?
Custom fonts must be uploaded to Smartcat (only TTF and OTF are currently supported) for Live Preview to render them accurately; otherwise Smartcat falls back to a default font in the preview. Uploaded fonts become available workspace-wide.
What happens if two text objects end up with the same translation key?
Smartcat flags the conflict, highlighting the affected strings in purple in the key list and surfacing them under the Errors tab; you resolve it by changing one of the keys or choosing which text value should apply.
Want to learn more?
See how Smartcat can transform your localization workflow.
Still need help?
Our support team responds within one business day.