Install the Smartcat connector for Adobe Experience Manager
Overview
The Smartcat connector for Adobe Experience Manager (AEM) lets you send your AEM content to Smartcat for translation. The integration supports all localization-enabled fields.
📌 This article covers the AEM on-premise connector. If you use AEM as a Cloud Service, see the Adobe Experience Manager cloud installation guide.
How to install the connector
-
Download the Smartcat connector ZIP file
-
In AEM, go to Tools → Deployment → Packages
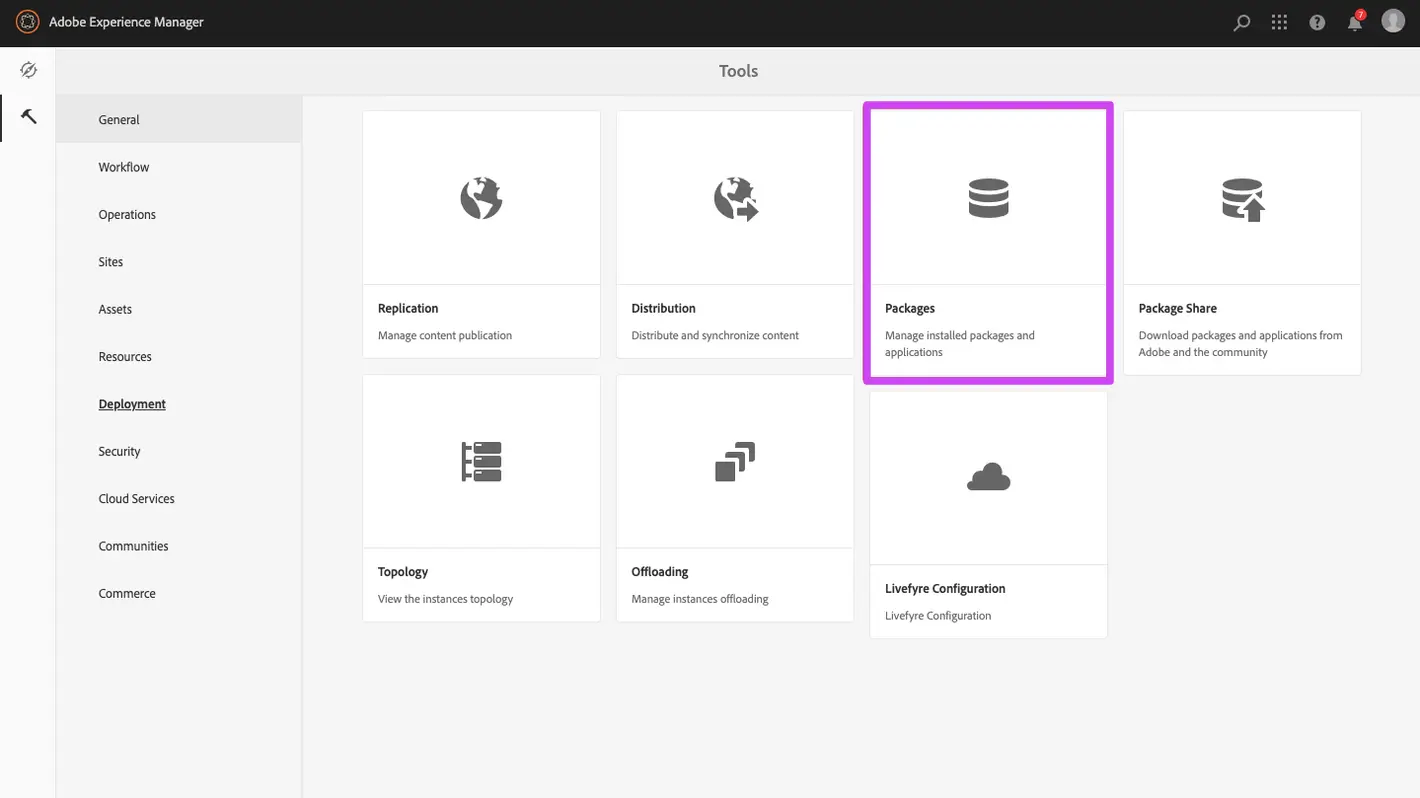
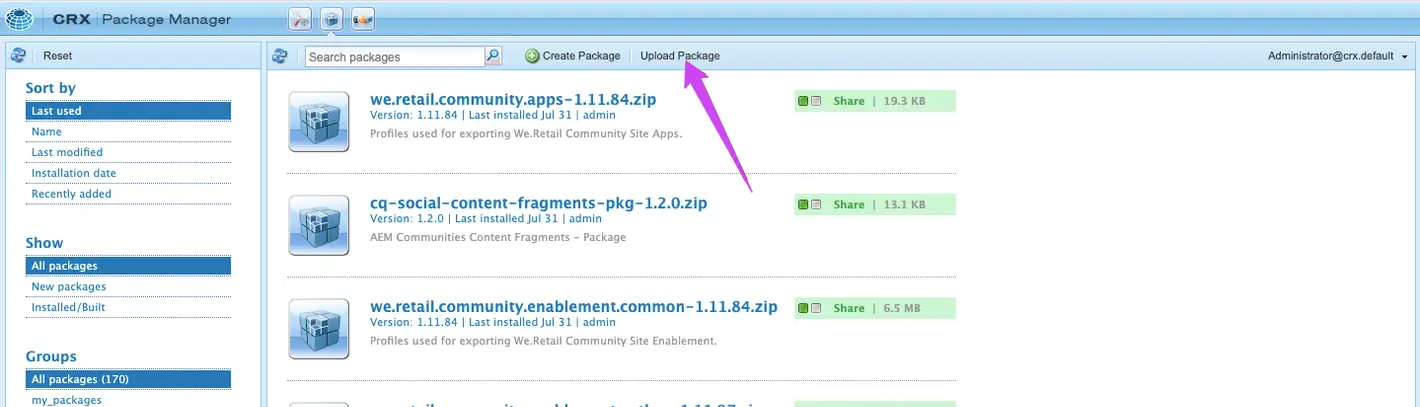
- Click Upload Package, then select and upload the ZIP file with the Smartcat connector
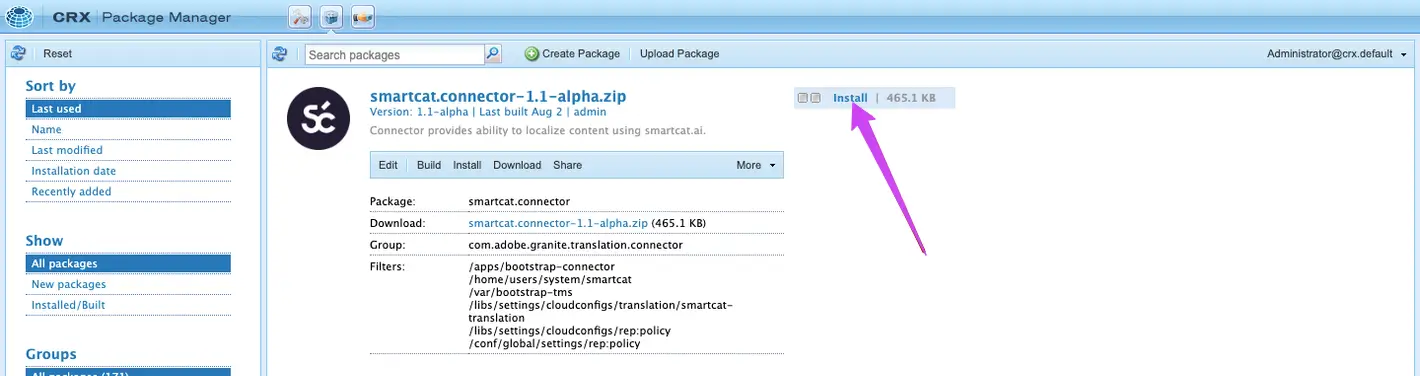
- Install the uploaded package
- Refresh the page and check that the installation is complete
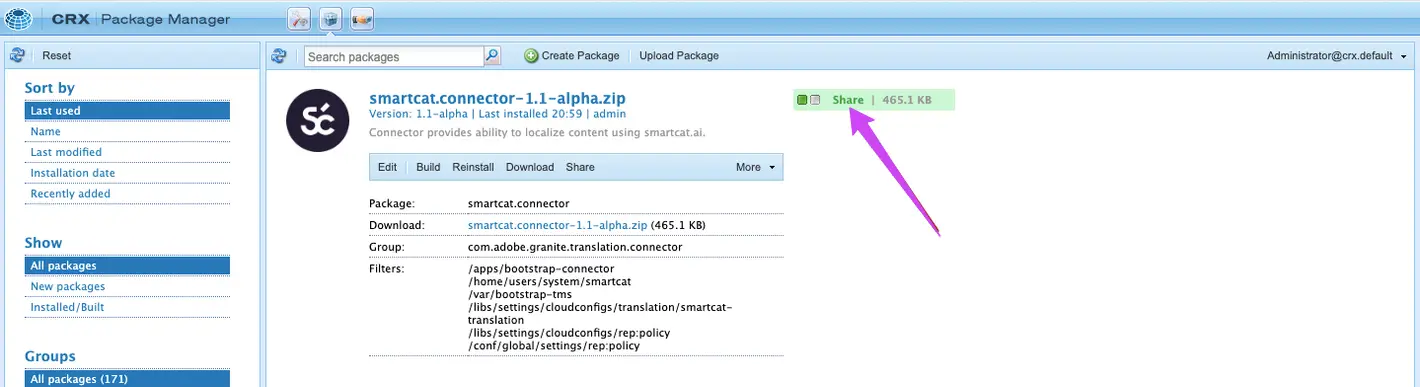
The Smartcat connector is now installed on your AEM instance and ready to configure.
How to set up the global configuration
📌 The global configuration is selected by default for all translations.
Create the Smartcat connector configuration
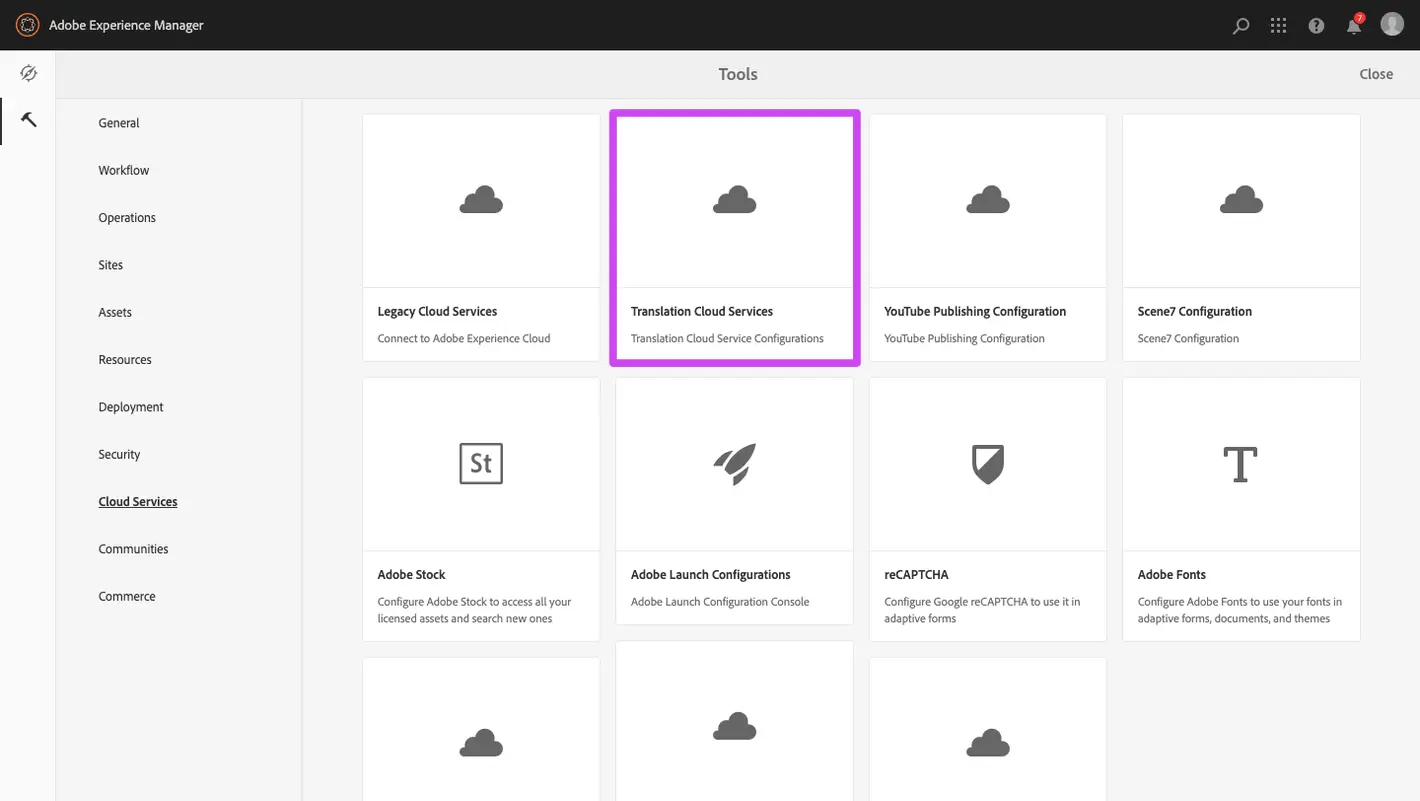
- Go to Tools → Cloud Services → Translation Cloud Services
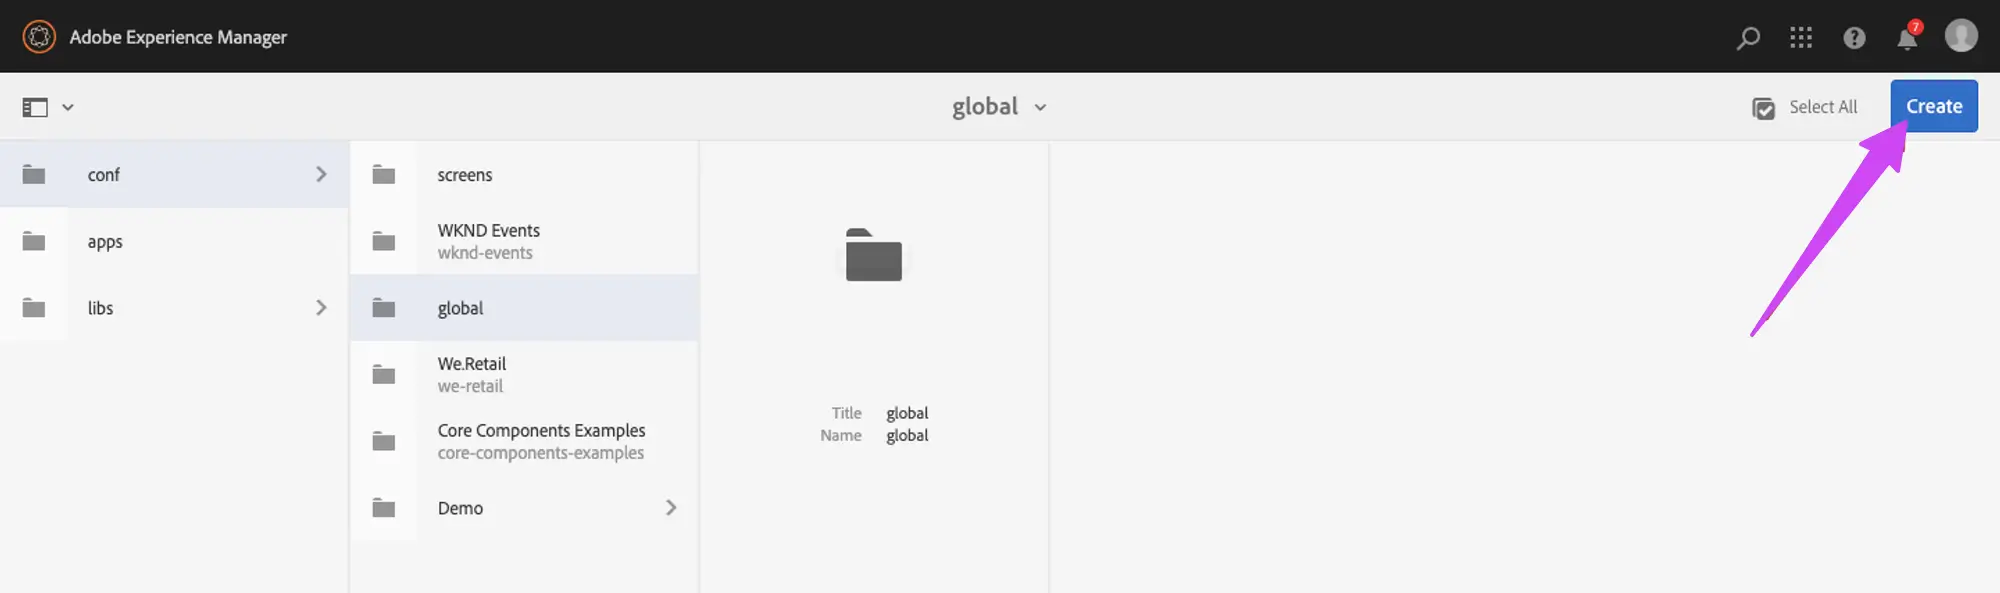
- Go to conf → global and click Create
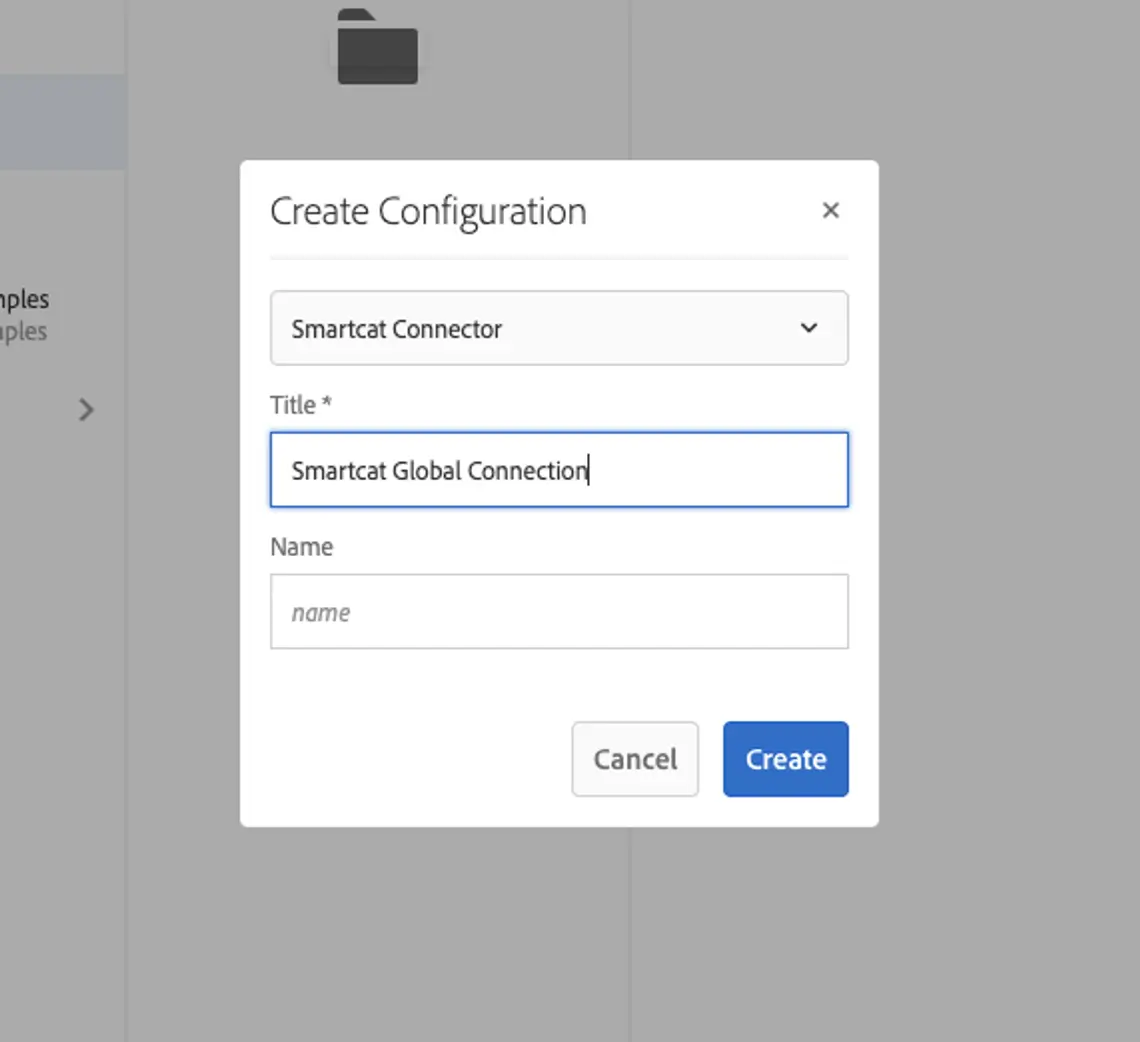
- Select Smartcat Connector in the dropdown list and enter a meaningful name for it
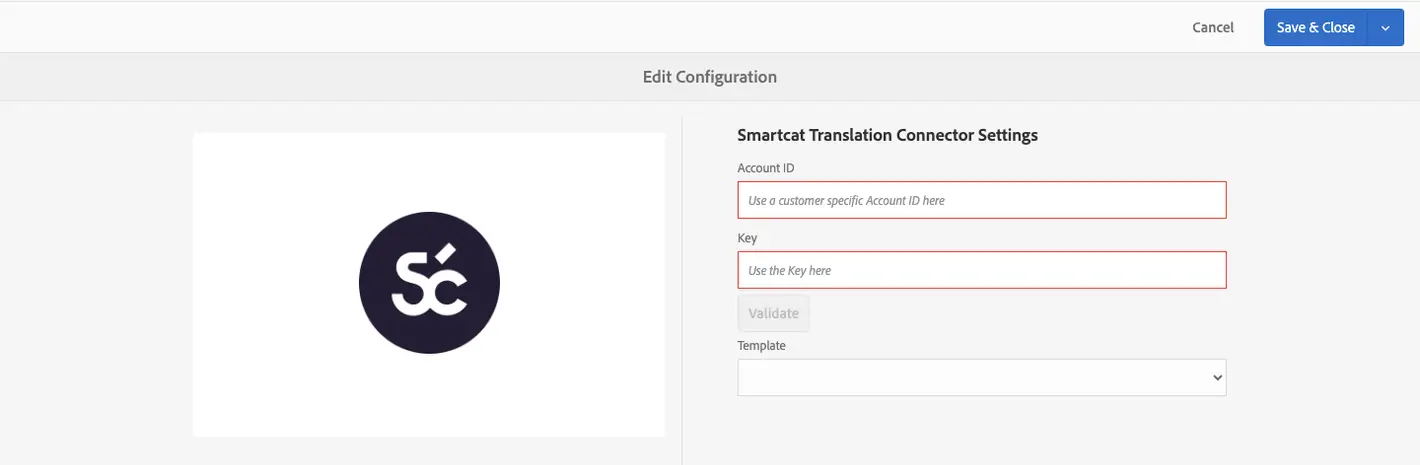
- Click Create, then fill in Account ID and API Key in the configuration settings — you can find both under Settings → API in your Smartcat workspace, where you can also create a new key if needed
-
Click Validate to check the connection — a confirmation message appears
-
(Optional) Select a project template to apply to all Smartcat projects created through this connection. By default, projects are created with the AI translation - Post editing workflow
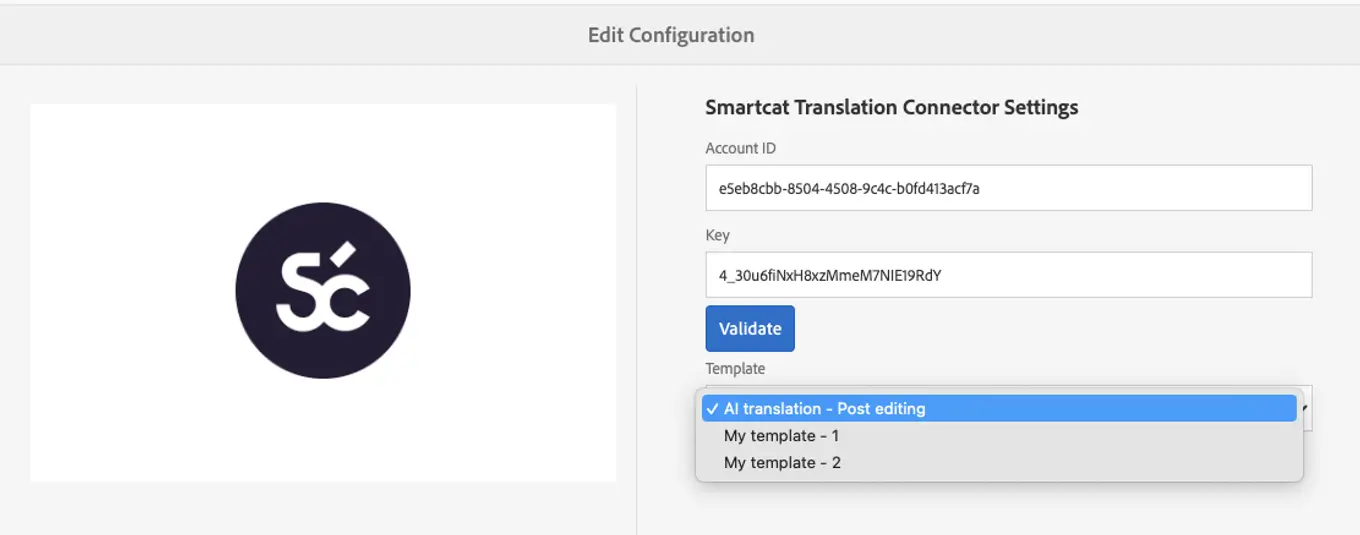
- Click Save & Close
The Smartcat connector configuration is now created and validated.
Set Smartcat as the default translation provider
-
Go to conf → global and click Create
-
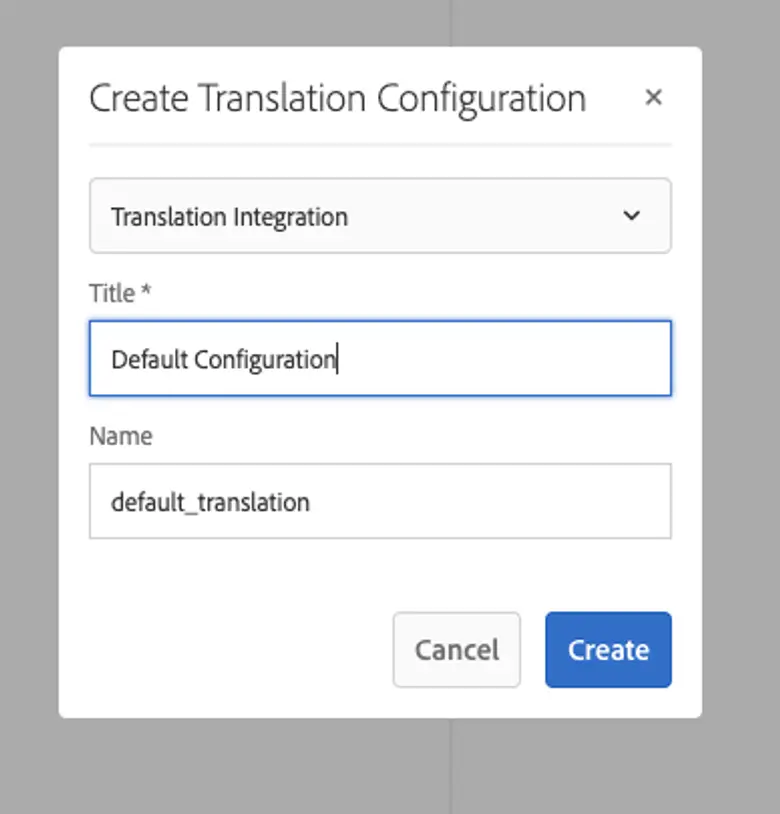
Select Translation Integration and complete the form
⚠️ Use these values only — Title: Default Configuration, Name: default_translation
-
Select the Smartcat connector as the translation provider in all tabs, for both Machine Translation and Human Translation methods where applicable
-
Select Human Translation to use the Smartcat project flow with the template from the connection configuration
-
If needed, adjust the translation settings to:
-
Include metadata and tags for Sites and Assets
-
Automatically start a translation job when it is created
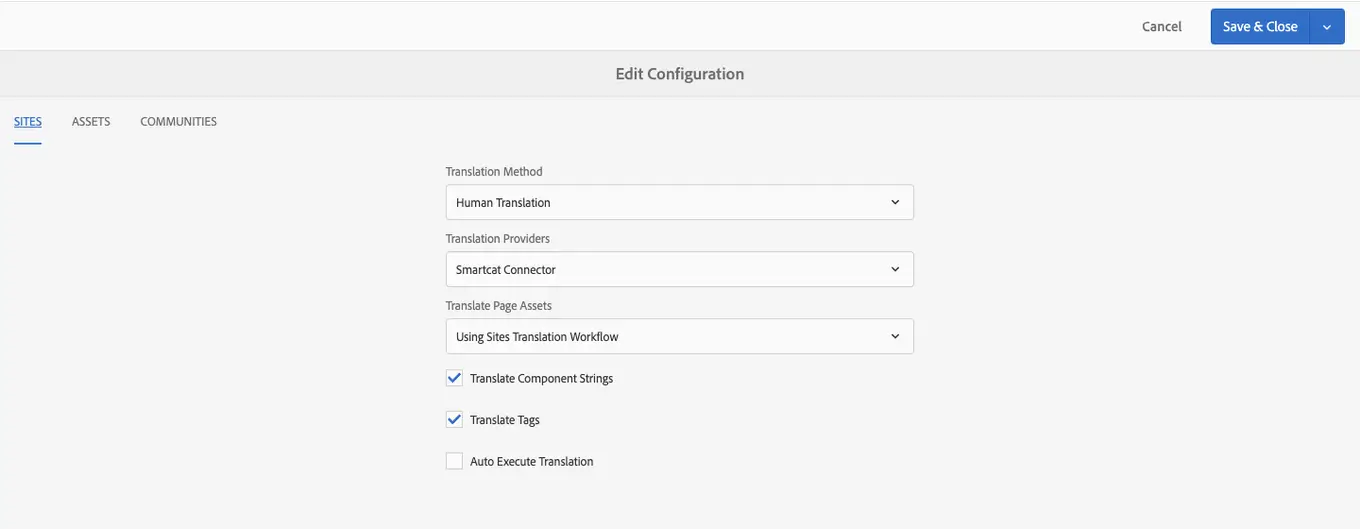
- Click Save and close in the configuration settings
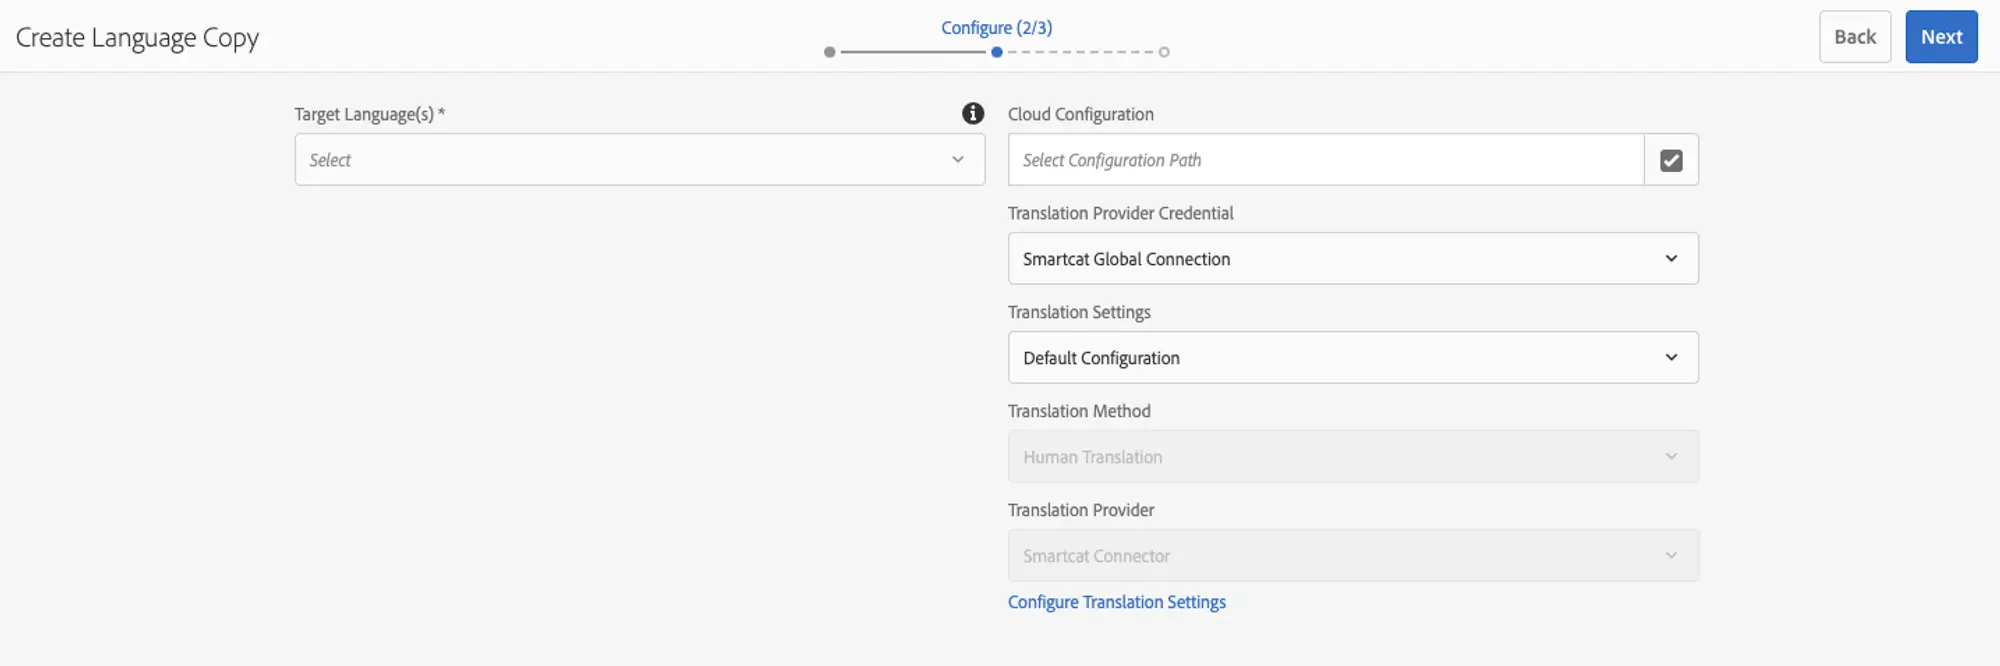
Smartcat is now the default translation provider, and AEM uses this global configuration by default — for example, when you create a language copy of site pages.
How to create and use multiple configurations
If you want to use different project templates, create a separate configuration for each one.
Create additional configurations
-
Go to Tools → General → Configuration Browser
-
Create a configuration path for the extra configurations
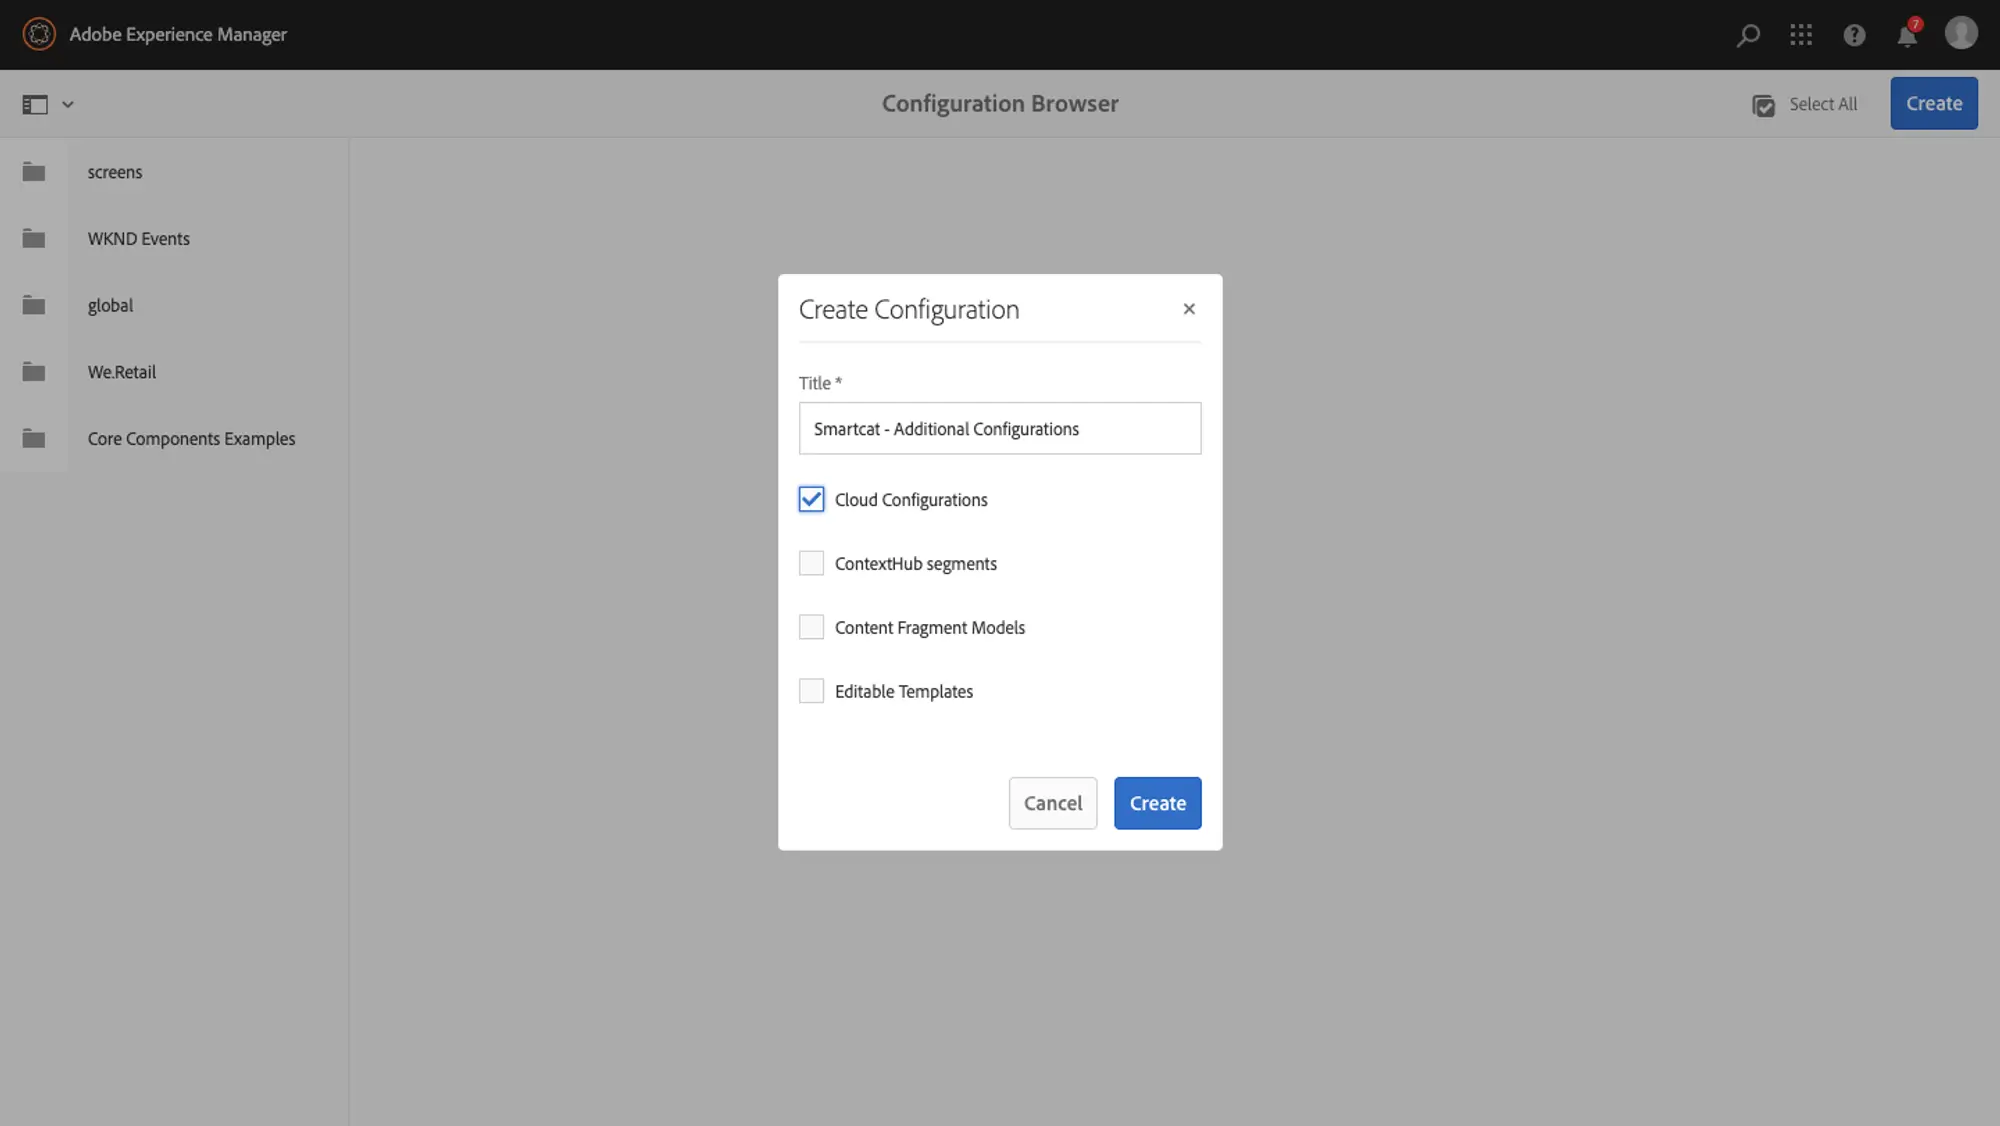
- Add a subpath for the exact Smartcat connection
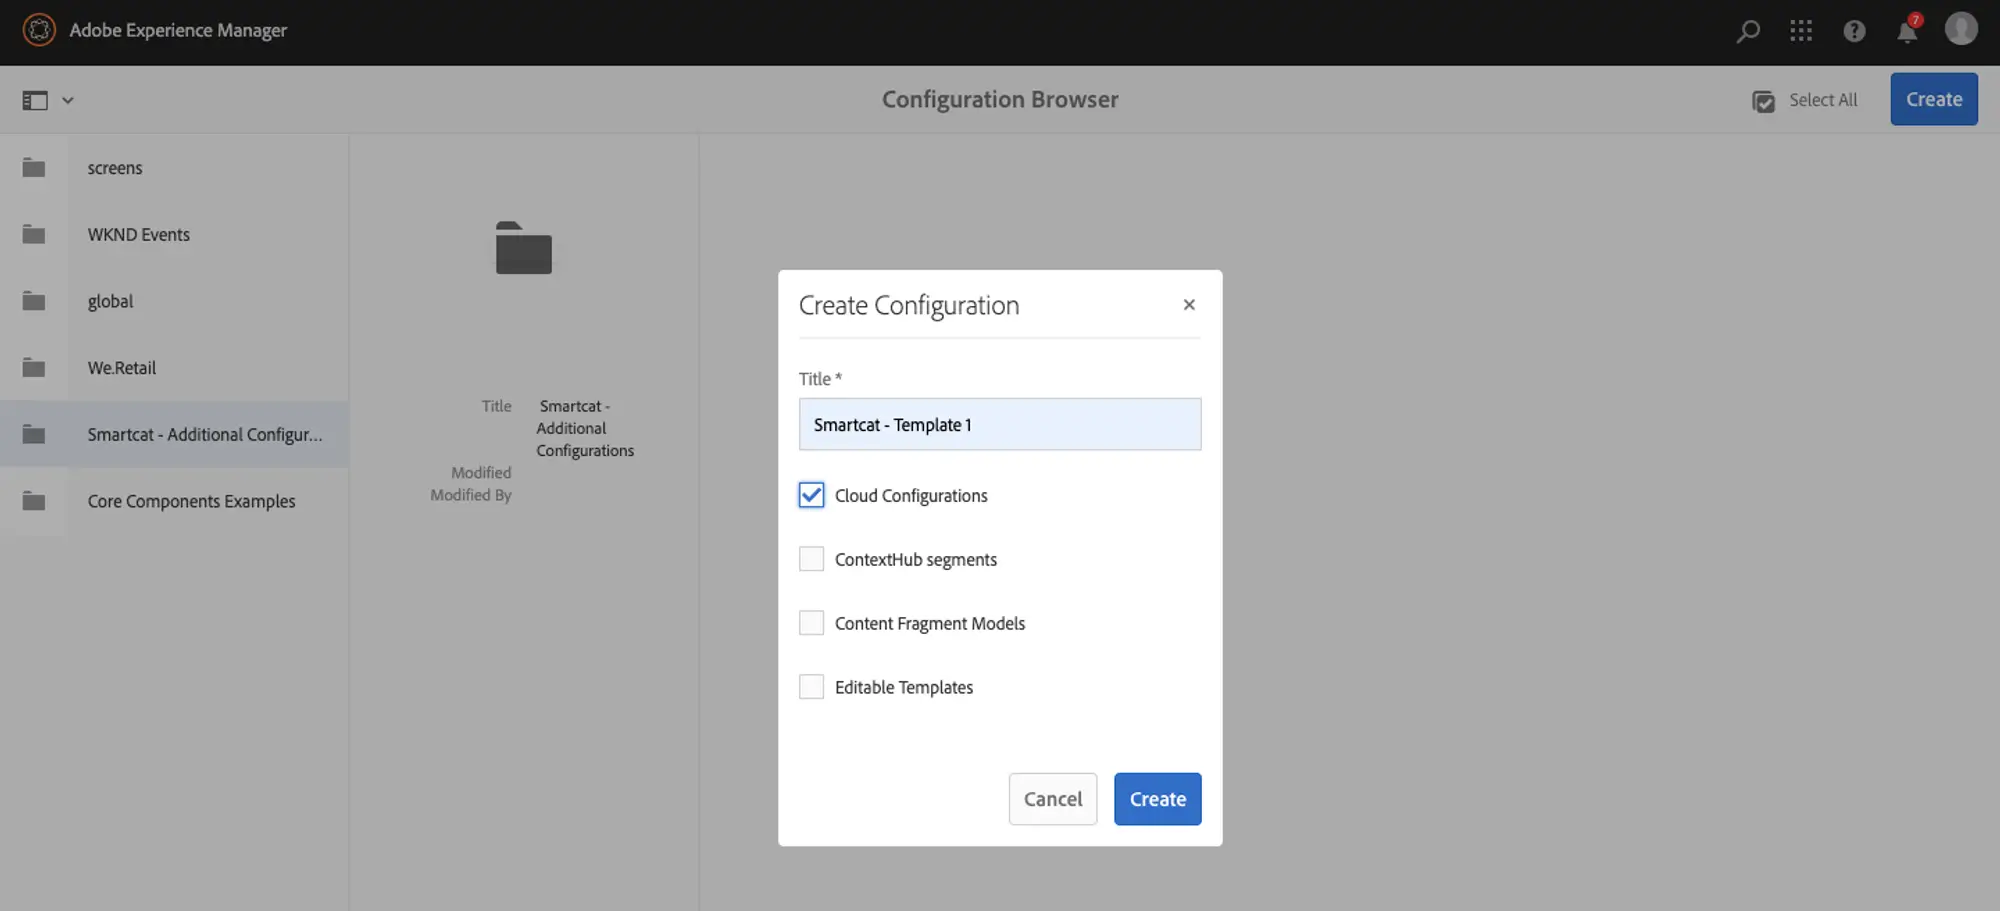
-
Go to Tools → Cloud Services → Translation Cloud Services
-
Go to the high-level path and create any configuration to reveal the subpaths — you can exit without saving it
-
Select the path to the exact Smartcat connection and create a connector with the desired configuration
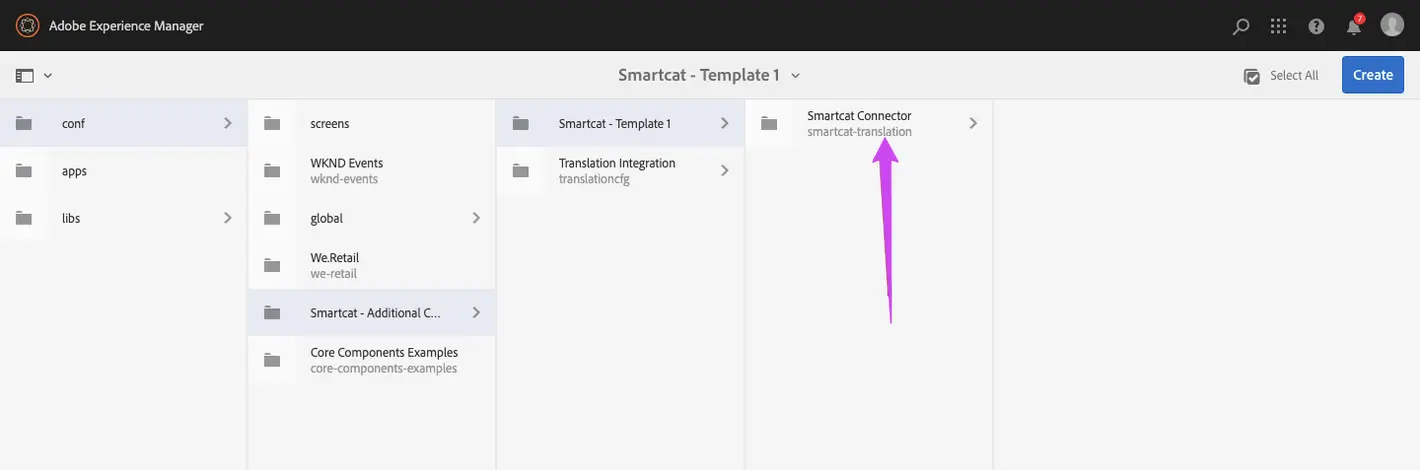
The additional Smartcat configuration is now created and available for selection.
Use a configuration
- When setting up a translation configuration, click Select Configuration Path
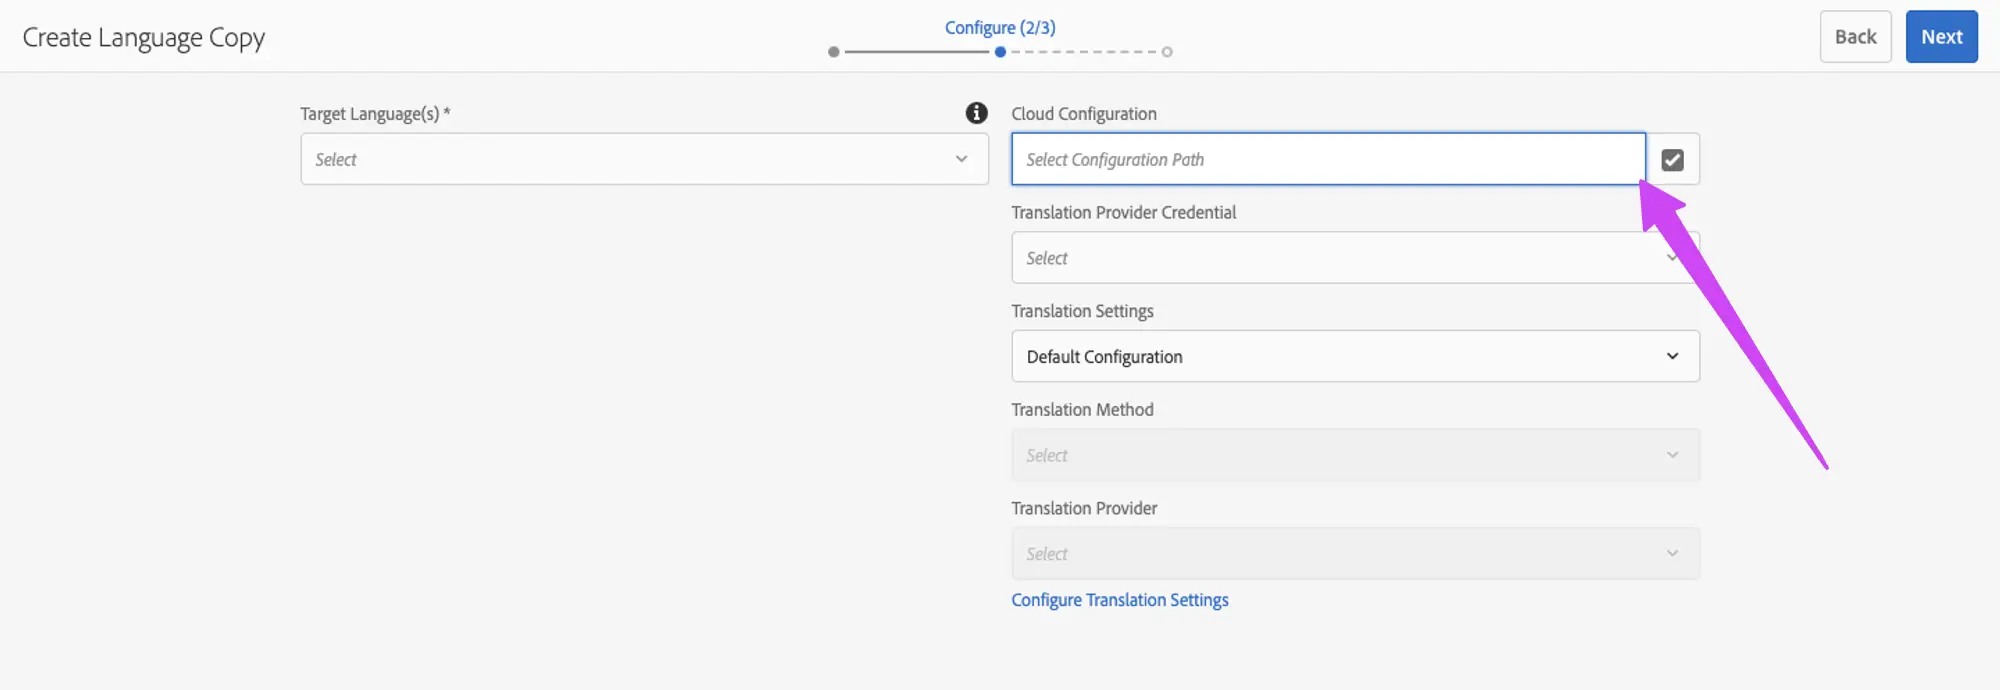
- Select the path to the Smartcat connector configuration you need
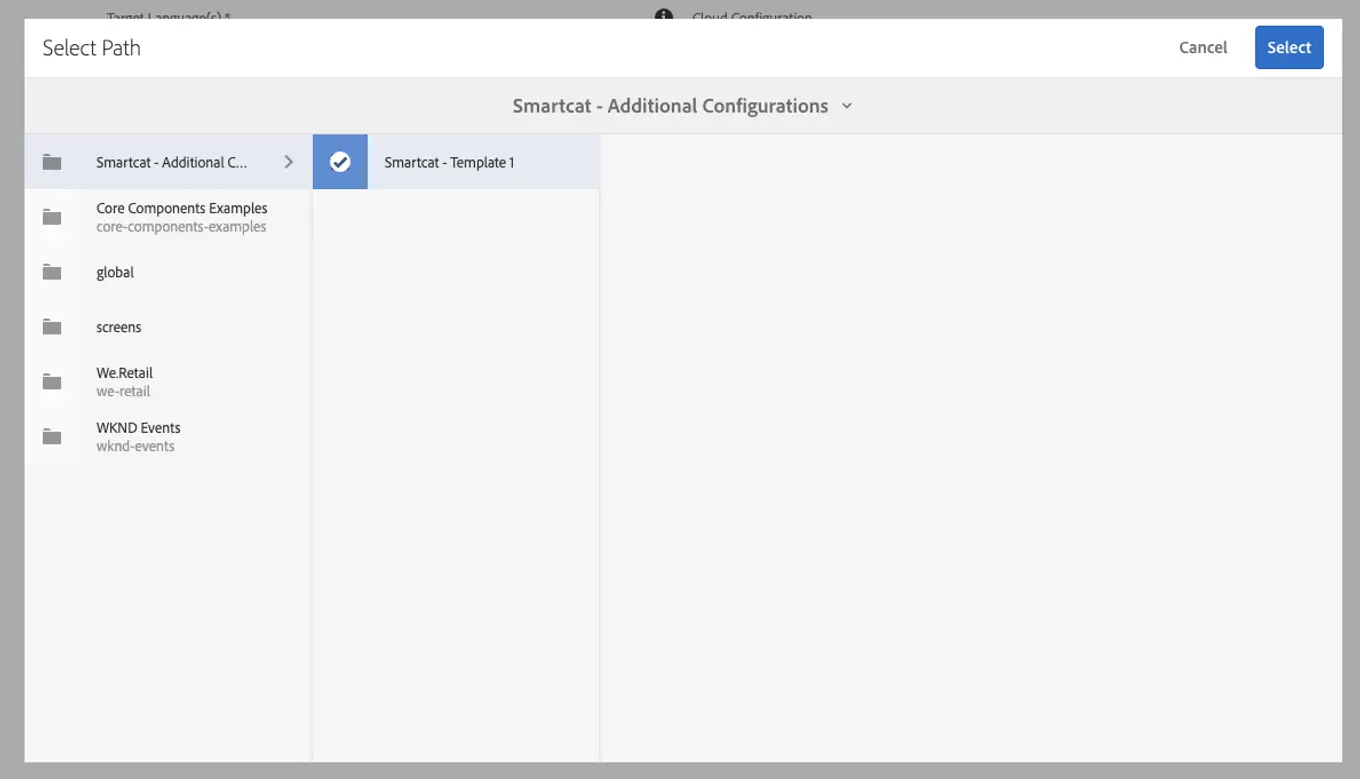
- Check that the correct configuration appears in the settings
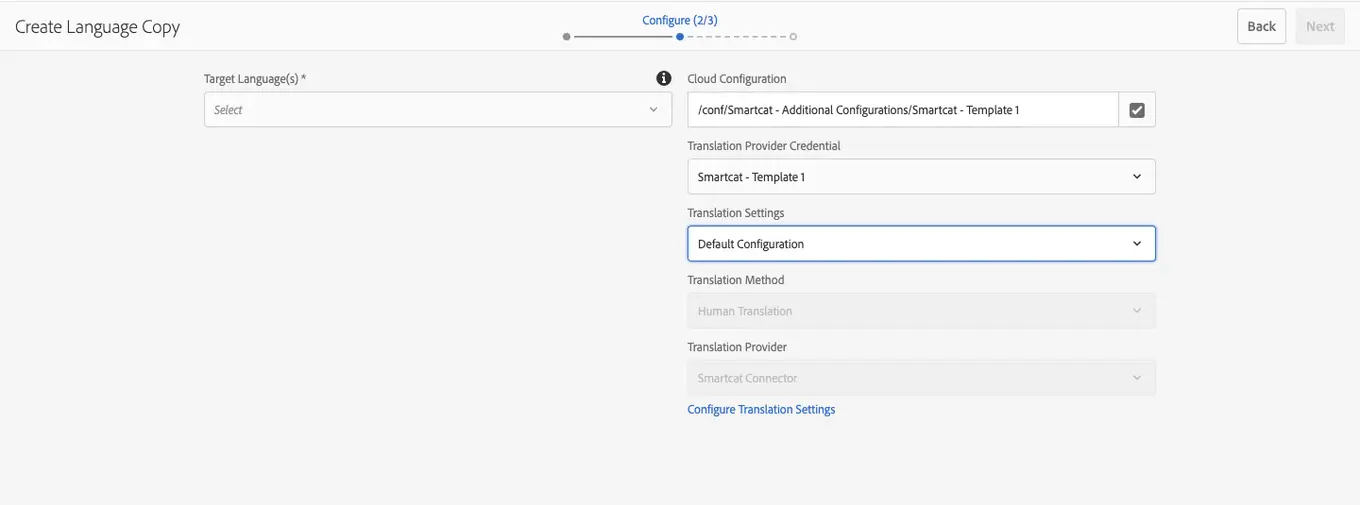
- Proceed with the translation flow as usual
The translation now uses the configuration you selected instead of the global one.
Requirements and limitations
-
AEM Administrator permissions are required to install the connector
-
Workspace Admin permissions in Smartcat are required to get the Account ID and API Key
-
The connector is tested with AEM version 6.5 — for help with installation on earlier versions, contact our support team
-
AEM allows only a single configuration per template
Troubleshooting: delete the global configuration
AEM may not let you delete the default configuration, even with admin permissions. To delete the global configuration manually, use CRXDE Lite:
-
Open your web browser and go to
http://<your-aem-instance>:<port>/crx/de, then log in with your admin credentials -
In the CRXDE Lite interface, go to the path where global cloud translation configurations are stored — usually
/conf/global/settings/cloudconfigs/translation -
Find the node that corresponds to the global cloud translation configuration you want to delete
-
Right-click the node, select Delete, and confirm the deletion when prompted
-
Click Save All to apply the changes
The global configuration is removed from your AEM instance.
💡 To learn more about the translation process, see the step-by-step guide on translating your content in Adobe Experience Manager with Smartcat.
Still need help?
Our support team responds within one business day.